
Academy UH-60L Black Hawk
By Ted Taylor
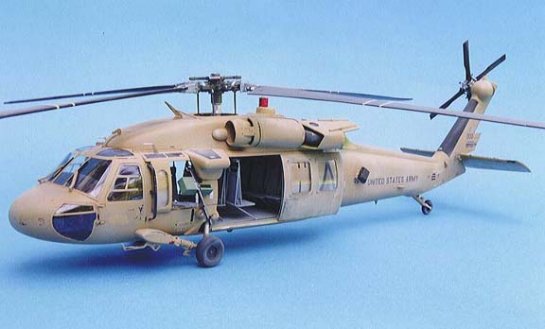
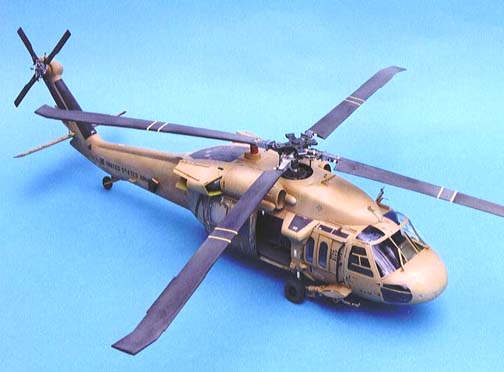
In March 2001 I was at an IPMS meeting in New Zealand and a member brought a review copy of the Academy Blackhawk in to show around, I took a close look and decided it was on my wants list when I got back to the UK. I have a small collection of "desert Storm" models in 1:35th scale so this could fit in nicely with them.
The kit box is large so you won't be able to sneak this one past the wife, and it is full to the brim. The parts are moulded in a light grey plastic that is easy to work on, the clear sprue is crystal clear and these parts fit like a glove in their frames. There are some optional parts in the kit but these are mainly to do with the "ESSS" pylons and fuel tanks, there are markings on the decal sheet for five aircraft, four in the helicopter dark olive colour and one in the desert scheme and 16 page instruction booklet shows all the variants quite clearly, the building sequences are easy to follow but some items are harder to construct than others, harder but not too difficult. An Idea I like with this sheet is that it includes lots of detailed photographs of the real item right by its build diagram.
Construction is fairly straightforward but there are a couple of tricky parts where you will need a little patience...
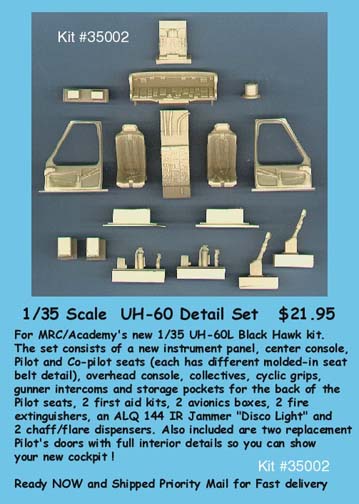
The Cobra company detail set for this model:
Step 1
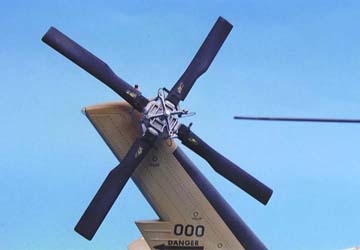
Deals with the rotors these are nicely detailed but as always you can add more in the form of plumbing etc etc. careful painting helps as well here. The blades on the main hub are an excellent fit and as the model is so large I only cemented one blade in the others can be stowed away for transporting or storing and push fitted for display.
Step 2
This is where the tricky bits start, careful assembly of the turnbuckle bars to the cabin roof is important as the seats later lock on to these.
Step 3
There are four types of seats to build all are tubular but there are different leg arrangements so be aware. Build up the seatbacks and pans and leave them to harden overnight then move on to...
Step 4
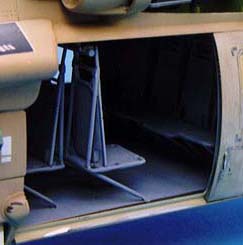
Paint and assemble the cabin area this is quite a strong structure; don't forget to drill the holes in parts B28/29. Now is the time to set up your troop seats, each has two legs but little idea of where to angle them so I cemented each leg on at roughly the correct angle and left until the glue was nearly set then I hooked the seat in position on the turnbuckle bars in the roof (quite easy) and adjusted the legs to locations in the floor pan, do the gunners seats first and work along remembering that the seats are staggered. When you have them all installed you can cement the tops to the turnbuckle bars. The seat coverings are made from a Nylon type material and are a shiny silvery grey colour, dark gull grey is recommended but I thought that a little too dark for the examples I have seen.
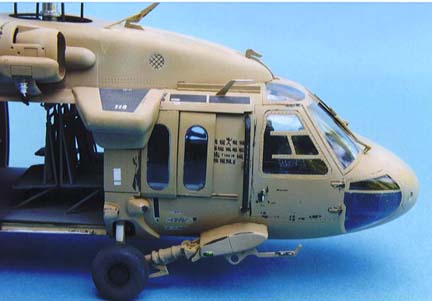
Step 5
The cockpit is pretty basic so some extra detail here may be required such as seat belts for the crew, the release cable for the side armour plates (shown in photos) plus you might want to add some plasticard structure beneath the cockpit floor around the nose window area as you can see right through from each side. I have not done this as my windows were already masked off and I only found out upon unmasking.
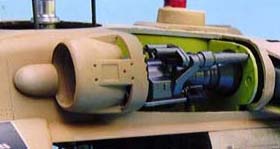
Step 6
If you intend to show off the engine then there is a nice photo showing some of the "plumbing" involved on the real thing, but do make sure that parts B38and B45 line up with their locations before the cement hardens. Most of the engine is shown as one colour but several shades will certainly enhance your model.
Step 7
You will need to paint the interior of the fuselage halves now and decide which version you will be making, drill the holes for the chaff dispensers if needed, insert the tail rotor pin and cement the two halves making sure the floor of the cabin is seated properly, I had trouble here as the floor would not quite fit tight to the bottom, there is a gap which I could not resolve, but I think the answer is to sand down the edges of the cargo hook box until the floor lies flat. Tape this assembly up and leave overnight to harden.
Step 8
Assemble and clean up the joints on the intakes before adding to fuselage and note which side each fits onto as they are handed.
Step 9
Build up the basic legs but if you aren't going to mount the wheels until you finish painting then do not mount the cable cutters parts L6/L12 or the step parts A15 as they will get knocked off, mine did several times.
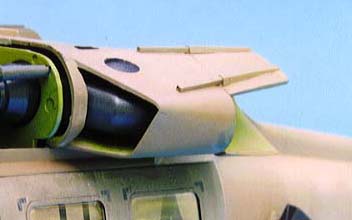
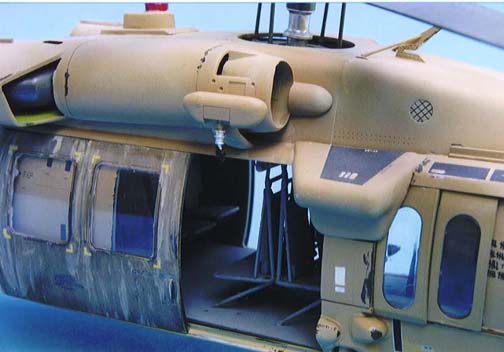
Step 10
Assemble the remaining roof section and test fit the HIRSS units, I found them a tight fit but they did eventually tuck nicely into the end of the engines. When you add the shields parts B12/13 don't try cleaning up the join as they are only bolted on and are never flush.
Step 11
Add the front cover then adjust the runners parts D21 accordingly. If you Intend to do a different aircraft to that supplied beware of the different intakes for the bigger more powerful engines
Step 12
Careful cementing required here on the clear parts and don't get the gunners doors mixed up, the largest goes to the rear and fits on the bottom rail. Make your mind up time now, if you want the ESSS pylons mounted build them up, they are quite impressive when mounted on, I only did a dry run on mine and the actual contact with the fuselage was not too good a join, but I used the alternative parts D39/40 any way which weren't half as bad. The undercarriage fits on the same for both versions but until you have painted and decaled the model and added the wheels do not add the cable cutters to the legs, I kept knocking them off.

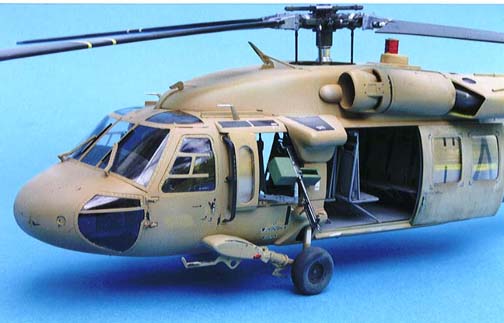
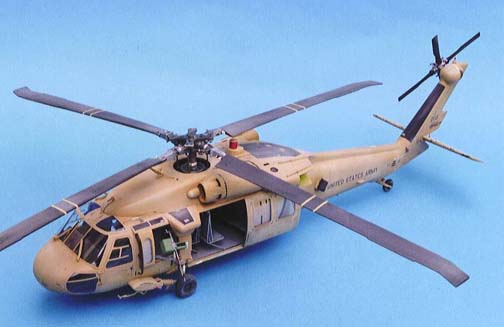
Painting and Finishing
I used Humbrol HU250 desert sand as the overall colour and for the engine bay Hu 81 chromate with a little light green mixed in. I used Hu 85 coal black For the rotors also for the aerials including those two that look like hand rails by the cockpit doors, for the rotor hubs I used a combination of silvers ie. Steel, aluminium and gunmetal mixed until I had a variety of shades to work with. I have since learned that the rotor mast is painted olive drab and ofcourse each blade and it's push rod are colour coded, they put a piece of coloured tape around to identify each one when down for maintenance, red, yellow, green and blue are the norm.
Tyres are always interesting, they are only ever black when they come out of the moulds and a dark grey is nearer for "in use" purposes, I use a mix of Hu67 panzer grey and Hu85 coal black to give a really dark grey, when this is oversprayed with some dust or mud they look quite lifelike.
To add a little wear and tear some panel and leading edges were treated to some specks of dark helo green to represent chipping of the desert paint and the only photo I found of this machine shows the stbd door (which might be a replacement) to be almost void of sand colour so I put a wash of the green on in streaks to simulate this effect.
All the decals were added and the whole model was coated with Johnson's KLEAR (future) an acrylic varnish, to protect them. Next job was to add some dust, for this I used Floquil dust from their railway weathering set, an all over to start with then some build ups in strategic places but the windows are left clean as I presume the ground crew would pay attention to that for the pilots.
Nav lights and the IRCM (infrared countermeasures) set were painted Hu11 silver and when dry were given a coat of Tamiya clear colour, green for stbd and red for the port and IRCM, the silver reflects the light through the colour and looks as if it is alight, I think.
Some tiny touches of paint here and there and the last small parts added was all there was left to do, I now have a helo to put on display and although some areas were tricky (a lot of patience required) I have enjoyed the building of this fine looking aircraft, I recommend it to any Helo fan.
© Ted Taylor 2001
This article was published on Wednesday, July 20 2011; Last modified on Saturday, May 14 2016