
Revell 1/32 Spitfire Mk XIV Conversion
By Jim Brown
This conversion of the Mk XIV (Griffon engine Spitfire) I have used the Revell Mk IIa Spitfire as the host kit though any Spitfire can be used as the host with the appropriate modifications. I used the Revell kit as it is easily available at a very reasonable price and is readily available to buy almost anywhere. This is used in conjunction with the Mk XIV conversion kit, available from my eBay shop (jimleroybrown).
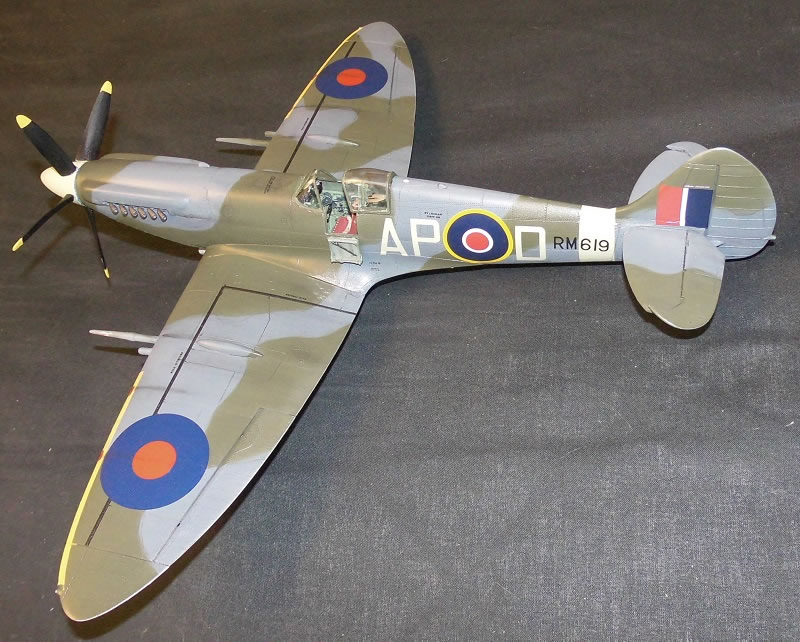
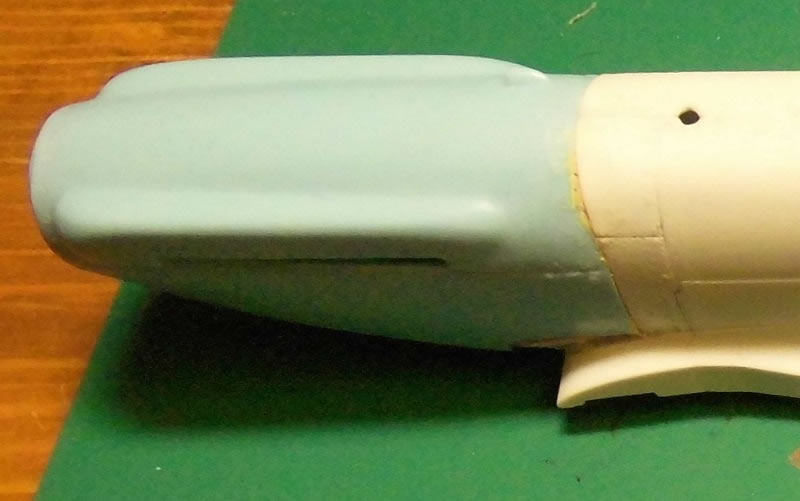
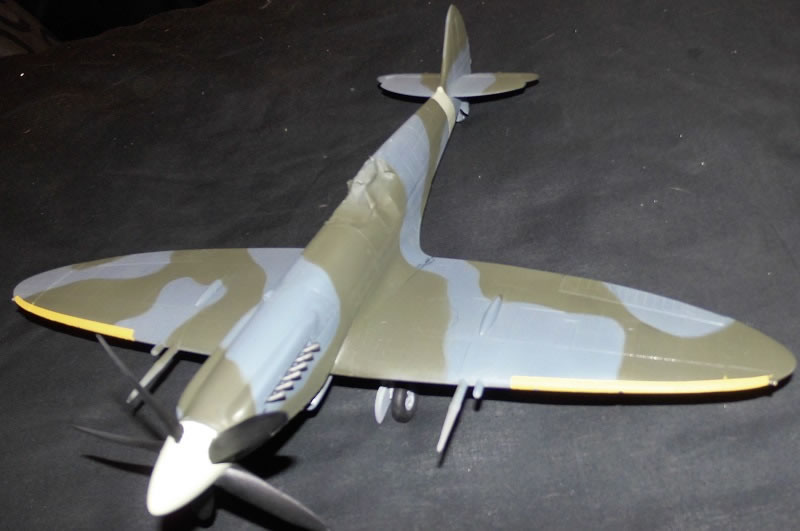
The best sequence to build the kit is to measure & remove cowls from the plastic kit (using replacement cowl as a guide), see pics 1-3.


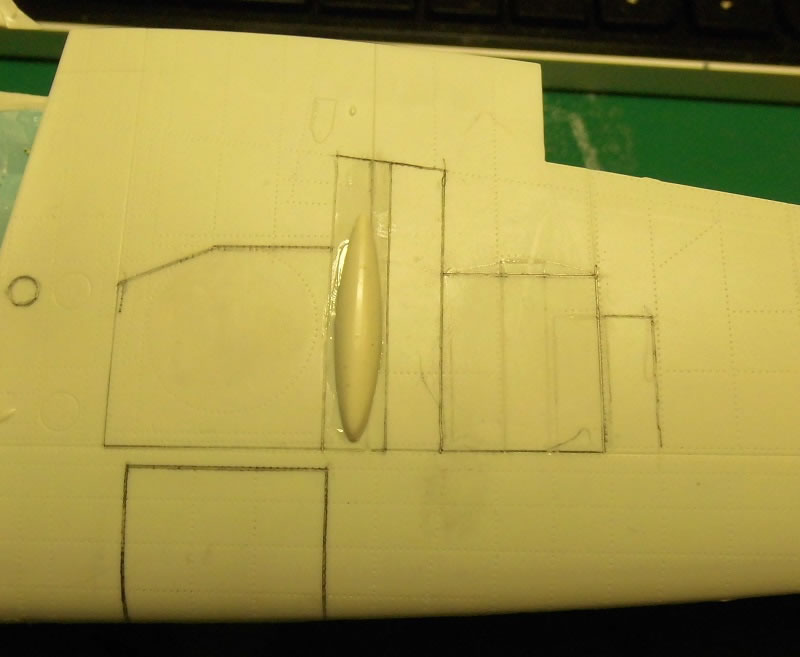
Any mistakes can be later rectified by adjusting the cut sections and by filling with putty, next it I removed the tail section as shown (see pics 4, 6, 7), I then measured and removed the intake sections from the wings, again any mistakes can be rectified, I then removed the the opening for the tail wheel. I then filled any lines and access disc recesses and then scribed all the required panel lines and newly positioned access discs on the wings, both upper and lower.


- If using the Revell Mk IIa kit carefully remove the cowls from both sides using drawings and resin conversion as guide. Please note that is my preferred sequence of building, you may prefer to do this differently.
- If using the Hobby Boss or Tamiya kit this process is easier as the cowls are separate parts.
- If using the Revell kit, part no 71 lower cowl/air inlet must be cut level with the front of the wing (fit cowl assembly first) (see pics 20, 21, 22) and discarded, on the Hobby Boss kit these are separate so discard.


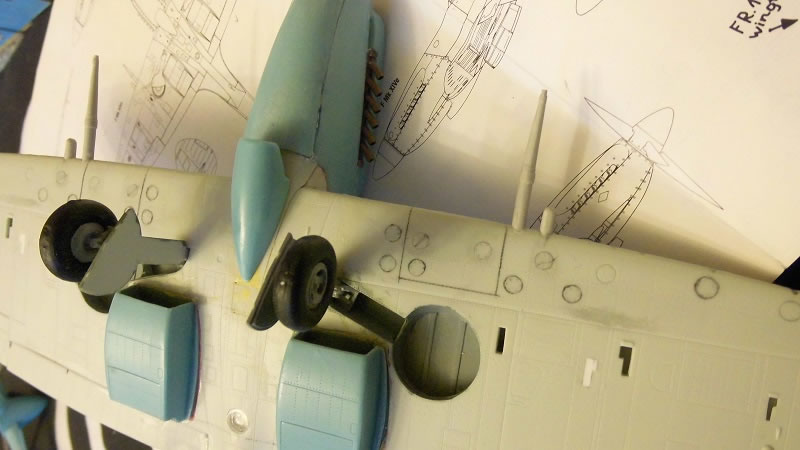
- The first surgery involves removing part of the lower tail section of fuselage for the retractable tail wheel (see pic 15).

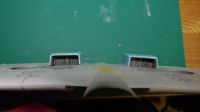
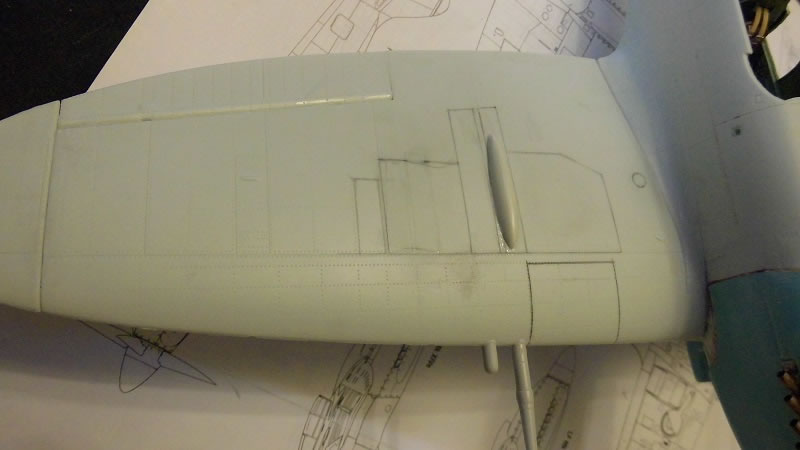
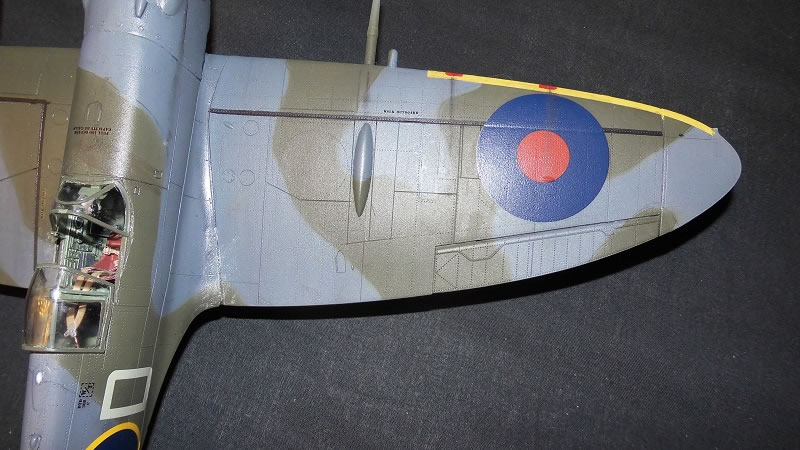
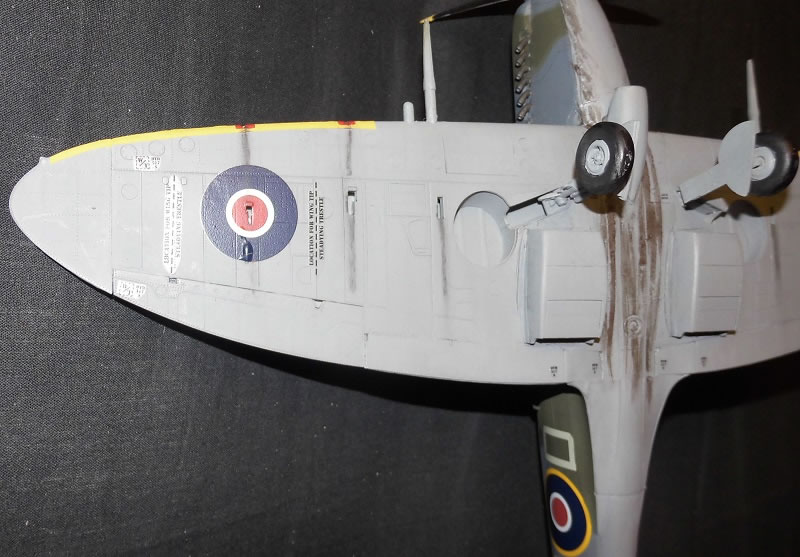
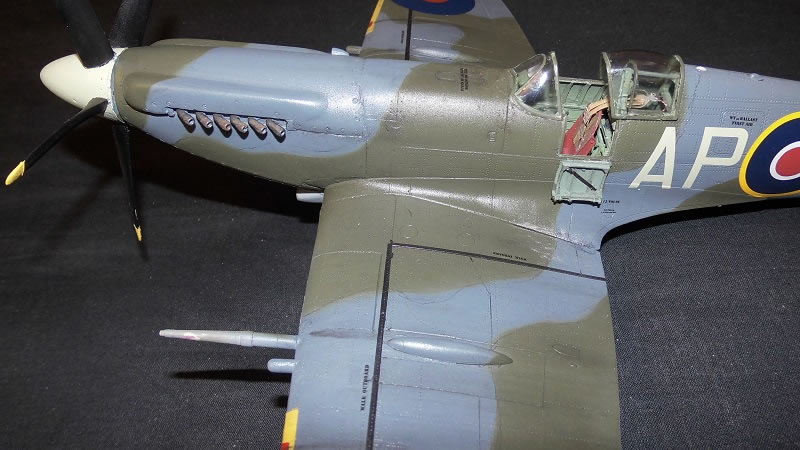
- This is the best time to scribe the corrected lines and and access panels, the cannon covers should be marked and scribed. And replacement covers glued in place. The bulges on the upper wings must be removed, these can be easily removed by scraping down with a sharp round scalpel blade and then sanded totally flat. On the Revell kit there are also a couple of other plates that need to be removed (you may use any other method that suits you).
- Remove the kit tailplane where shown on the scribed line on kit (when fuselage is joined make sure cuts are square). Using drawings and/or photos scribe the new lines under the tail and fill unwanted lines.
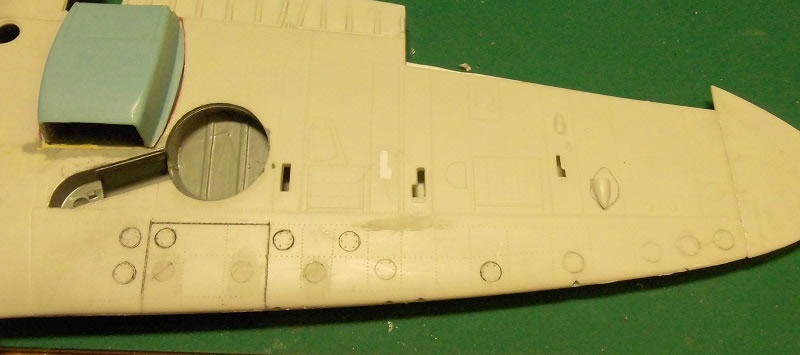
- When you have assembled the fuselage you will need to fill the join line forward of the cockpit as this was a one piece cover also fill and sand smooth the filler cap, this needs to be scribed in the proper place, also scribe the access plate on the side cover (see drawings).
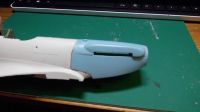
- Assemble fuselage and attach cowl taking care to make sure parts are square and glue, you can fill any blemishes/mistakes,when assembly is dry and firmly in place you can now carefully insert and attach the exhausts (see pic 16). Add the tailplane making sure to align correctly, you can also add rudder aligning how you desire.
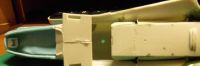
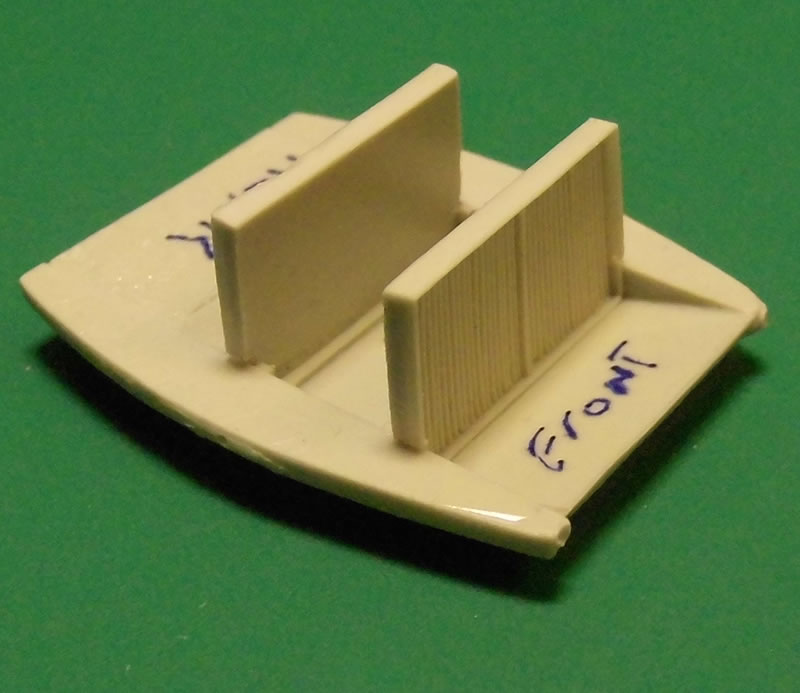
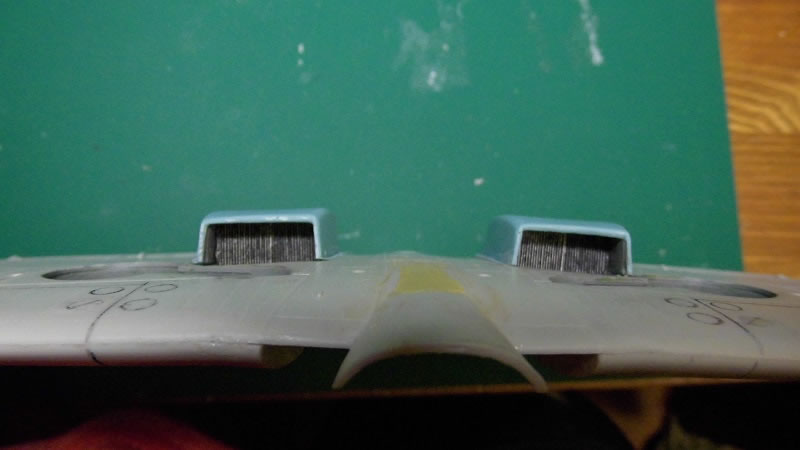
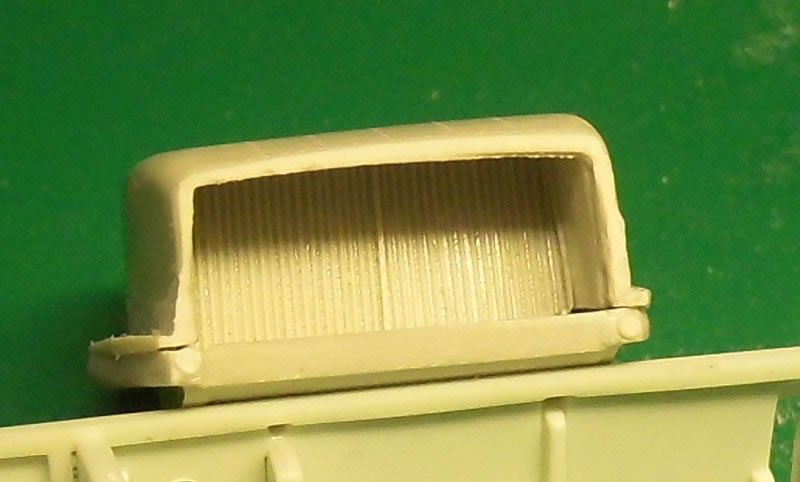
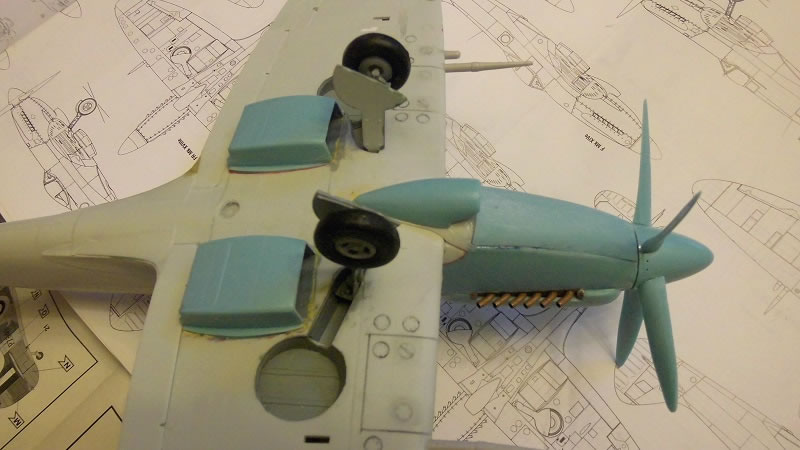
- To add the replacement radiators mark and remove section from lower wing X2 also remove the strengthener from upper wing to ensure a good fit (see pics) glue intake ramps in place below the surface level of wing add two radiator faces and radiator fairings, it would be best to dry fit all parts first to ensure good fit (see pics 5, 8, 17, 18, 19).


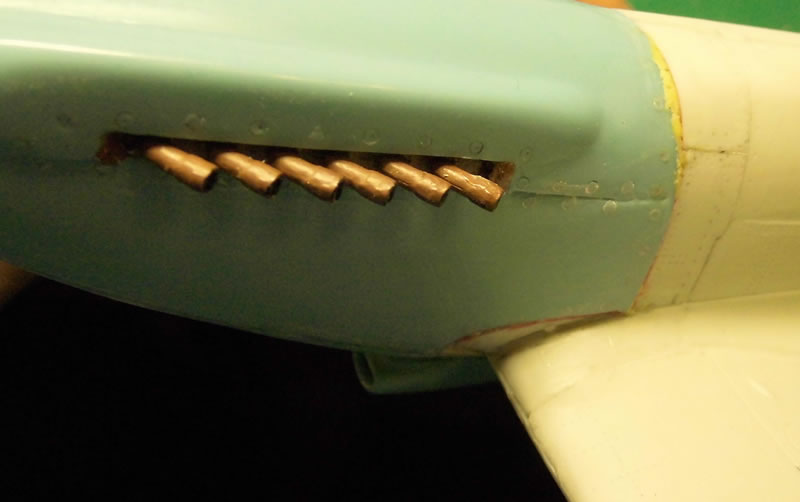
- When wings have been assembled and dry, mark and drill locating holes for the cannon and stubs (see pic 10).

- If you want the spinner to rotate you will have to locate and drill hole and add locating compartment for spinner rod (see pic 11), for rod, add disc on rod after inserting through spinner backplate attaching to spinner, you can now attach the lower cowl, when dry kit part no. 71 can be cut to size attached and moulded recesses can be filled with filler of choice, when dry the air intake can be attached in position.
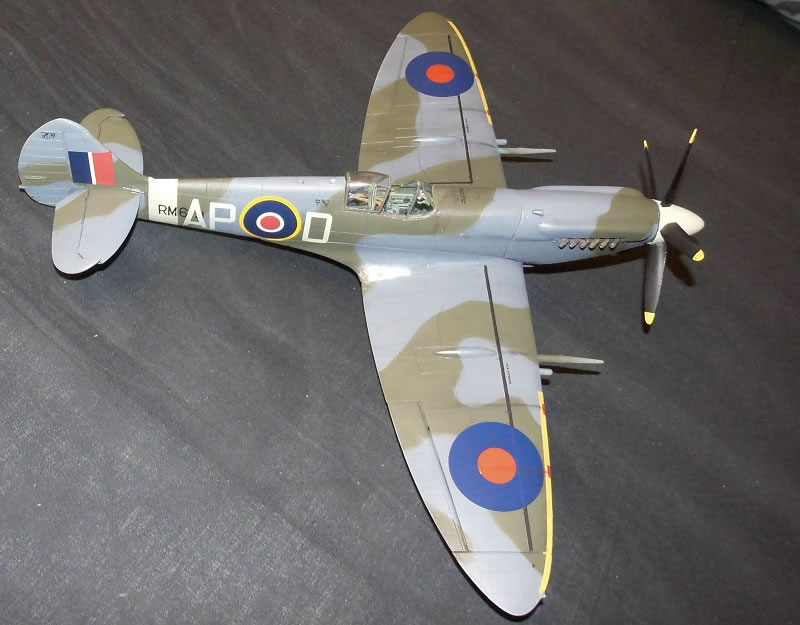
- The model can be built with full span wings or clipped (though most earlier Mk XIV spits had full span wings as I have built my kit).
- Don’t forget to fill some of the access discs on the wings, and add the others that are required.


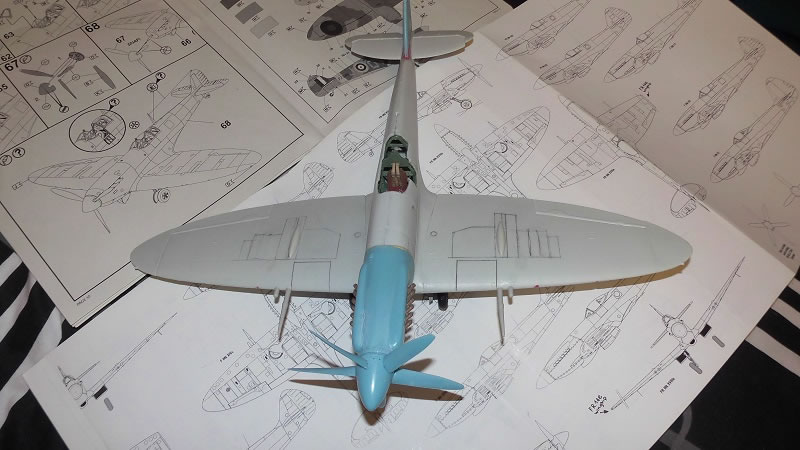


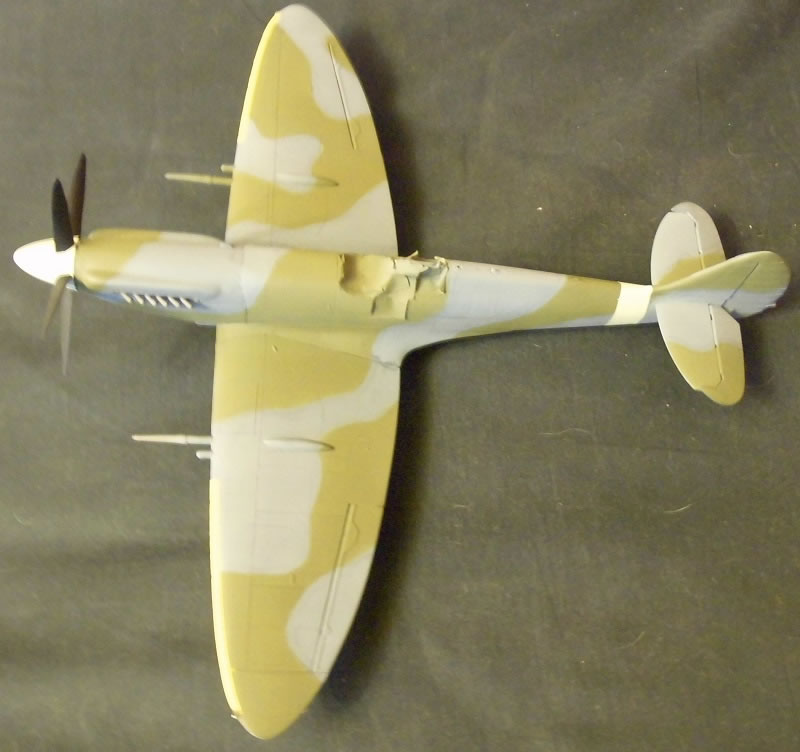
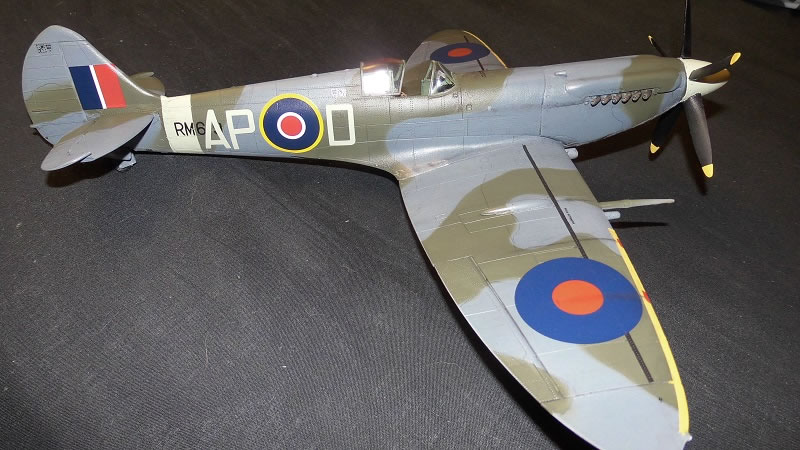
I then painted the model with primer so that all surfaces were the same resin and plastic. I then painted the undersurfaces with Tamiya acrylic Sea Grey and then the upper surfaces with Tamiya Ocean Grey, I the masked off the camouflage pattern for the Tamiya RAF green using White tack (not blue tack as this does not leave any marks on the paint surface) as I have read on the forums. It is also cheaper only a quid from the pound shops. Then filling the spaces not to be painted with masking tape. After painting I then sprayed the model with.

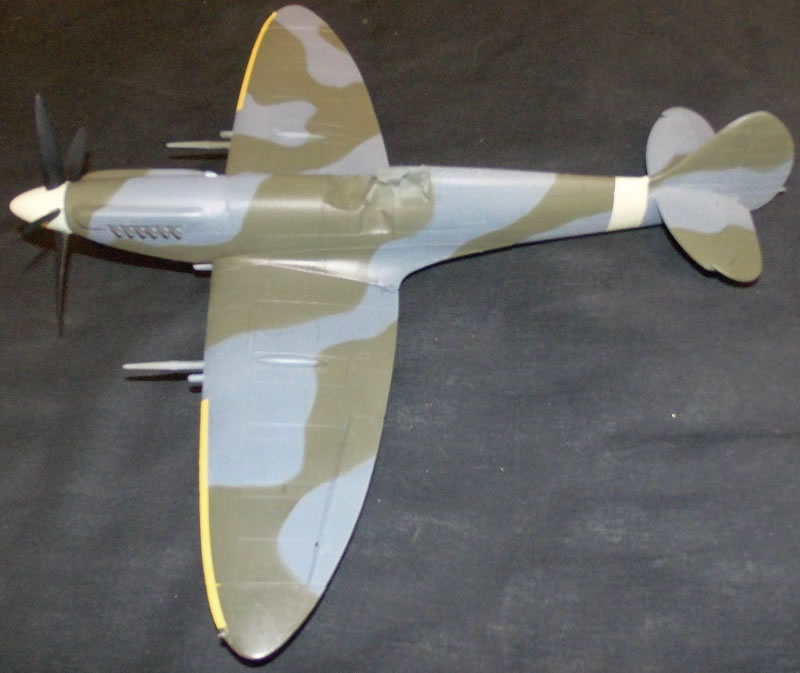

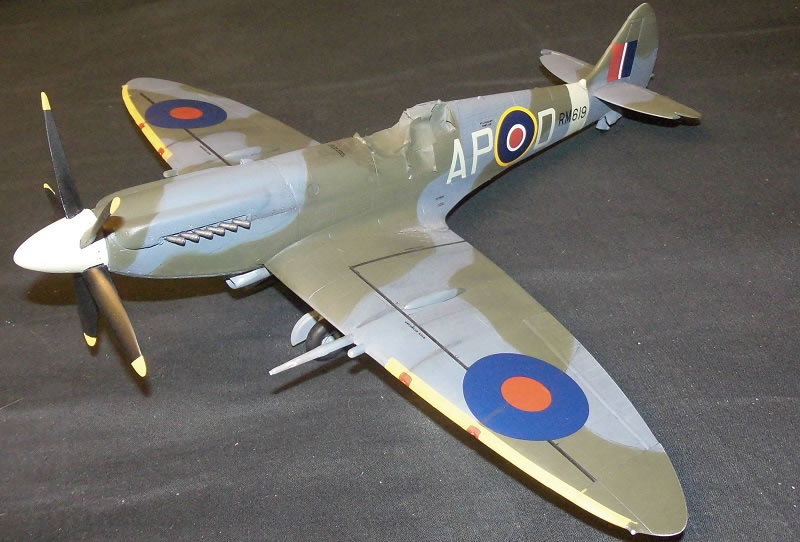

Not Future which is not very easy to get hold of and is very expensive, for a very small amount (after trying half a dozen different wax polishes, floor and furniture). I have used a very good substitute/alternative for Future...which can be both brushed and sprayed with very good results. This Astonish wood and floor polish, and is very cheap and readily available in most hardware shops (costs less than 2 quid for 750ml), using with a brush it dries with a shiny surface but when sprayed dries with a semi gloss sheen and takes decals quite well.
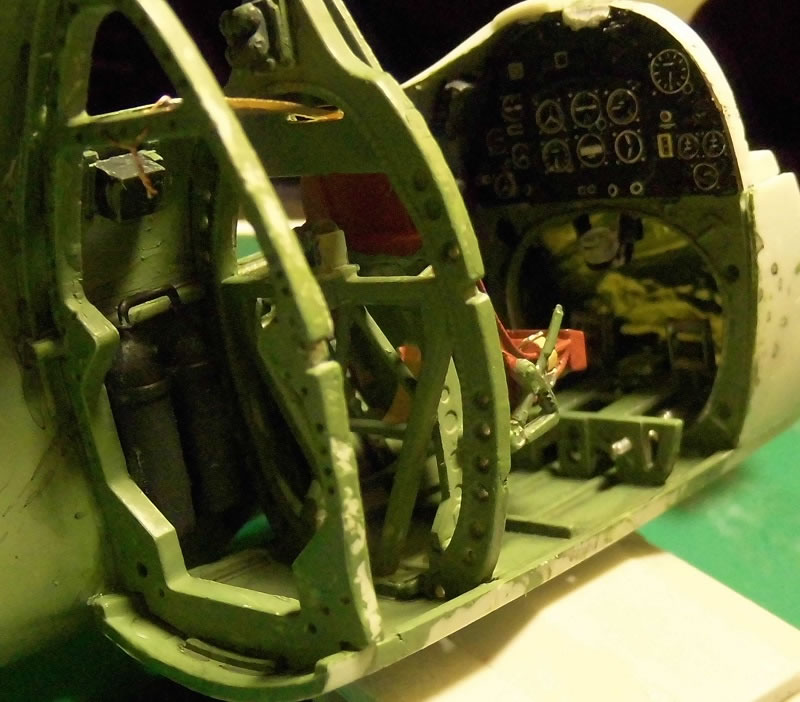
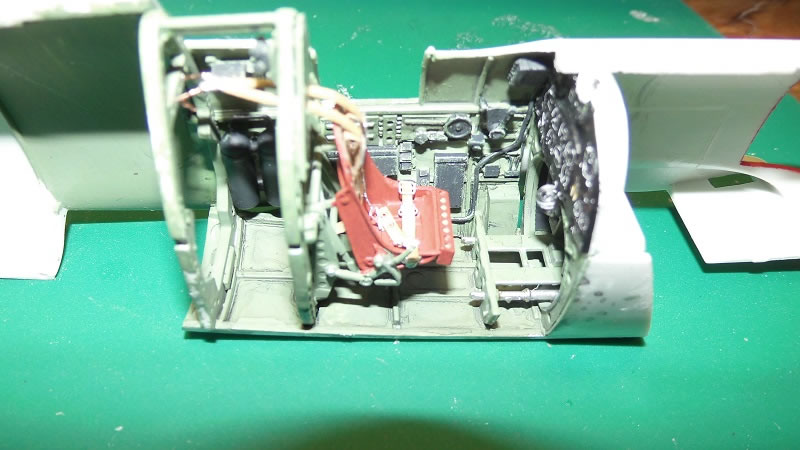
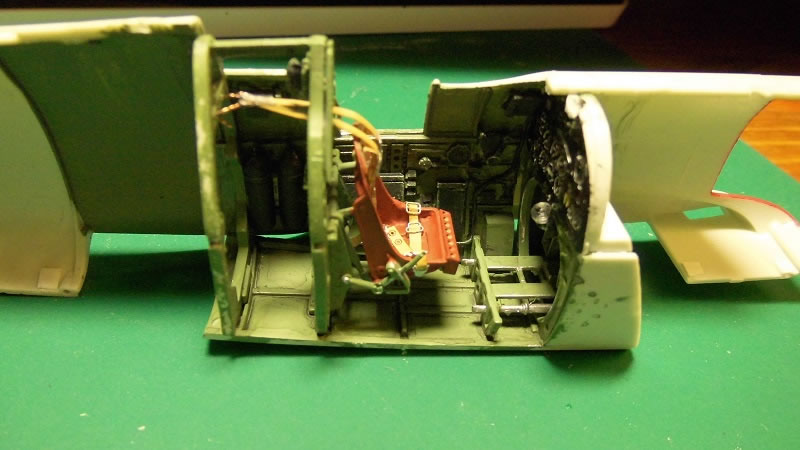
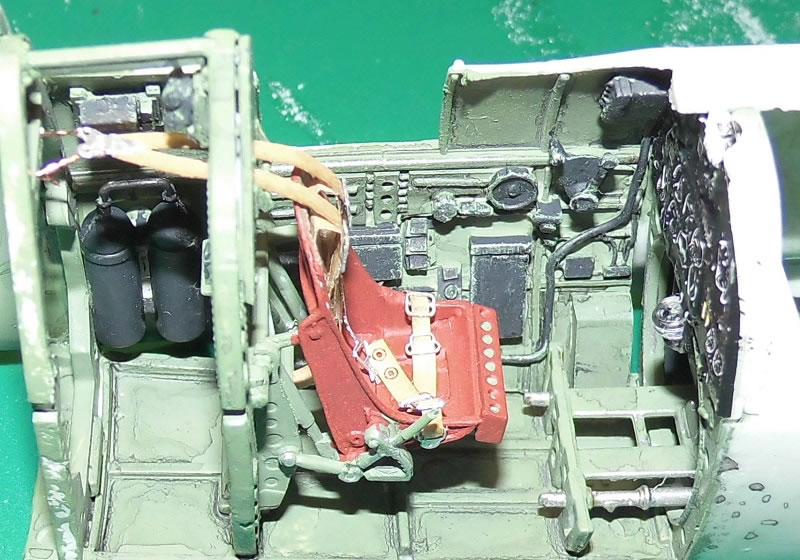
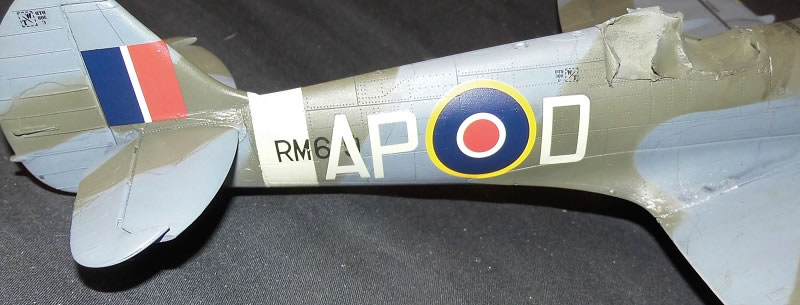
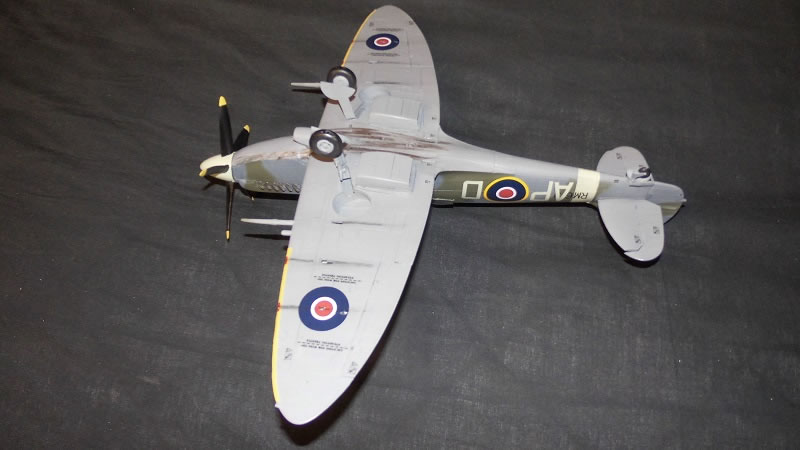
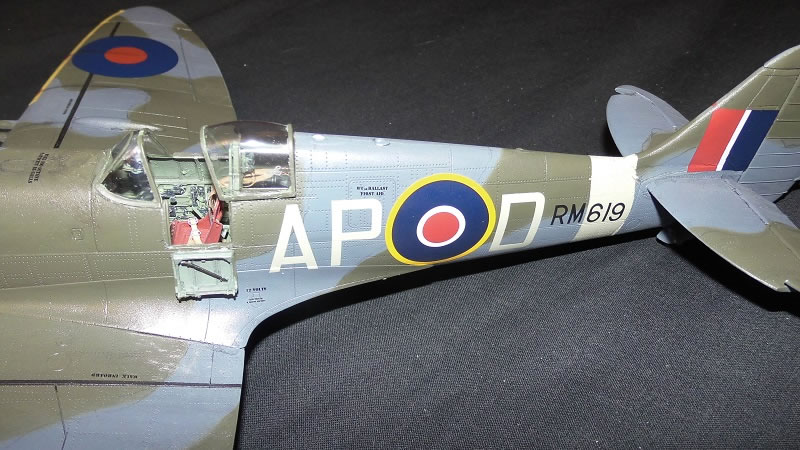
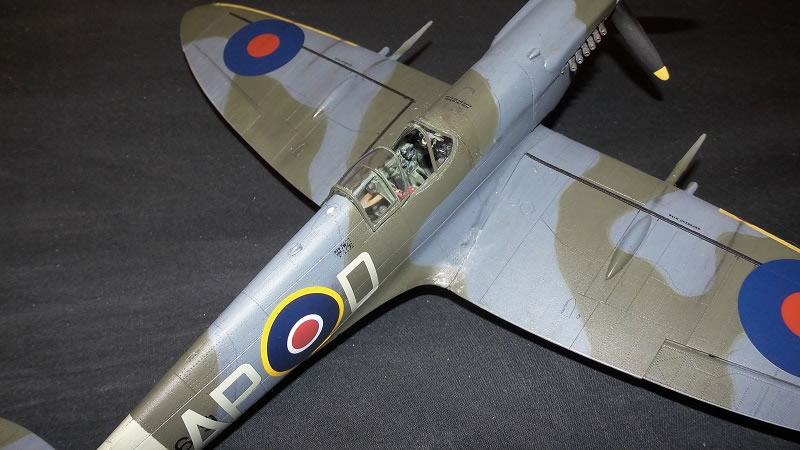
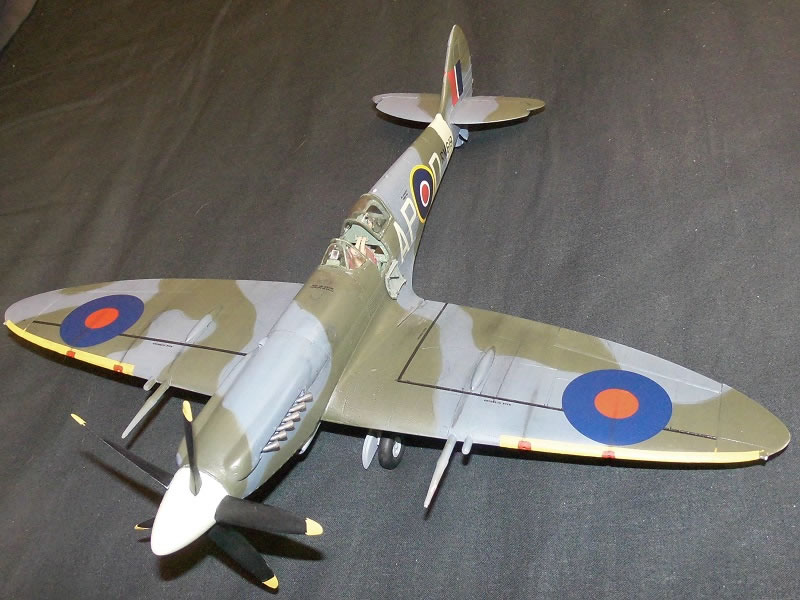
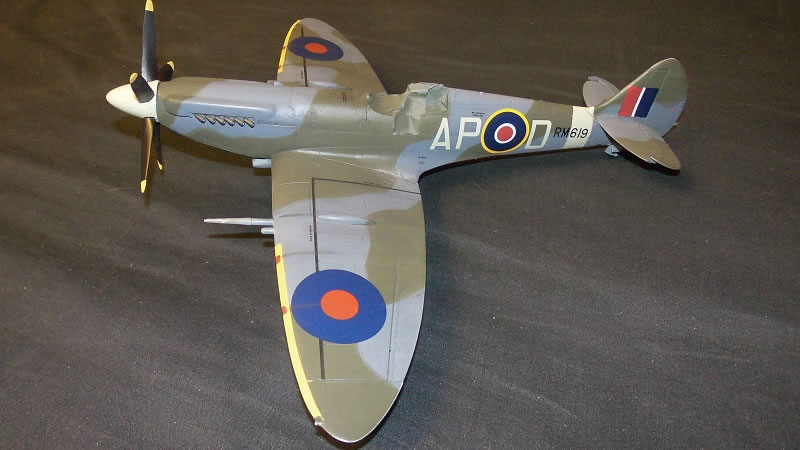
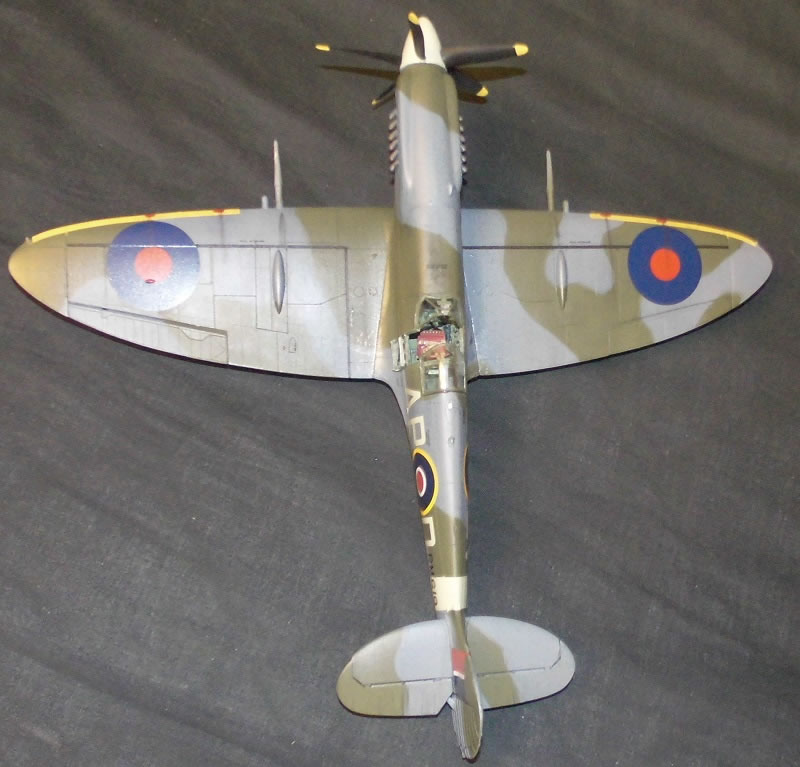
I have now applied the decals to the kit. Roundels were taken from my stash but I had to buy decals for the sky codes and the black serial numbers, both of which were provided by Xtradecals. I will now apply a further coating of Astonish to seal all the decals, paint and the pastels used. I have also included some pics of the cockpit, I forgot to add the armour behind the seat…too much of a hurry to finish the model.


© Jim Brown 2017
This article was published on Tuesday, January 24 2017; Last modified on Tuesday, January 24 2017