
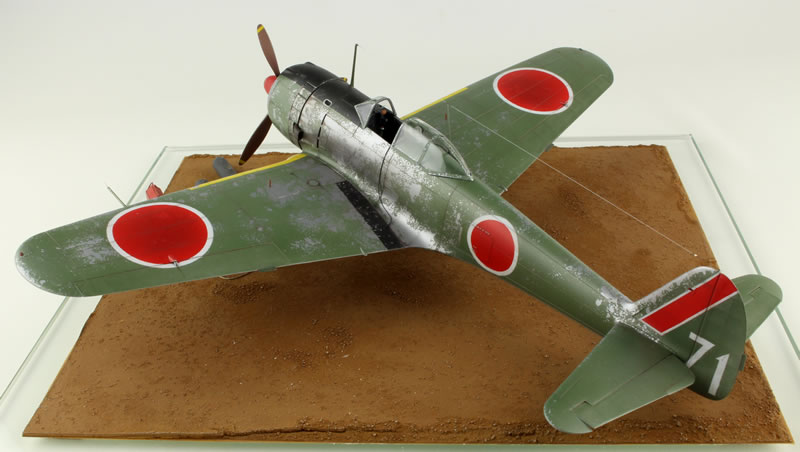
Hasegawa 1/32 Ki-43 Hayabusa
By Luc Janssen

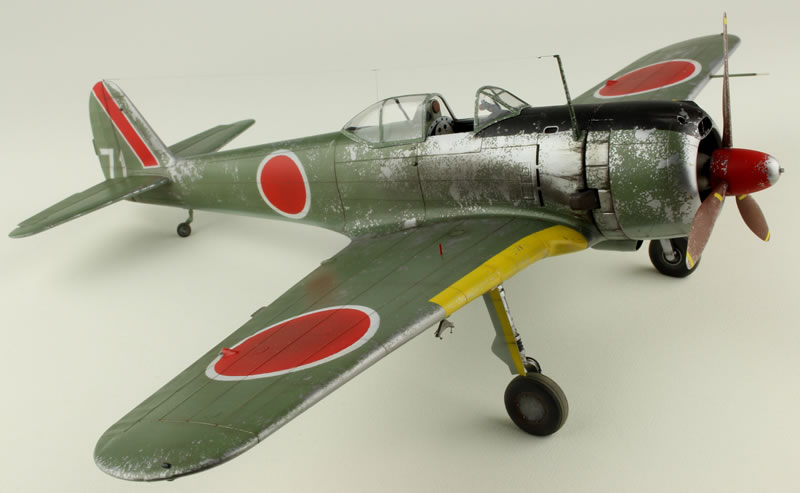
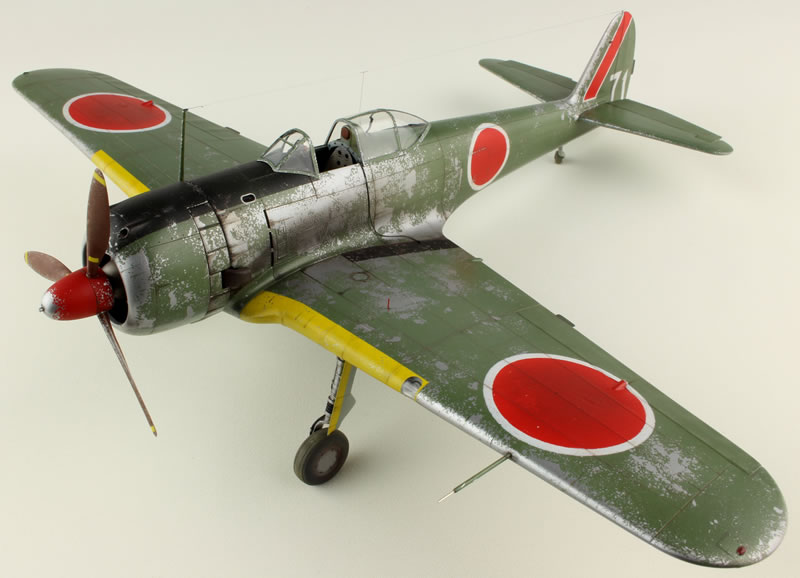
The Ki-43 Hayabusa always fascinated me, not only because it is a beautiful fighter but also because lots of photographs show this small plane in an extremely paint-worn condition! During the Okinawa campaign Ki-43s were equipped with bombs and used as suicide fighters. After checking my books and magazines, I decided to make a small diorama of a very weathered and paint-worn Ki-43 being prepared for a Kamikaze attack.
BUILDING
The Hasegawa kit is an older kit and some work has to be done to cope with nowadays standards of model building. I started to scribe the panel lines of the different parts before assembling them. Fortunately, when working carefully and prudently, the scribing can be executed with good results, still keeping the original riveting!
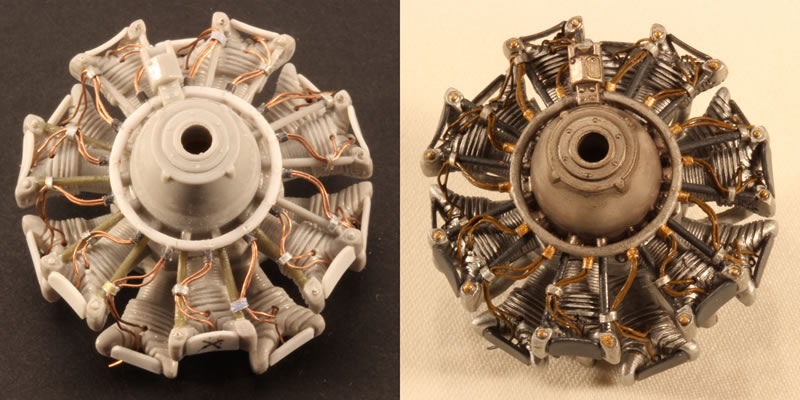
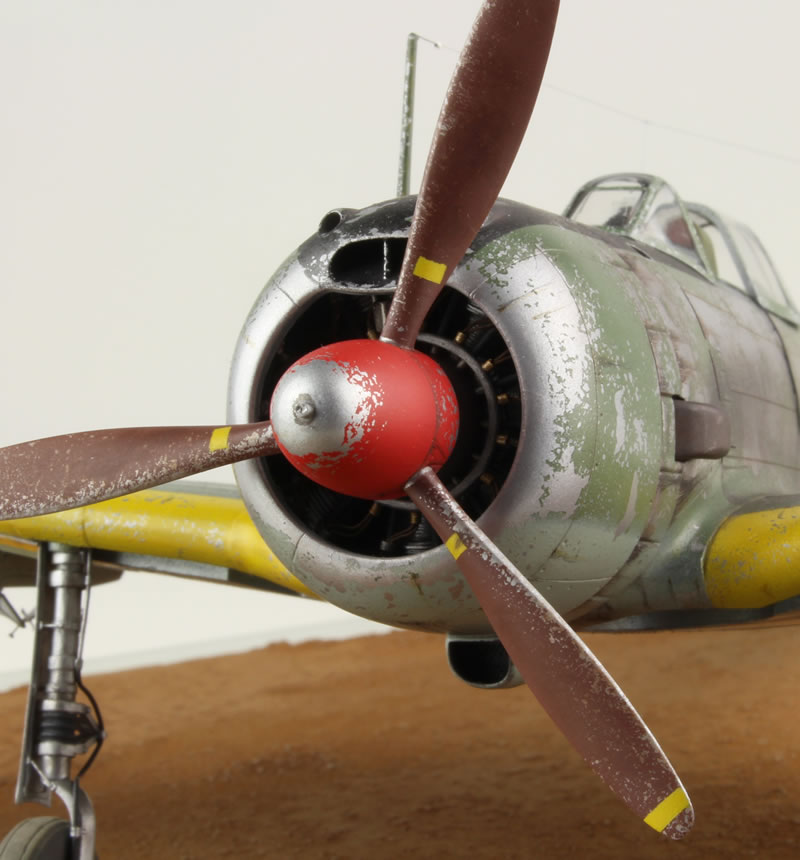
The next step was the Ha-25 radial engine. I assembled the kit radial engine and made a new ignition ring from plastic rod and ignition cables from copper wire. With small lead foil strips the ignition cables were then attached to the push rods. The gaps behind the propeller blades on the propeller hub were filled.
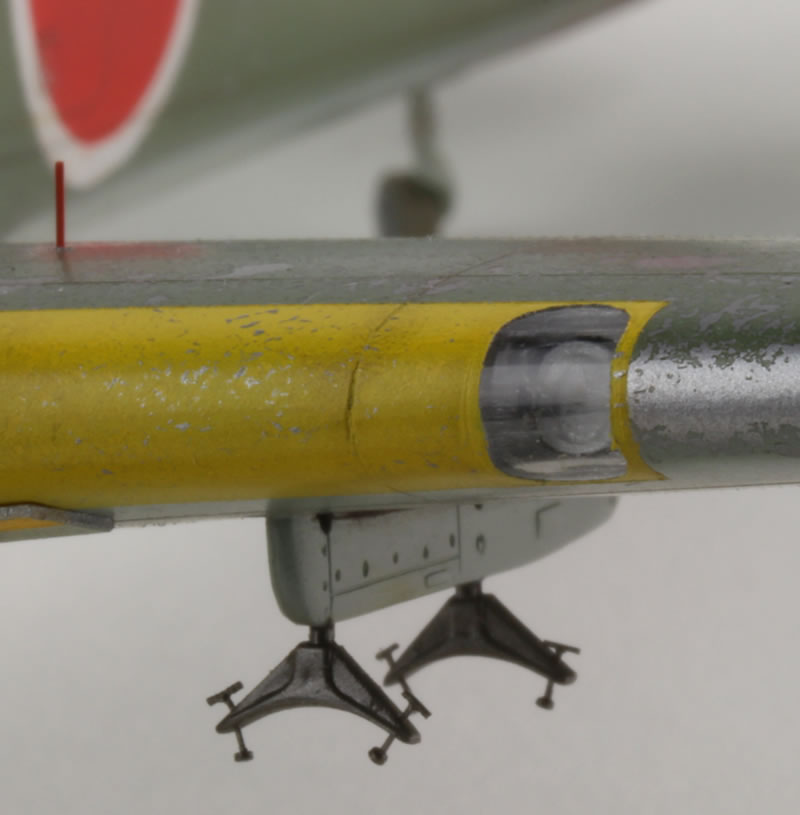
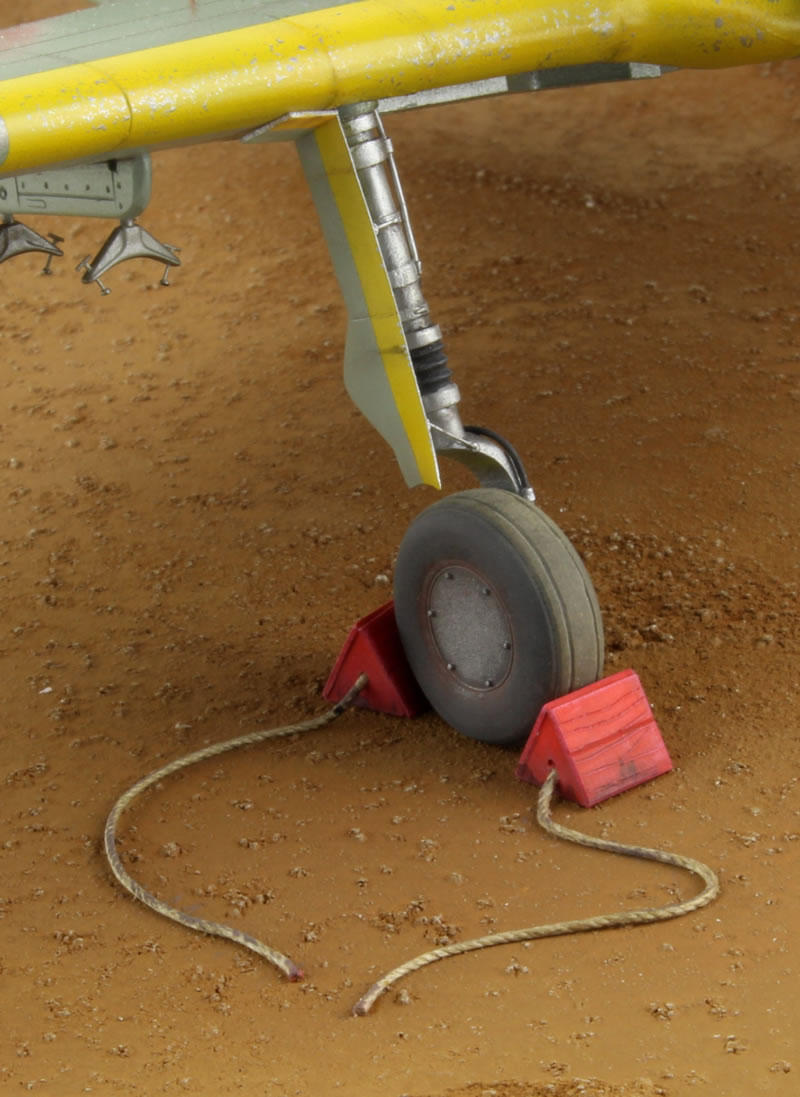
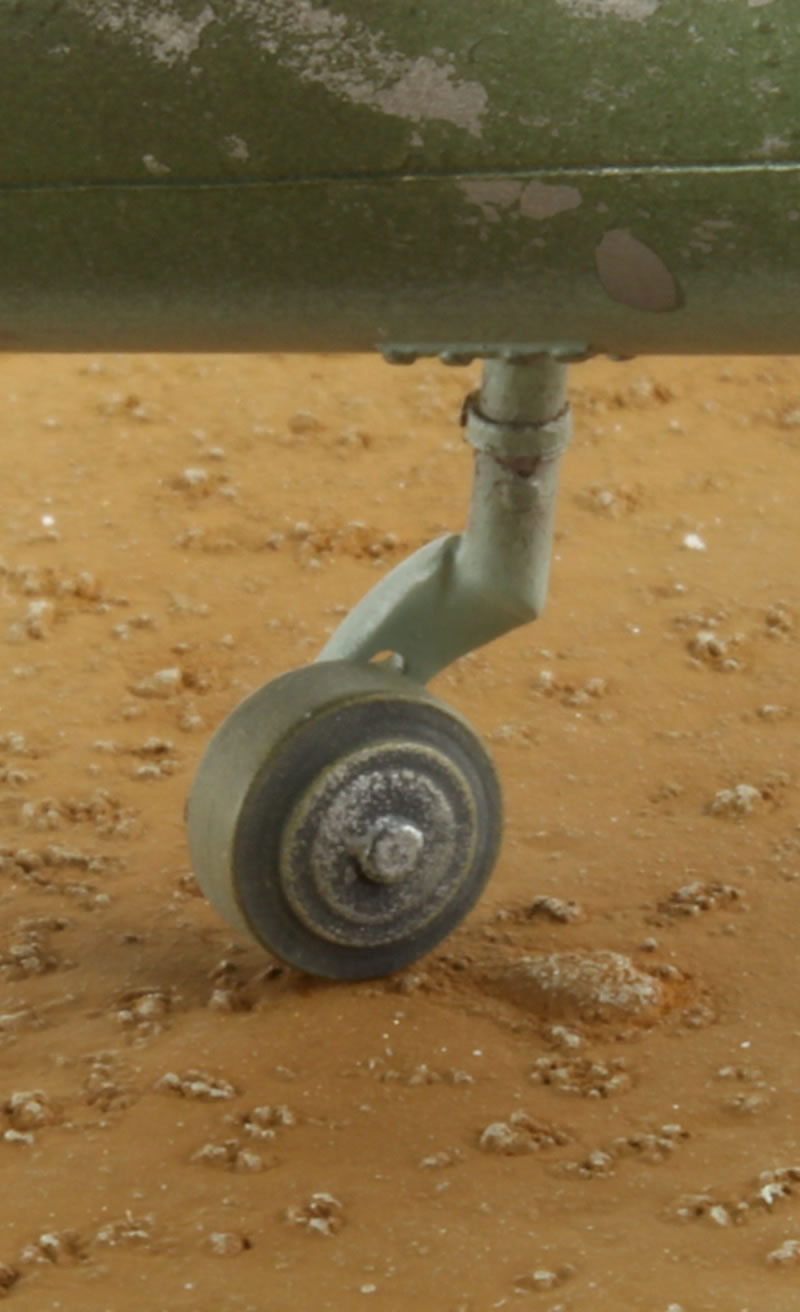
The landing gear was completely reworked. From the main landing gear, I only used the struts. First I sanded the oversized struts, after which I detailed the attachments for the landing gear covers and the covers themselves, both from scratch. The brake lines were made from lead wire. The tail wheel and strut were made from scratch whereby I left away the canvas cover of the strut to accentuate the typical “high sit” of the fighter.
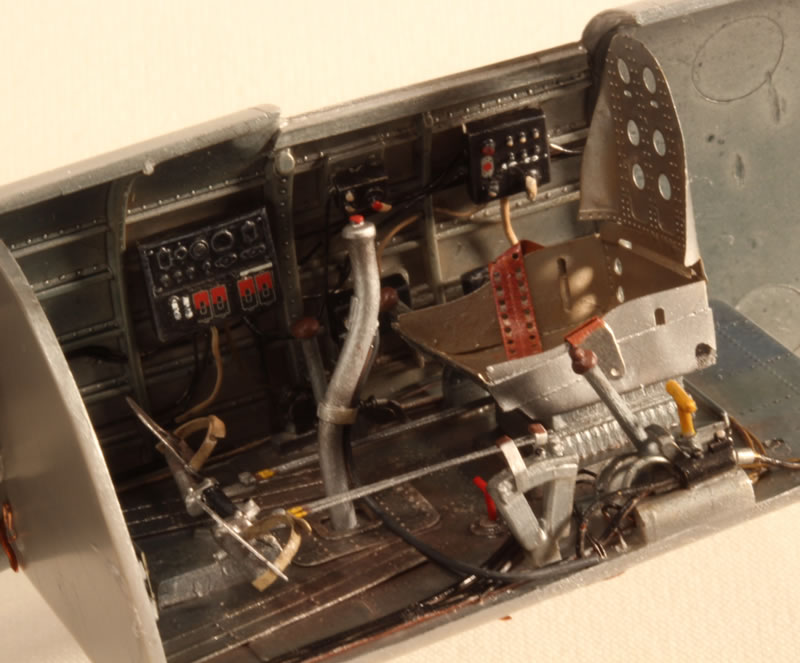
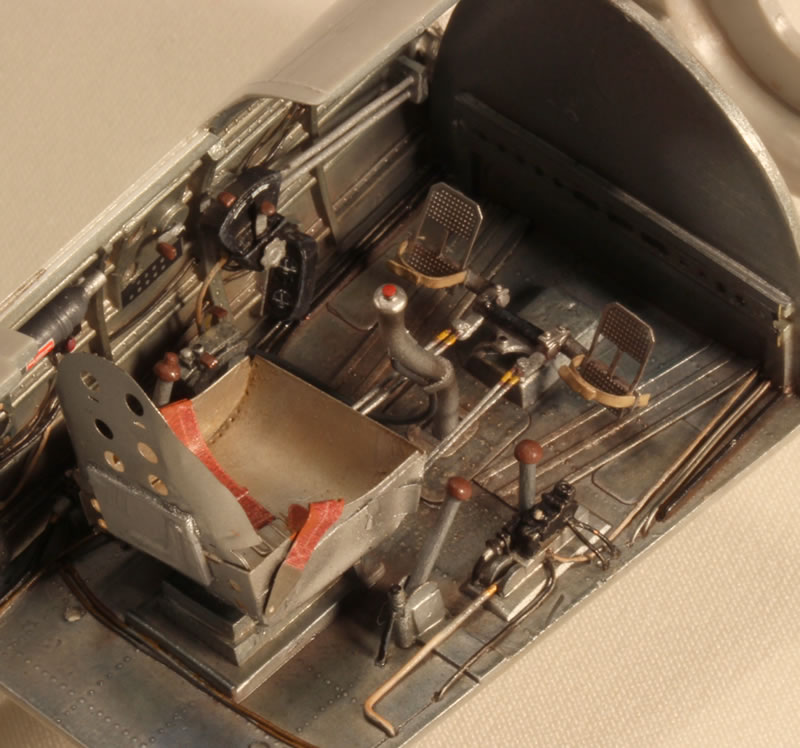
The cockpit in the kit is very, very basic and I had to rework many details. I used the instrument panel, the seat and some other parts of the Eduard Ki-43 II after market set. From scratch I created the type 100 gun sight, new panels, the control stick, the rudder pedals and levers, handles and knobs. The cabling was made from copper and lead wire. The safety belt also came from Eduard.
In the leading edge of the wing I installed the landing light and used the kit landing light cover, which fitted perfectly! The drop tank/bomb racks were made from scratch and on the sway stoppers the adjusting screws were added.
Finally, the elevators were cut out and placed in a lightly upward position and foreseen of trim actuators.
PAINTING
The Engine
The completely assembled engine was airbrushed with White Aluminium. I then fixed the painted engine on a rod, dipped it in Indian ink and removed the excess ink by rotating it. This operation was repeated several times until the contrast of the cooling fins on the cylinders was right. Then the ignition cables were painted and some details highlighted with Silver and Gold metal paints.
The whole engine was treated with pastel powder (Black and Burnt Umber) to give it a used and dirty look.
The Cockpit and the Wheel Bays
The interiors of Japanese airplanes were often coated in the mysterious Aotake paint. Why mysterious? Because even today nobody seems to know how and when it was applied during the building process of a plane and what colour is really was, as it degraded severely under exposure of ultraviolet light.
To simulate the Aotake coating, I started to airbrush the cockpit interior (not the seat), the wheel wells and the interior of the cowling with Airframe Aluminium. I then sprayed a coat of Gloss varnish mixed with Non Specular Sea Blue (1 part Gloss varnish + 3 parts thinner + 0,25 part Non Specular Sea Blue). When compared with reference pictures, this finish looked like an older Aotake coat.
Now the details were hand painted in their different colours, dry brushed and everything was sprayed with Gloss varnish. Some small decals were put in place and sealed with a coat of varnish (1,5 parts Gloss + 5 parts Matt). I then treated the floor plates and the lower parts of the sidewalls of the cockpit with pastel powder (1 part Burnt Umber + 1 part Raw Umber) to simulate a used and dusty interior.
Unfortunately, almost nothing of these details can be seen once the fuselage is closed...
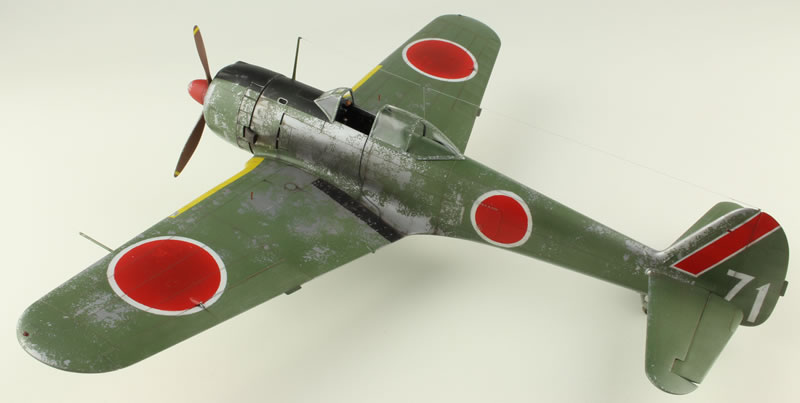
The Camouflage – the Toothpaste Connection
Reference pictures of Ki-43s show heavy weathering and paint wear. I had to look for a way to obtain this effect and I found the toothpaste trick. Let me explain:
I started to give the model an overall coat of Alclad II Grey Primer & Microfiller. I covered this coat with Alclad Airframe Aluminium over which I sprayed 2 coats of Gloss varnish.
Now I mixed some toothpaste with Indian Ink to create a greyish paste. The dark colour of the paste was needed to obtain a contrast on the Aluminium surfaces! With a small sponge and always checking with reference photos, I carefully applied small dots of this greyish toothpaste. Where the paint was completely worn off, the toothpaste was applied more heavily. I tried this technique first on an old model until I had a kind of feeling how to work with it!
The paints I used for the basic camo of the Fighter were Imperial Japanese Army Light Grey and Russian Armour Green. I wanted to simulate the faded green of a plane that had been in action for a longer period in tropical conditions. After trying out some paints, I concluded that Russian Armour Green gave the best results.
On the model treated with toothpaste, I now sprayed the undersides in Imperial Army Light Grey and the upper surfaces in Russian Army Green. On the top of the wings and tail planes and the fuselage I sprayed another diluted coat of Russian Armour Green + White to accentuate the sun fading, but this gave only limited results as the difference can hardly be seen once the paint is removed.
Once everything was thoroughly dry came the trick: I simply cleaned the model with dish soap and the toothpaste vanished nicely leaving a paint worn surface of the fighter!
Although I normally seal the paintwork with Varnish, the look of the worn surface of the model looked just right and I did not apply a coat of Varnish.
The colour borders on the wings, the Hinomaru’s, the tail numbers and the Sentai’s insignias were air brushed in their different colours.
WEATHERING
As always, I try to obtain a weathered look working with pastel powder and colour pencils. Although I have been experimenting with pre-shading and diluted paint-washes, I prefer the mentioned system as it is easier to correct and it gives more realistic finishes.
I started to run over the panel lines with a very sharp pencil. After trying some colours on a sample, Dark Brown seemed to give the best results for the upper surfaces and Dark Grey for the under surfaces. The panel lines of the anti glare panel were treated with Medium Grey and the colour borders of the wings with Orange.
Once this job finished, the panel lines were gently “painted” with pastel powder. The upper sides with a mix of Burnt Umber + Sand and the under sides with Raw Umber + White. I used brushes no. 2 and 3, depending on the needed contrast. This pastel powder treatment has to be executed very gently and carefully to avoid exaggerating the results.
On places often worked or walked on, I simulated small dirt spots with tiny dots of diluted Dark Brown paint. The exhaust strains were simulated with a mixture of Black and Burnt Umber, repeatedly brushed on carefully following the airflow over the wing. Immediately behind the exhausts, the exhaust gases appear small and accentuated on the fuselage, but further ahead they widen and become less visible.
On the front parts of the plane, the bottom of the fuselage behind the engine and left and right on the upper surfaces, oil and dirt strains were simulated with colour pencils. The main colours were Dark Brown and Black for all dark paintwork and Light Brown and Medium Grey for the lighter paints. Some are barely visible, others heavily accentuated!
FINAL TOUCHES
All details such as the antenna, the gear position indicators, the landing gear, the drop tank/bomb racks, the canopy, the Pitot tube and the prop were put in place. Some Ki-43s had a boarding rope installed and I added such a rope as an extra detail.
THE BASE
On a glass plate I formed a frame by taping strips of 2 mm sheet styrene at the edges of the glass plate. I diluted a universal “all filler” with water until it was very liquid and poured it onto the glass plate, carefully checking the thickness to avoid flooding the edges. On this still wet underground I then spread coarse-grained sand. Once thoroughly dry, I air brushed the base with a mixture of Chocolate and Italian Dark Brown and dry brushed it afterwards with a mixture of White + a little Italian Dark Brown.
Then the styrene strips were removed, the edges cleaned and the base was ready.
Now I installed my finished Ki-43 II onto the base, put the wheel chocks against the wheels, added some bombs and a forgotten oil drum with a toolbox in front of the fighter and voilà, my diorama was finished!


REFERENCES
- Japanese Aircraft Interiors 1940-1945
- Aero Detail Nakajima Ki-43 “Oscar” HAYABUSA
- Osprey Aircraft Of The Aces – Ki-43 ‘Oscar’ Aces of WW2
- The Maru Mechanic No 6
- Different Kokufan Magazines
Luc Janssen
PS: for comments or questions go to lucjanssen32nd.com.
© Luc Janssen 2016
This article was published on Thursday, November 10 2016; Last modified on Thursday, November 10 2016