
Tamiya F-4G Wild Weasel Part 1
By Paul Stoner
Soon after the fighting had ended during the first Gulf War the F-4G Wild Weasels were tasked to defend coalition aircraft against ground threats in the areas outlined as a " No Fly Zone". Most of us are aware of the task at hand after the war so I'm not going to get into a history lesson.
I have really grown to love the big Tamiya F-4 kits and waited for years for some one to come out with a good F-4G conversion or even thought that Mr. Tamiya himself would do something about this. Well we all know this will probably never happen, So the next best thing to do was tackle this myself. A couple of years ago I kind of retooled CAM's F-4G conversion for the Revell F-4E kit and thought that would be a good start and would change some things on the set once again to fit the new Tamiya F-4E kit. First of all I will apologize for not making any molds of what I've done but I want to make sure the conversion fits and works before I jump into a set that would be far too much work in correcting things.
Part one I will go over some of the tips and techniques I used to convert the stock cockpit and how to get the over all airframe to Weasel standards. The second part will be on the painting, decals and weapons load.
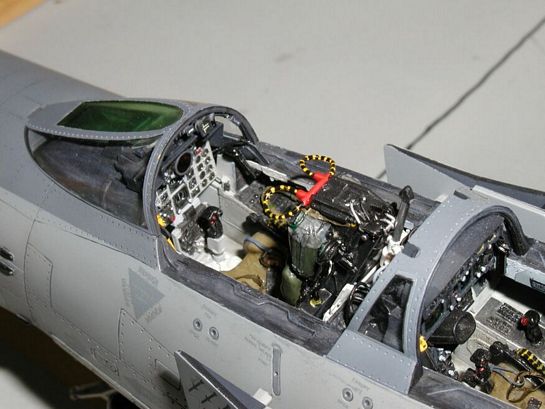
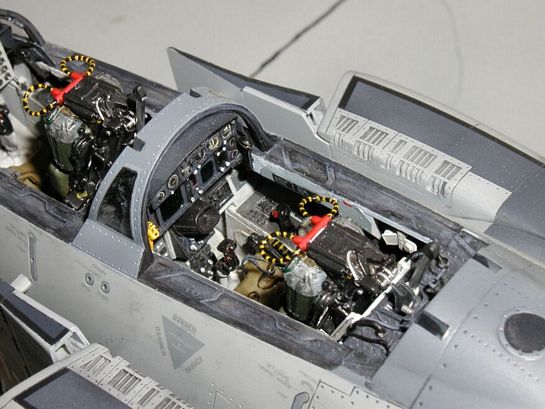
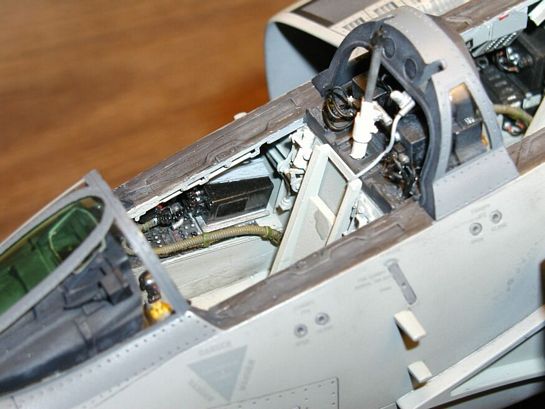
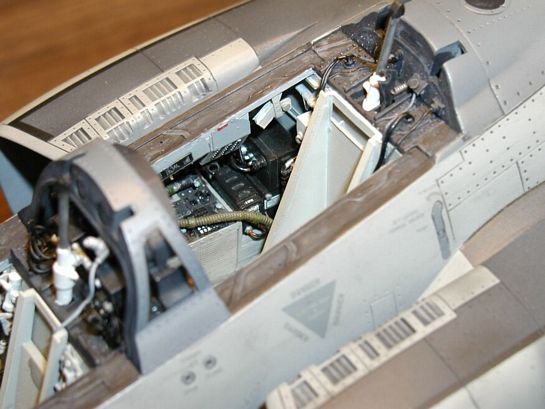
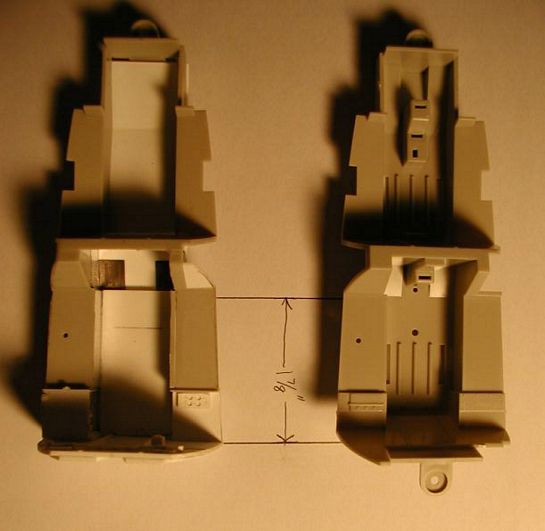
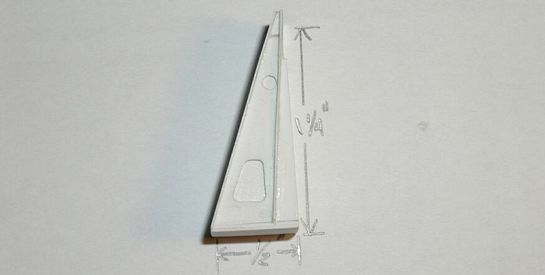
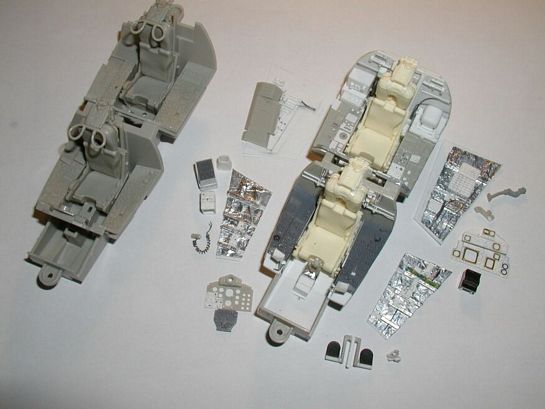
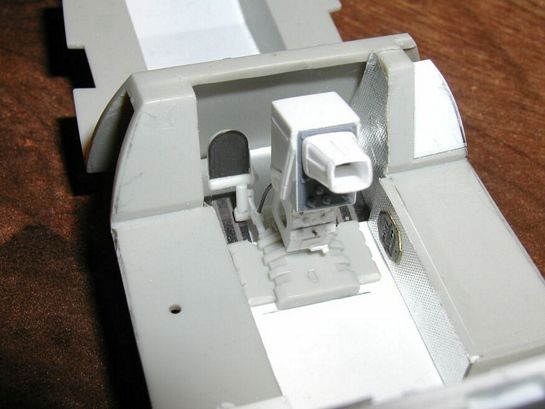
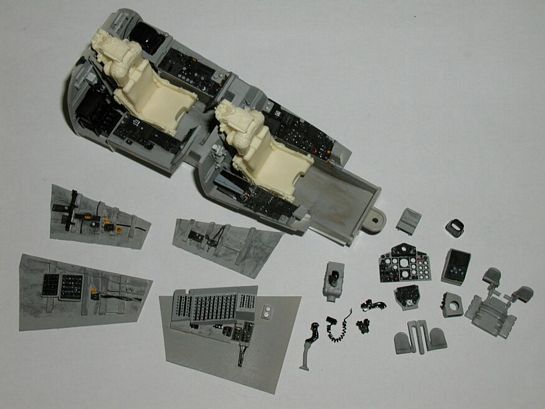
With almost any build we all start in the office and I knew that with this one I'd have to make some major changes and my goal was to really get the cockpit right and as accurate as possible. For me the biggest problem I have with the stock tub was the rear bulk head. On both the Tamiya and the Revell kits this bulk head is tilted in the degree to fit the rear seat, as where the real thing is not. The rear bulk head on the kits tub was cut off and extended to get the bulk head straight and vertical. From the front of the side panels to the rear of the bulk head was 1,7/8" and the bulk head was shaped to meet the inside of the fuselage. I made a brace to be attached to give the rear seat the proper angle and added instrument components and wiring to dress up this area. I also cut off the floor so I could add more realistic details to the office.
I made most of the details for the cockpit but with the help of Eduard's cockpit detail set made things look much better, plus this set adds a bunch of detail that would be too hard to make from sheet stock.
Another great detail set that was used to dress things up was from Cutting Edge. The cockpit details for their F-4E conversion will help get the front panels correct but for the rear seater's panels I had to make a few instruments. The sidewalls took a bit to build but I think they came out very nice and even though allot of this will be hid after the build is finished but the effort was still fun. I used foil from a candy bar wrapper to simulate the insulated padding which looked great and glued to the sheet stock without any problems. Circuit breakers and knobs were made with a punch set, which I would recommend if you can afford it get a set. On builds such as this a punch set come in handy more times than I can think. Compared to the stock cockpit you can see what a difference a little work makes.
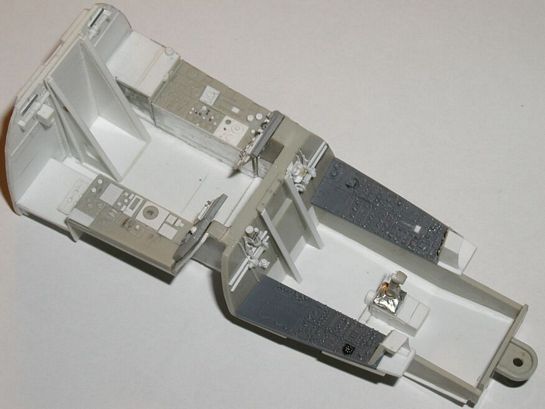
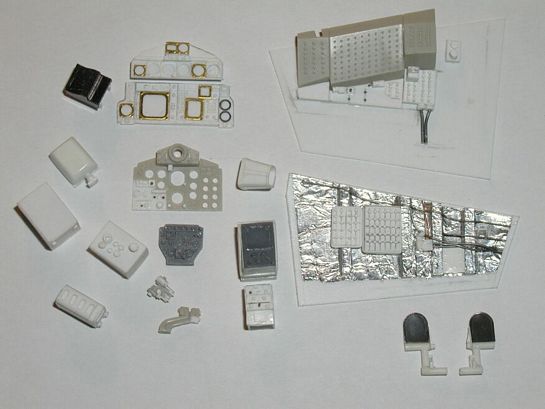
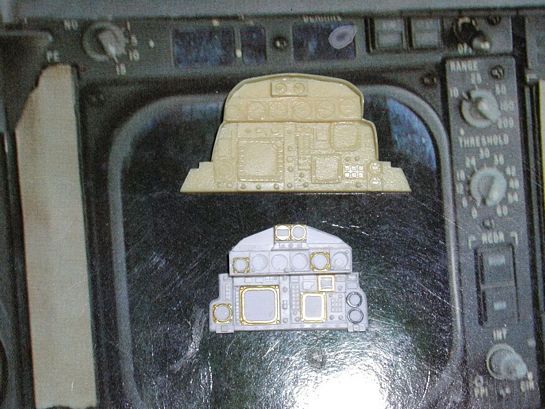
The APR-38 panel that came with the CAM convert really didn't work with the Tamiya kit so I decided to make a new one and with the help of the punch set and Reheat's PE sets an accurate panel was born. I also wanted to detail the radar scope and foot peddles so more modifying was done to finish off the rear office. More work was done on the front of the cockpit and after painting the cockpit was ready to be installed. The seats used were the new ones from CAM and Eduard's seat belt set to be installed later.
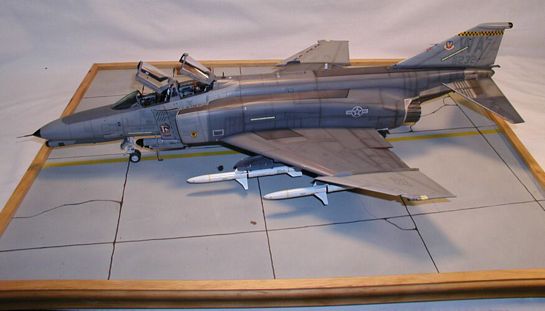
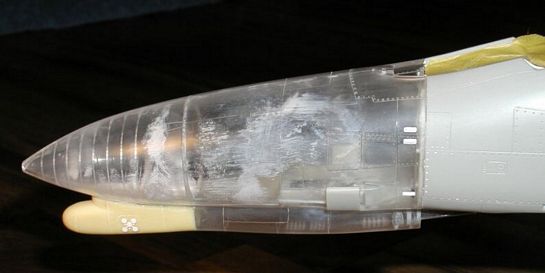
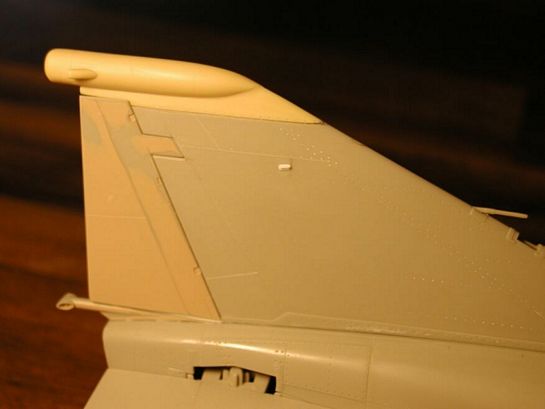
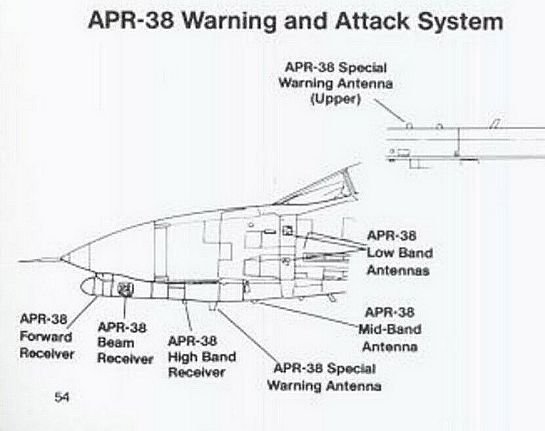
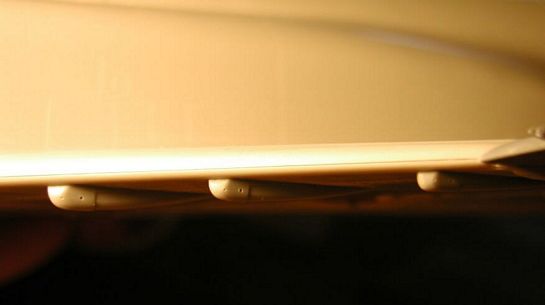
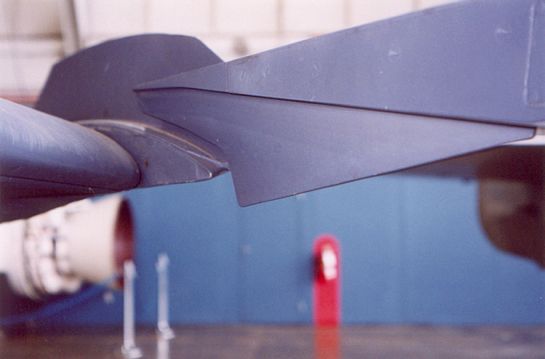
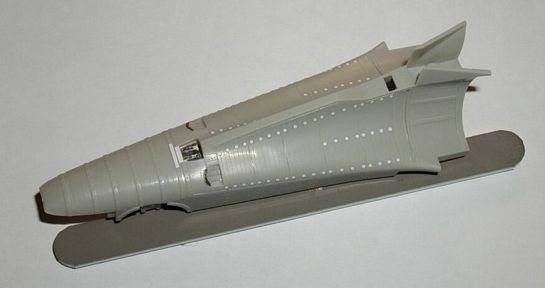
After the cockpit was done I focused my attention to converting the airframe. I took the APR-38 antennas from the CAM set and reworked them to fit the Tamiya nose and vertical tail. The chin antenna had to be thinned down to fit the cannon housing and used some round punches for the beam receivers. Also added were the Low Band antennas to the nose and to the tail just below the aft receiver. To finish out the APR-38 Warning and Attack system the High Band receiver, Special Warning antenna and Mid Band antenna was added in order forward to aft on the bottom of the cannon housing, also the (upper) Special Warning antenna was added to the top of the fuselage.
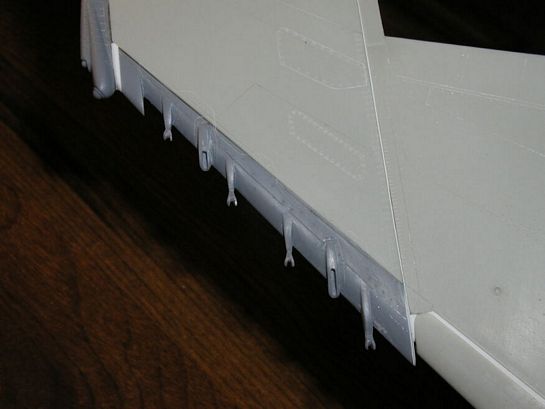
I have used Cutting Edge's slatted wing conversion several times and have learned a short cut to insure that the wing tips fit properly to the main wing. The big draw back from using resin parts is that the casting shrinks and is not exactly the same as the master. In the past I have had problems with this using Cutting Edge's wing tips, where as the tip is smaller and doesn't fit right. To fix this I cut off the leading edge of the CE wing tip and and the kits leading edge and mate the two together. This gives you the perfect fit with the main wing and the wing tip and all that's needed is a little filler to get the piece to the right size. I also fill in the panel lines and rescribe it to the correct lines found on the real slatted wing tip. For the inboard slats I simply cut off the top of the wing flap and a bit off the bottom in since making my own slat. With a little stock to fill in under the slat the impression of a real stowed slat is achieved. I used the slat hinges from the Revell kit and modified them to fit the Tamiya wing bottom. I have tried this affect with the Cutting Edge slats but when they are in the stowed position there was a large gap at the bottom of the slat and the wing. I also added a small fin that is on the inboard end of the wing tip slat that is common with the real slat but was not on Cutting Edge's slat. I'm not sure what it dose but wanted to add it to my slat. I think that this way worked for me and will be the way I do the same thing in the future.
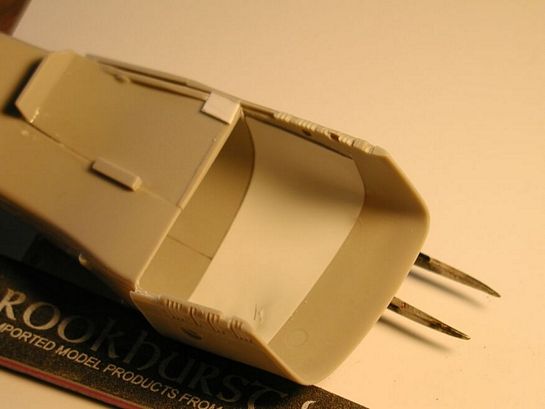
There are several ways to achieve seamless intake trunks for this kit. You can use Cutting Edge's intakes or those from Seamless Sucker's or you can do it your self with a little sheet stock to make up for what Tamiya lacks. I chose to do it myself and try to save a little money on this project. First I cut off the trunk parts that are part of the kit's fuselage, then glue the other parts to the trunk together and sand the insides smooth. I then glued each trunk to the intakes and added stock to make a smooth transition to the insides of the intakes. One trick I do now is to cut the splitter plates off the inner intake so they don't get in the way of fitting, sanding and later painting this area. They are easily glued on later after the model is painted, works for me at least. I also wanted to dress up the rear end and exhaust area. I scribed some lines between the lines that were already there and added some raised washers with some punch rounds. With added details from Eduard's PE set this part was really looking good. The tail hook also got a little attention and the entire area was opened up a bit to except the larger exhaust nozzles to be covered later.
In Part 2 I will go over final fit of all converted parts, AirDOC decals and paint scheme. I hope that this article will help someone who plans on converting the Tamiya 32nd scale F-4E to a F-4G Wild Weasel.
© Paul Stoner 2004
This article was published on Wednesday, July 20 2011; Last modified on Saturday, May 14 2016