
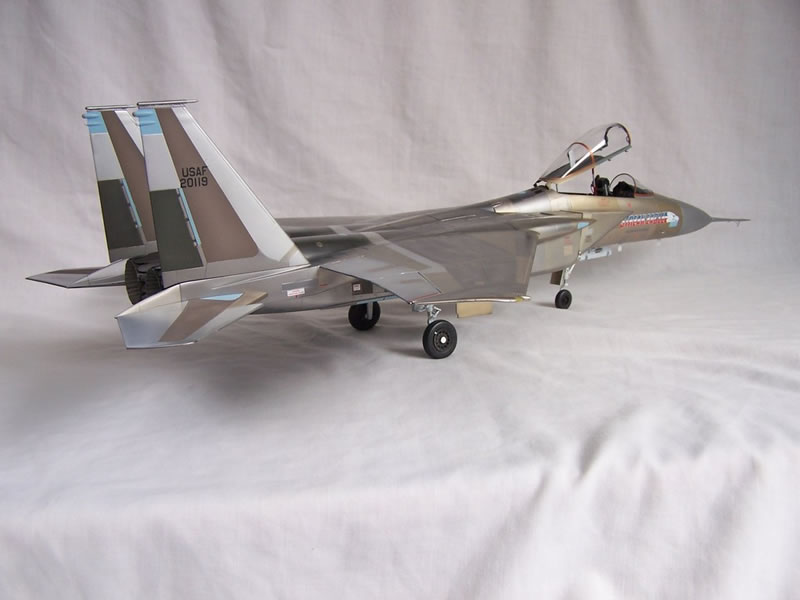
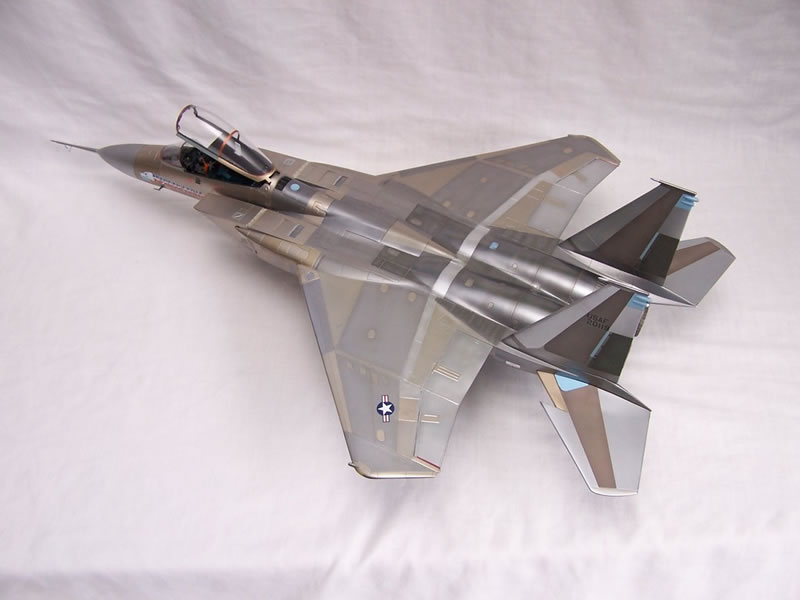
Tamiya 1/32 F-15A Streak Eagle
By Danny Attree
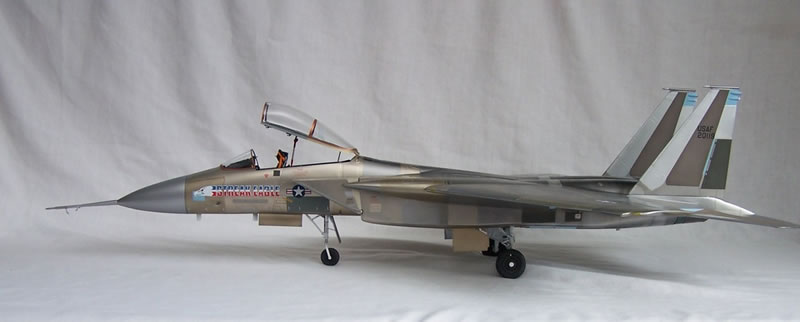
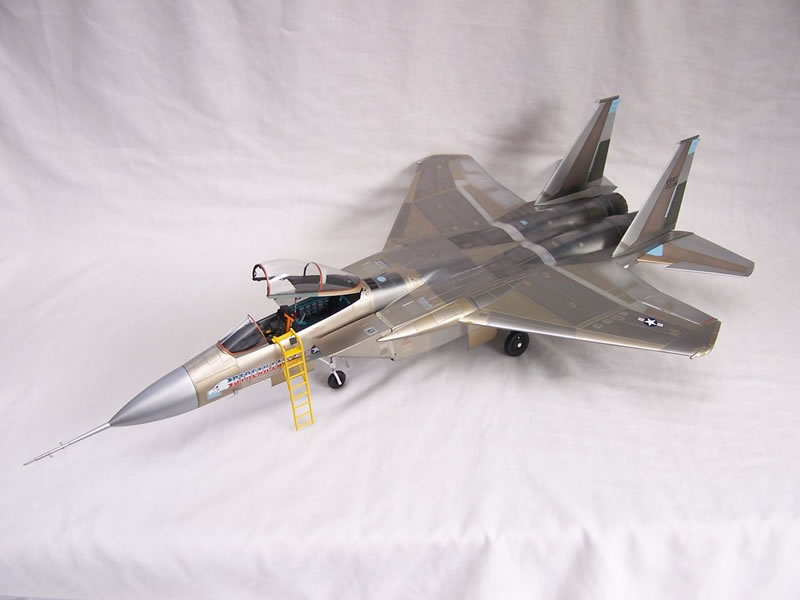
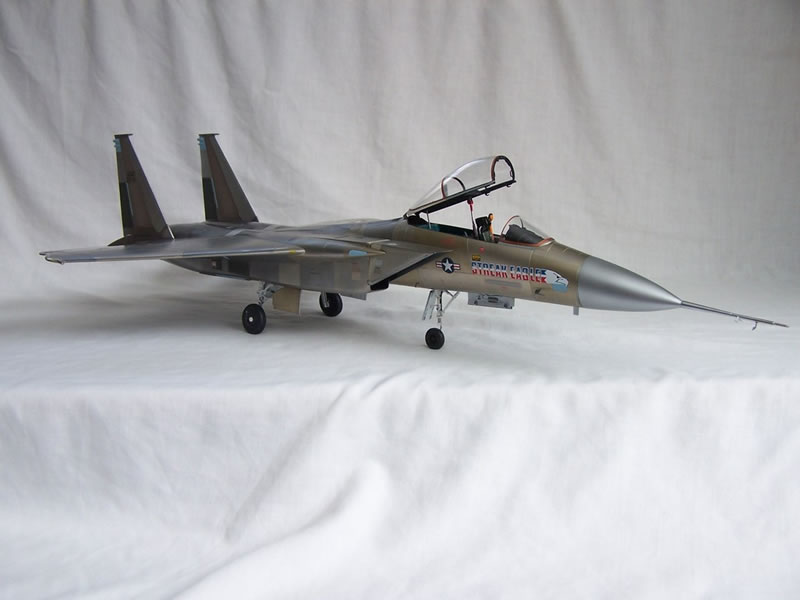
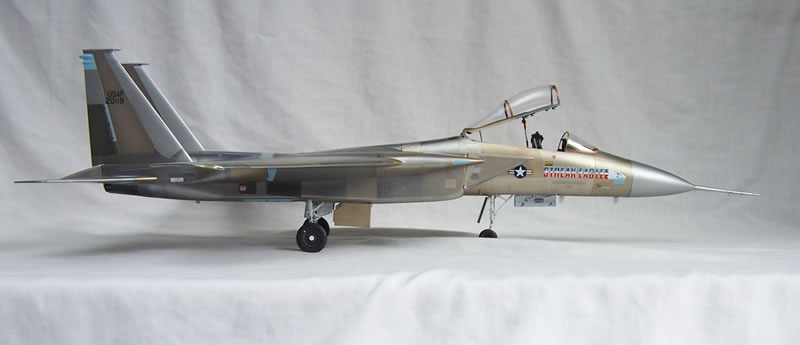
Well fellow modellers, it is with great pleasure I present to you my finished F-15A Streak Eagle, it has been a challenging build in a lot of ways with a fair amount of research to try and get the right result.
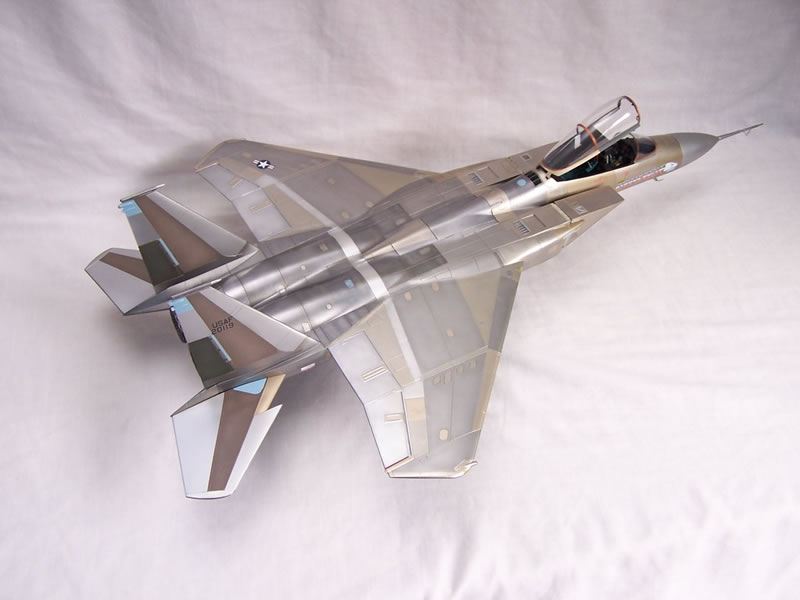
I am sure there is still further detail to find but this is the best I could do with the information I have to hand, overall I am pretty pleased that is for sure. I have tried to capture the change in shades and the composite features as well as give a realistic metallic effect at the same time.
I have only applied decals I could see and confirm, I believe that most of the markings applied were burnt of due to friction anyway. The airframe has also only been decaled to represent the aircraft during the record attempts, the large tail decals etc were added after that for press and photo opportunities.
For those of you have been following my build thread in the forums, many thanks. And for those who helped out with various details and parts you have my sincere thanks as well.
I have included my modification list at the bottom of the image gallery.

Modification List
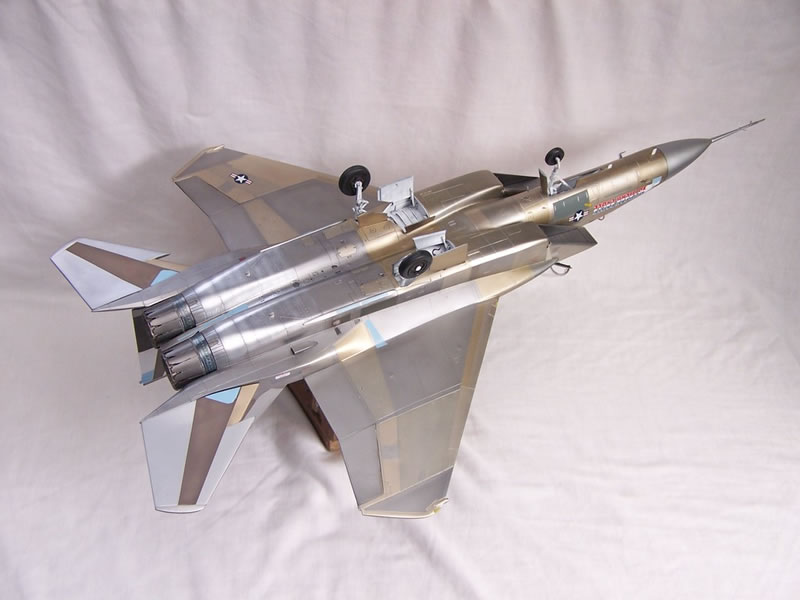
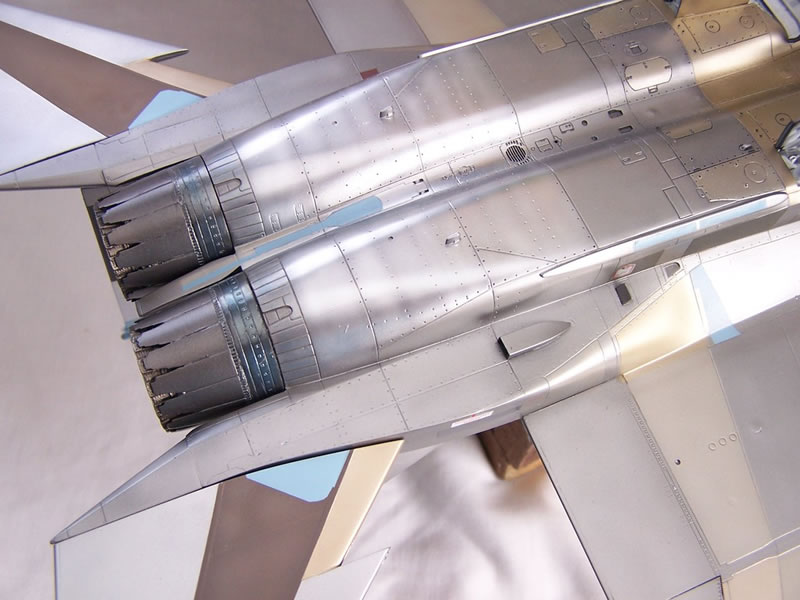
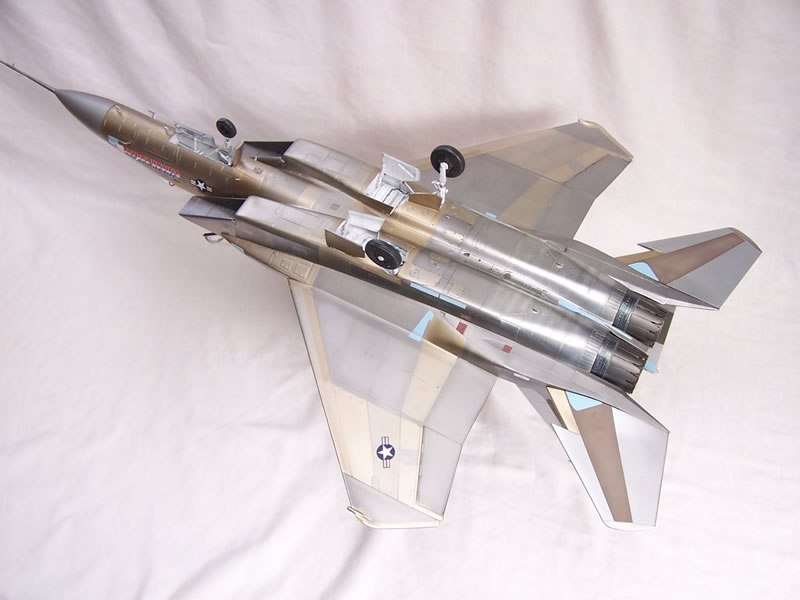
- Burners are fully feathered and we have this nicely covered with the GT resin set and kit parts. (info)
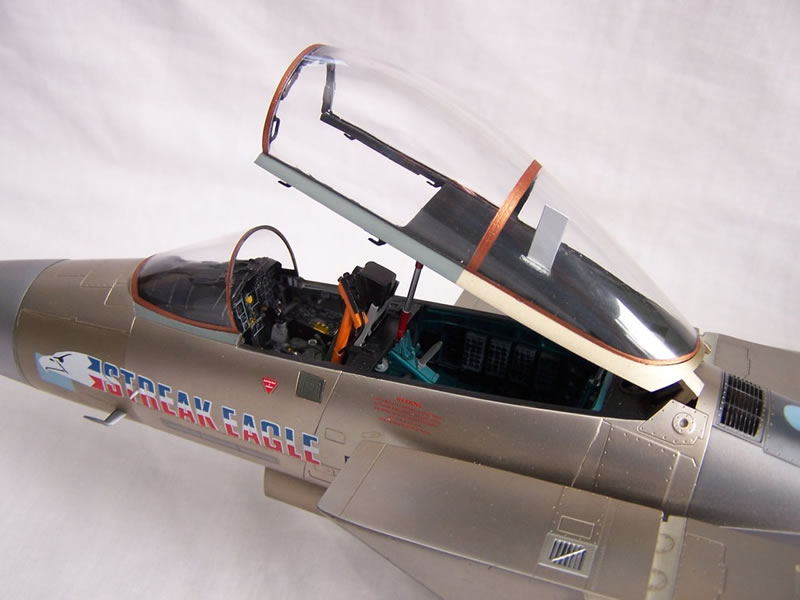
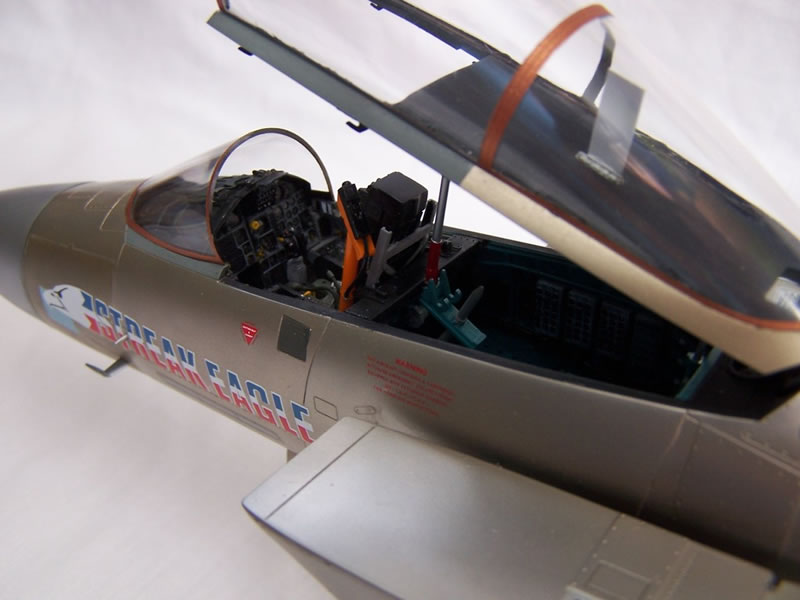
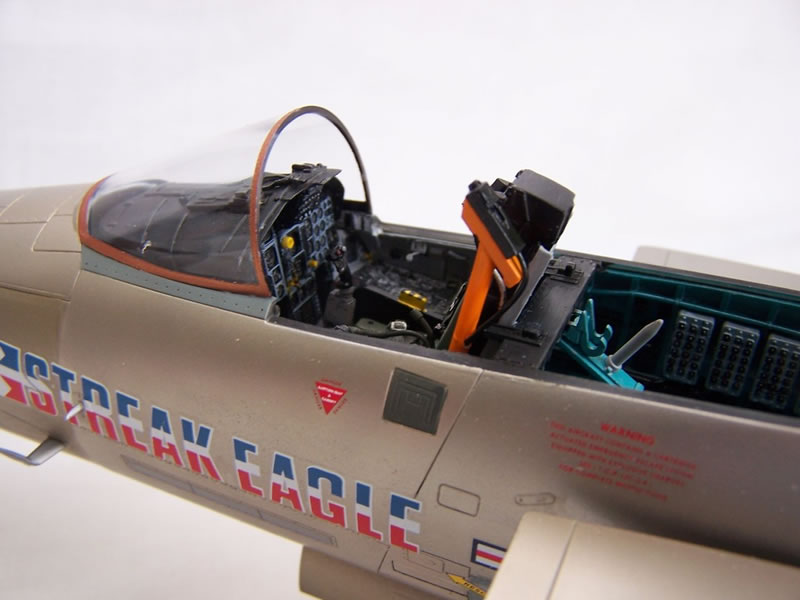
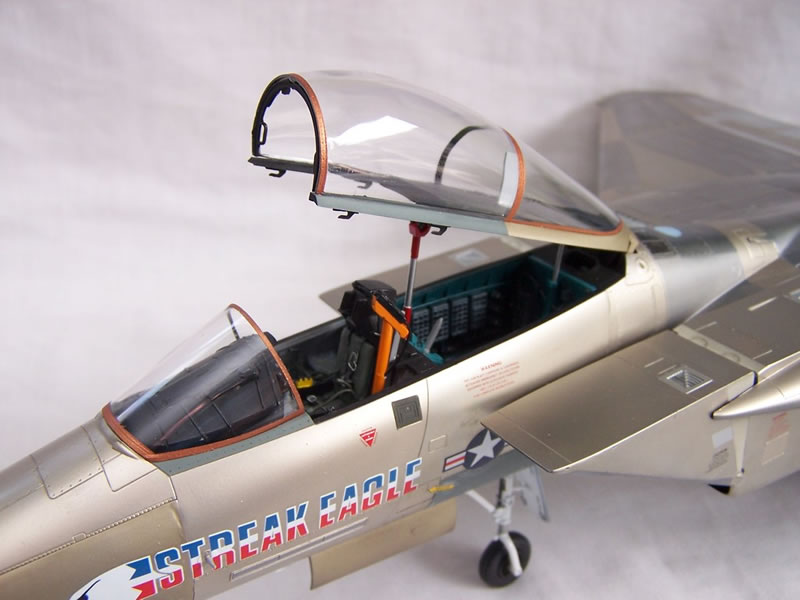
- The cockpit will utilise the Early F-15C Aires resin tub using an Aires ESCAPAC seat.
- The rear avionics bay has the TAC/TEWS/ECM boxes removed in the actual Streak Eagle, other specific parts for recording telemetry were added back in including video recording equipment but without reference material it’s hard to know exactly.
- The Ejection seat needs to be changed to an Escapac IC-7 version without the canopy breakers, from the information I have the Escapac for the A-4 will be the best/nearest option, top ejection hoop needs to be removed/not fitted.
- Airbrake, the one fitted on the Streak is much shorter and more rectangular, this is highlighted in the 1/48 Hasegawa kit and in other sources, brake fairing also needs to be checked, modify as required.
- Gun Port, this needs to be covered up as obviously the Streak had no armament, this is basically nothing more than a plate patch.
- Wheels, early F-15A wheels are required, I have ordered a set from Bruce (http://partsrparts.homestead.com/F15parts.html) and I have also got a set coming from Sierra Hotel which are made for the Tamiya Kit.
- There is no HUD fitted to the Streak.(info)
- The Pitot tube will need to be modified as again the one fitted to the Streak is different, again that should not be an issue, copy the Hasegawa example.
- The arrestor hook is completely removed and the associated recess covered.
- Duraluminum nose cone
- Sealed gun bay vents for cooling air and gas ventilation
- Sealed round vent on the starboard side near the rear canopy rail
- Eliminate UHF/VHF radio antenna blade on upper fuselage spine
- Sealed forward Sparrow missile attachment point, close all openings
- Retain rear sparrow launch fairing, fill all hole (http://www.cybermodeler.com/aircraft/f-15/pages/13304.shtml)
- No pylons on wings or fuselage, fill holes.
- Outer wing flaps permanently up (actuators were eliminated to save weight)
- All formation and navigation lights sealed on wings (including low intensity panels on wingtips)
- Remove the starboard side lower aft avionics heat exchanger exhaust duct and intake door
- Reduce the thickness of kit parts for the low intensity navigation light panels fitted on the sides of aft fuselage. The slime lights were not used and were filled in but the frame outline still remains.
- Vertical stabs with EWWS (or similar) antenna housings on both tails (pre-record attempt with tail patch marking, info only, not required.
- Vertical stabs with small shortened mass balance’s on both tails instead of EWWS housings fitted during record attempts, not decals on tails at this point.
- Coloured navigation lights on upper trailing edge of both tails sealed
- Eliminate taxi and landing lights from nose gear
- Forward nose gear door closed while on the ground (prior to record attempts, info only)
- Forward nose gear door open while on the ground (for record attempts)
- Forward main gear doors closed while on ground (prior to record attempts, info only)
- Forward main gear doors open while on the ground (for record attempts)
- Add Scratch built camera mount to port side of seat, orange bracket with black camera, top of bracket pivots up.
- Add large white UHF blade antenna on rear canopy deck
- Fill Kit Chaff and Flare Dispensers
- Fill Holes for C/Line Pylon
- Access hatches on top of the engine humps and the JFS starter intake and exhaust.
- Remove bulges on the vertical tails for the rudder actuators as they are late model configuration and too exaggerated.
- Remove the Stiffener panels on the horizontal stabs.
- Front landing gear below shock absorber need to be rounded not square.
- Port side tail spine ECM pod not required, both should be the pointed tails.
- Angle of main landing gear, stance is more pronounced angling outward, see http://partsrparts.homestead.com/F15photos.html
- Reduce/remove the outer wing elevator actuator fairing top and bottom side, remove the small bumps as well.
- Remove small rectangular raised detail on the exterior of port intake port side.
- Fill two small holes above rear sparrow launch fairing, holes are for a strengthening/reinforcing plate not used on the Streak.
- Fill the hole for the TACAN antenna directly behind nose landing gear.
- Fill 2 small holes for the ECM antennae between the UHF Aerials.
- Remove the antenna from the nose gear door.
- Nose Gear wheel to be painted black, rear gear wheels are black as well with the small hub in the middle being white, anti-rotation markers on rear tyre.
- Add the missing rhomboid vents on the outside of each moveable intake section, mask in or cut out hole.
- Front instrument panel displays/panels removed:- HUD Control panel, TEWs display, Radar scope, Armament Control Panel, Standard G-Meter.
- Port Console panels removed, All Navigation related panels, IFF and TEWs panels, Radar Panel.
- Starboard Console panels removed, All TEWS, Navigation , and Compass related panels
Points 48-50 will be virtually impossible to remove neatly, I have some good cockpit layout drawings so I know where they are, I suspect these will be best left alone.
© Danny Attree 2015
www.modelmasteruk.com
This article was published on Sunday, August 23 2015; Last modified on Monday, February 29 2016