
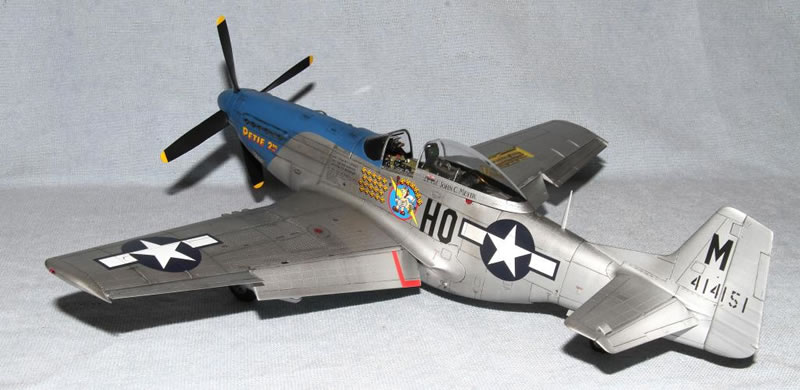
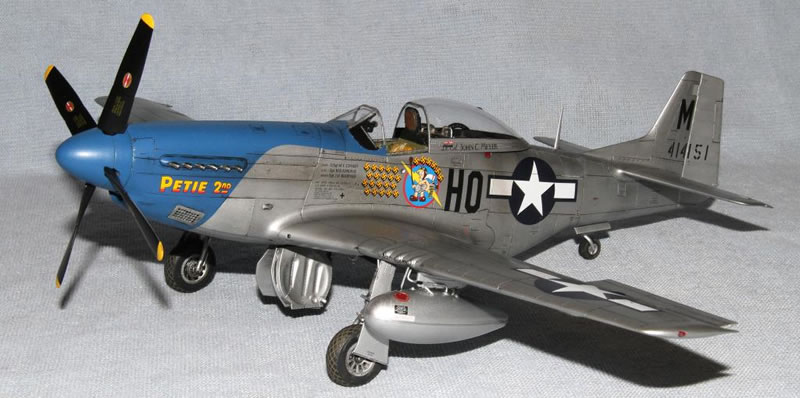
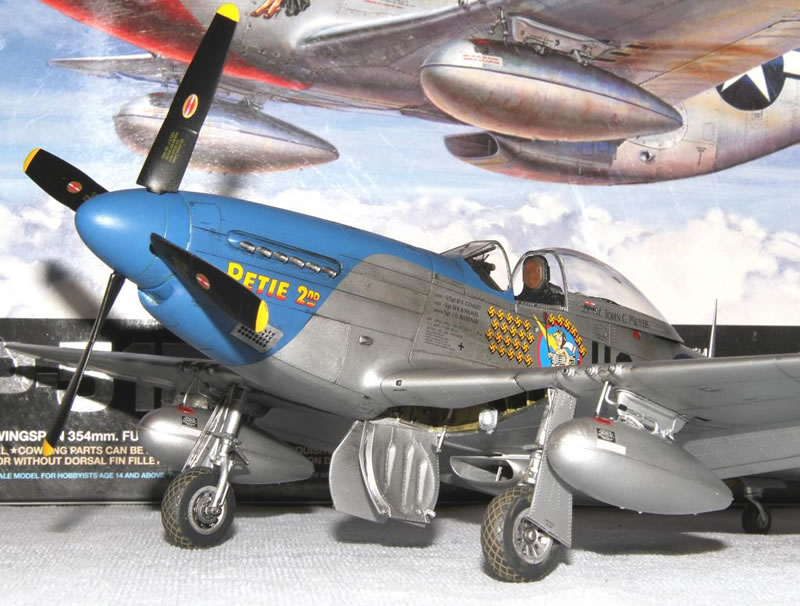
Tamiya 1/32 P-51D "Petie 2nd"
By Peter White
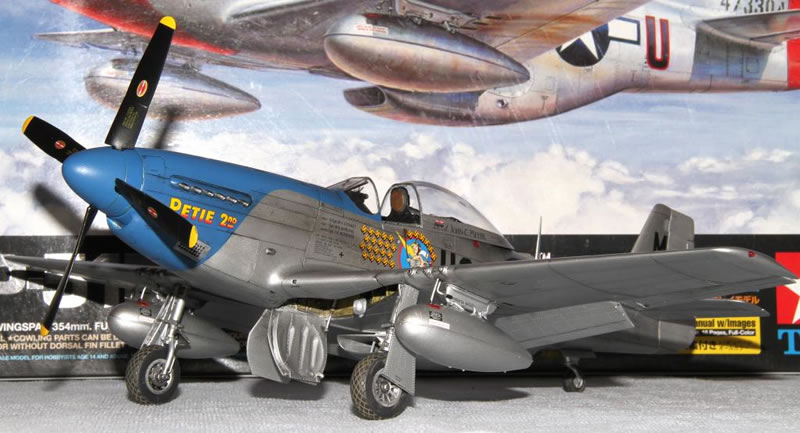
I am happy to present my Tamiya 1/32nd scale P-51D completed this morning after commencing the build late in January 2014.
The Tamiya kit is a masterpiece with no build issues and fantastic detail.
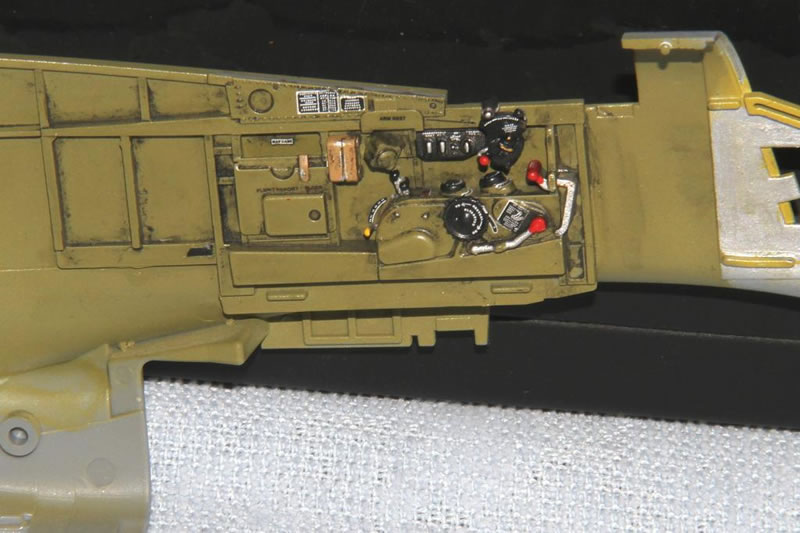
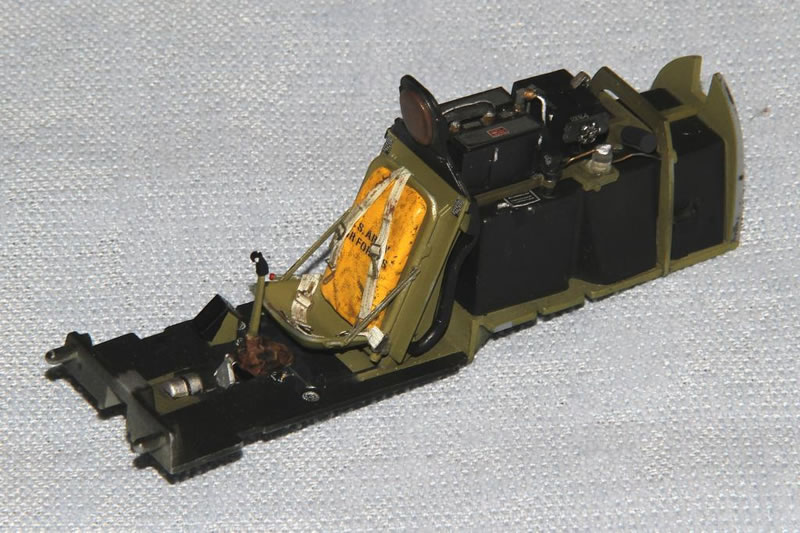
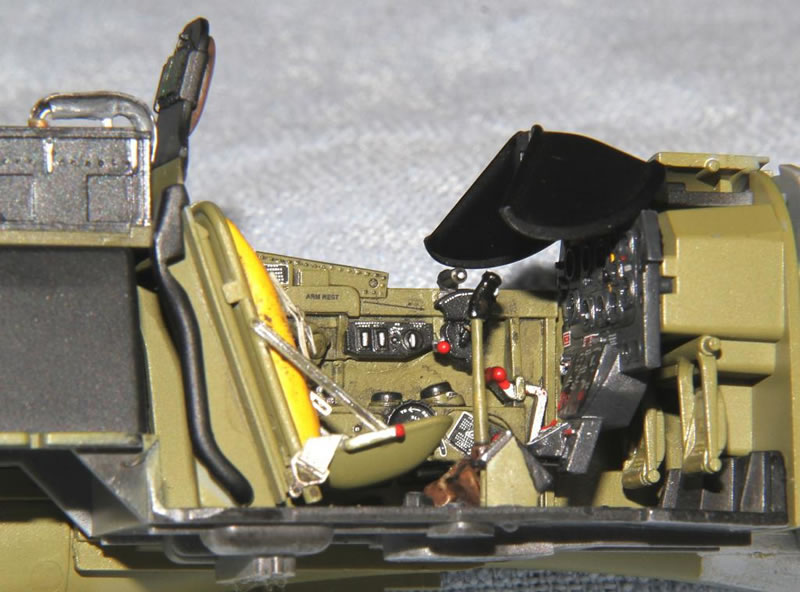
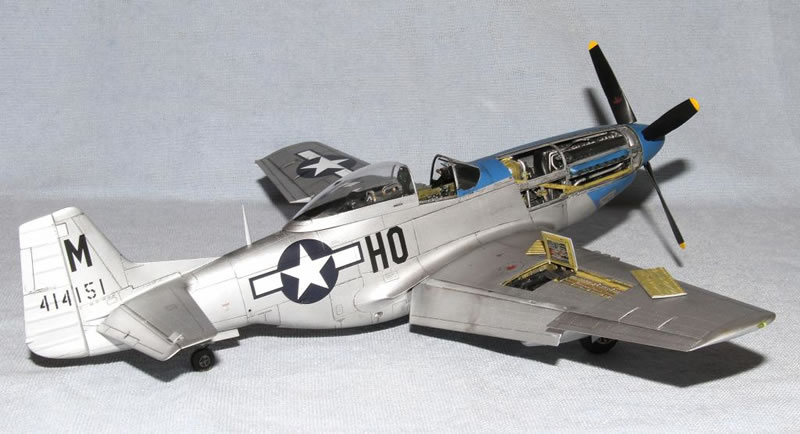
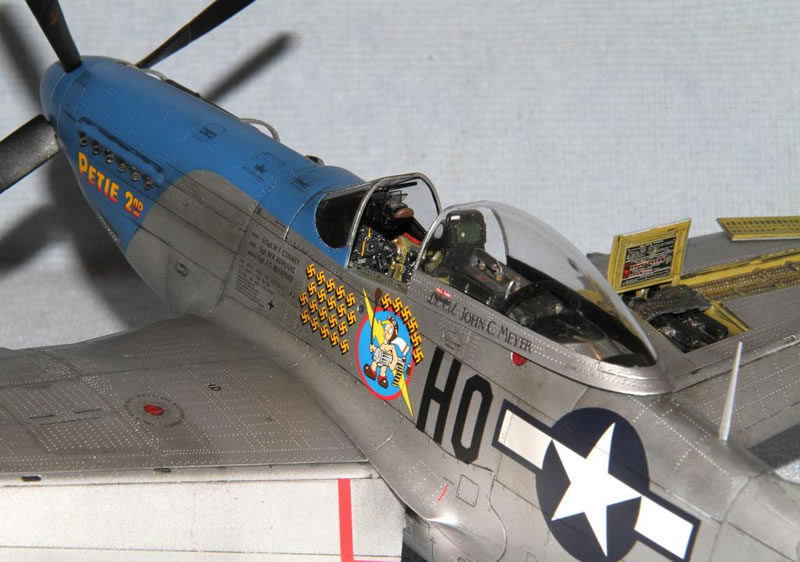
I used the Barracuda Cast cockpit which although it is really good has a few fit issues. The best part of the Barracuda gear is the placards which really enhance the look of the cockpit. Eagle Cal decals were also used as my experience in the past with Tamiya decals is that they are too thick.
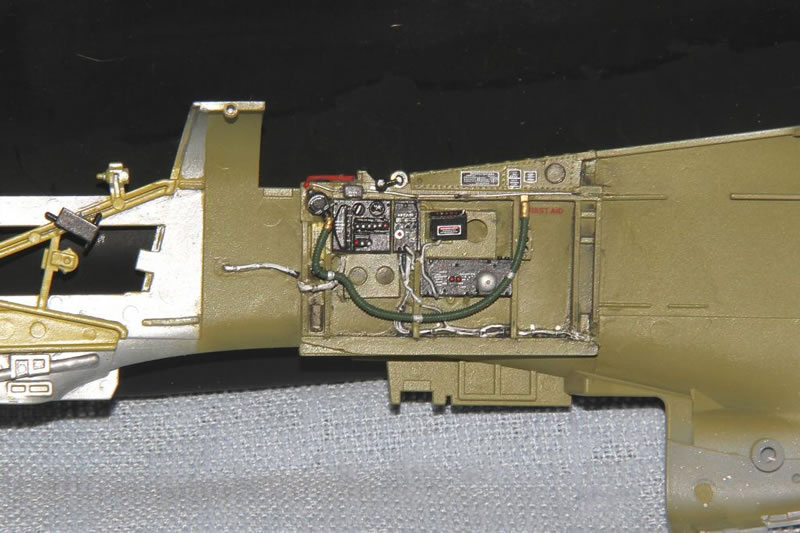
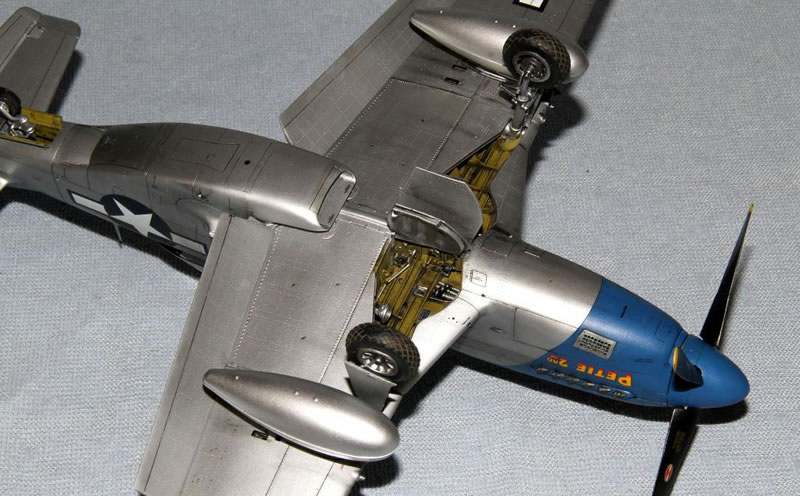
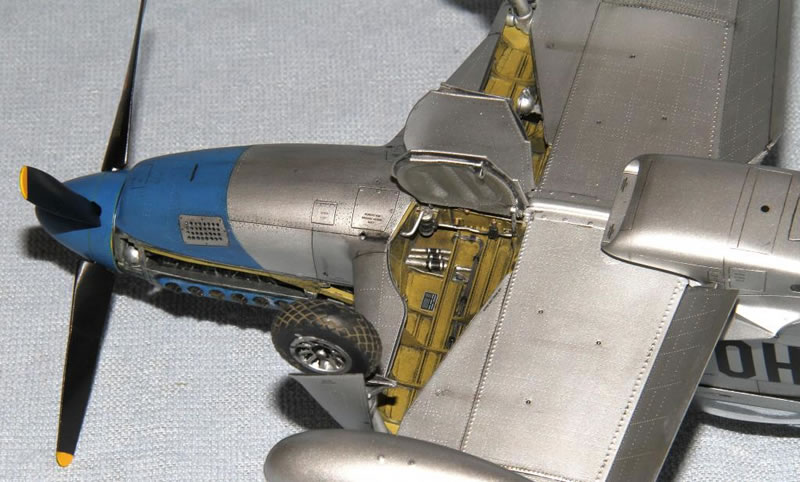
I followed the US Army instructions for painting the interior. Tamiya XF-4 Yellow Green for the engine and undercarriage bays and in another XF-4 jar, added sufficient black to make it darker for the cockpit area. The real aircraft where undercoated in "chromate yellow" and for the areas that required a second undercoat, black was added to make the "chromate green". I think this was a quality control issue to make sure that the inspectors could easily determine that the areas that required a second coat actually got it.
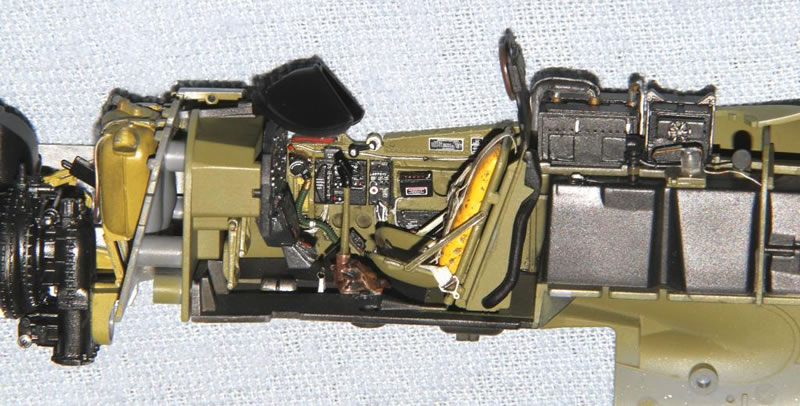
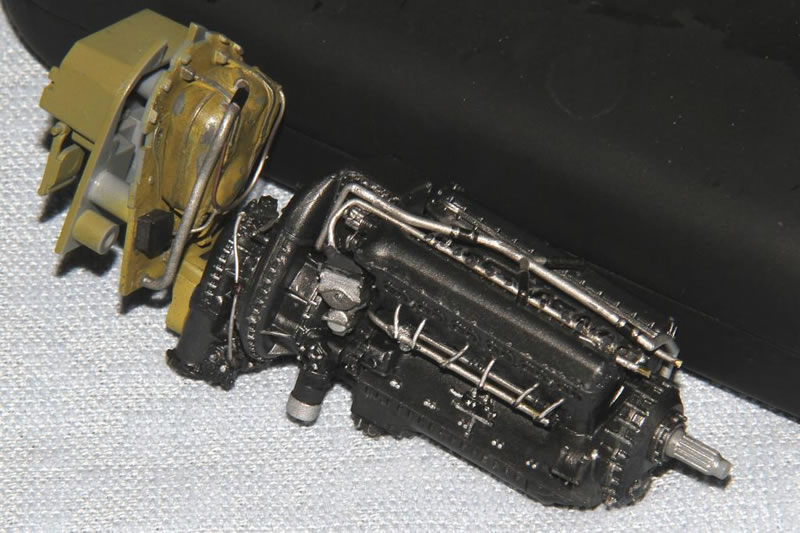
I did a little bit of work on the engine using some lead wire. Only one side was detailed as the other side was going to have cowlings in place.
The HGW detail set was used for the life raft and seat belts. The belts are excellent.
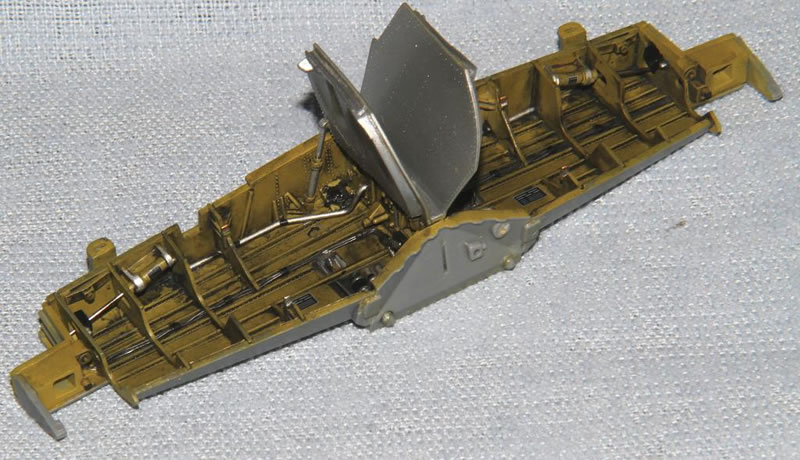
Some wire and placards were added to the undercarriage bays along with some Eduard photoetch for extra detail.

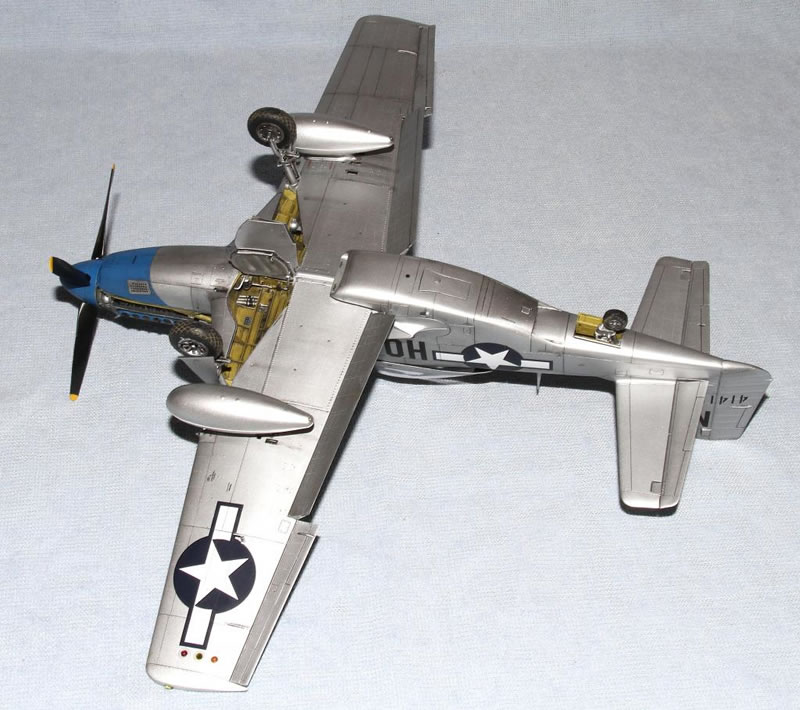
The model was painted with Tamiya TS-17 decanted from the spray can for better coverage control. Control surfaces and some panels had different shades of Alclad applied.
The blue was a mix from a base of Tamiya XF8 with some X-14 as per the kit instructions.
A thorough coat of Tamiya X-22 clear was applied for the decal application and panel lines cut through them before applying some Flory black wash to the panel lines and then MM 4637 Semi Gloss Clear for the final coat. I really like the MM Semi Gloss. It is nearly flat but when dry can be polished to give a random sheen over the model and it thins and cleans well with Tamiya X-20A.
The drop tanks were left in clear gloss as they would have been replaced after most missions. Fuel lines were added to the drop tanks using some soft wire.
The carburettor intake holes were drilled out of the kit part and they came up really well.
If I am going to leave engine or gun bays open I like to have them both on one side of the aircraft so that the other side looks whole.
I added a couple of wires into the gun bays but the main work was painting the ammunition and gun belts. The detail is good but not much there to add to the kit really.
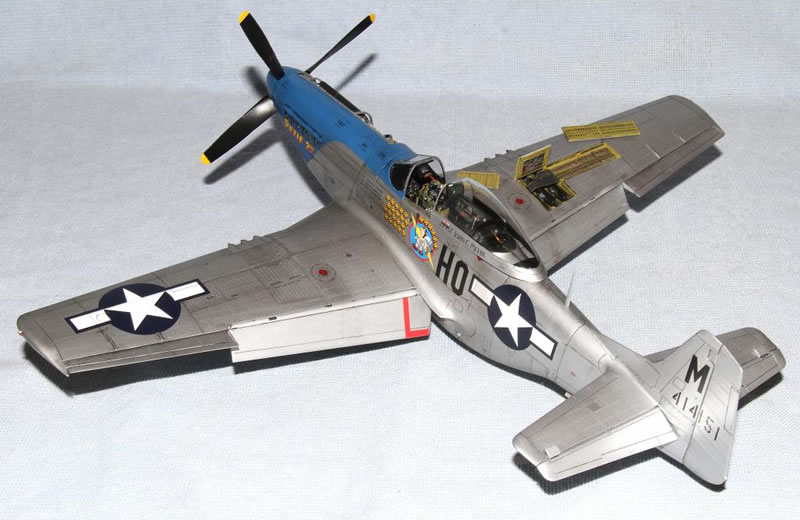
You can see some of the different shaded panels.

So there she is, in a pose that I hope represents what she would look like after being re-armed and re-fuelled a couple of hours after a mission and getting ready for the next.
© Peter White 2014
This article was published on Wednesday, August 06 2014; Last modified on Wednesday, February 24 2016