
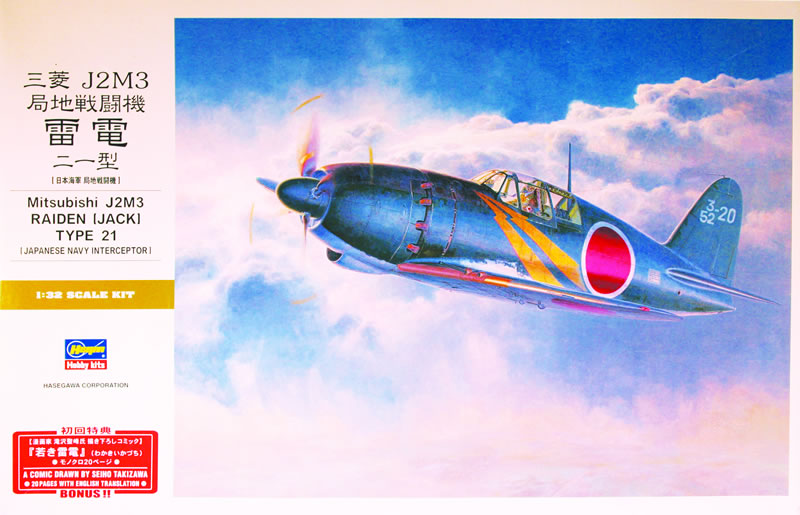
Hasegawa 1/32 Mitsubishi J2M3 Raiden ‘Jack’ Type 21
By Iain Ogilvie
The Imperial Navy’s ‘Thunderbolt’
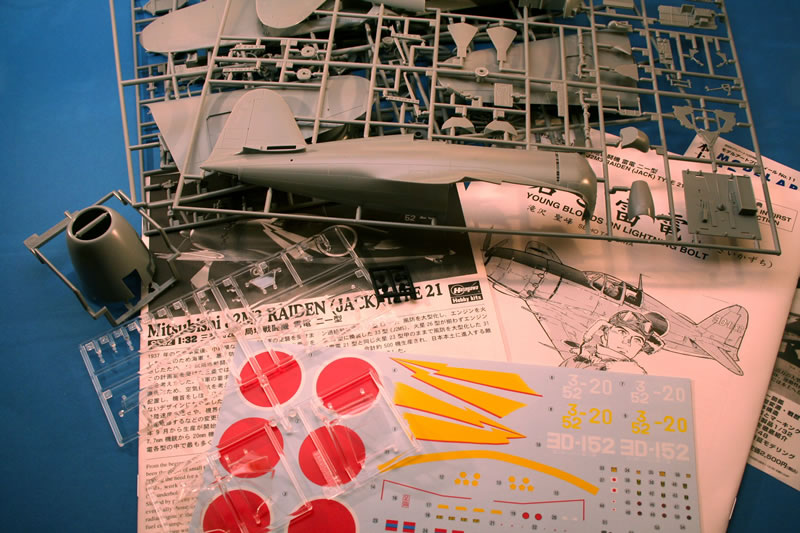
Released in the UK a couple of years ago, this new kit represents a beautifully-moulded example of Japan’s pugnacious interceptor and it represents a quantum-leap in quality and accuracy over the only previous 1:32 kit of the type: Revell’s early ‘70s kit that is long out of production.
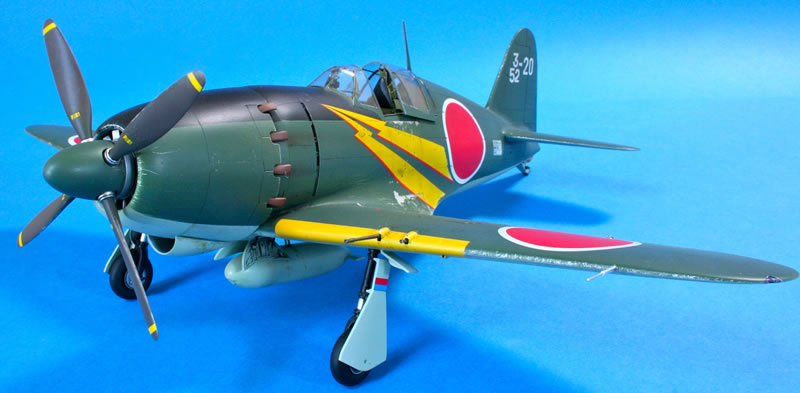
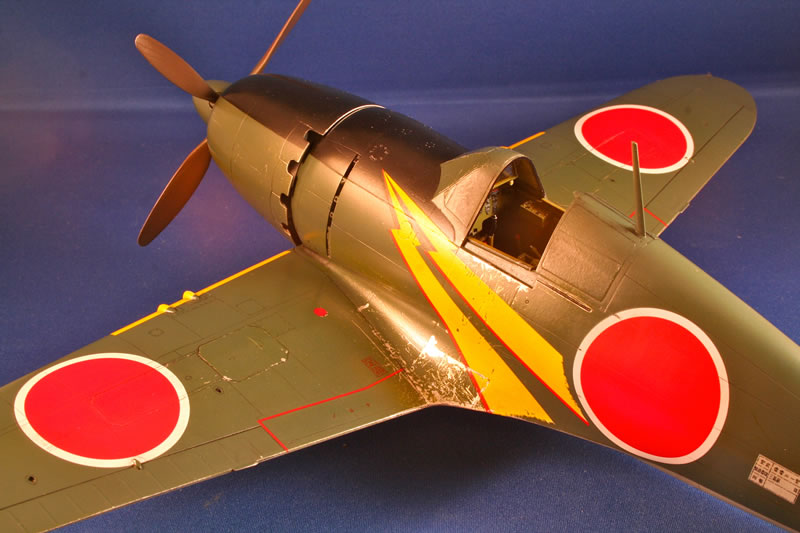
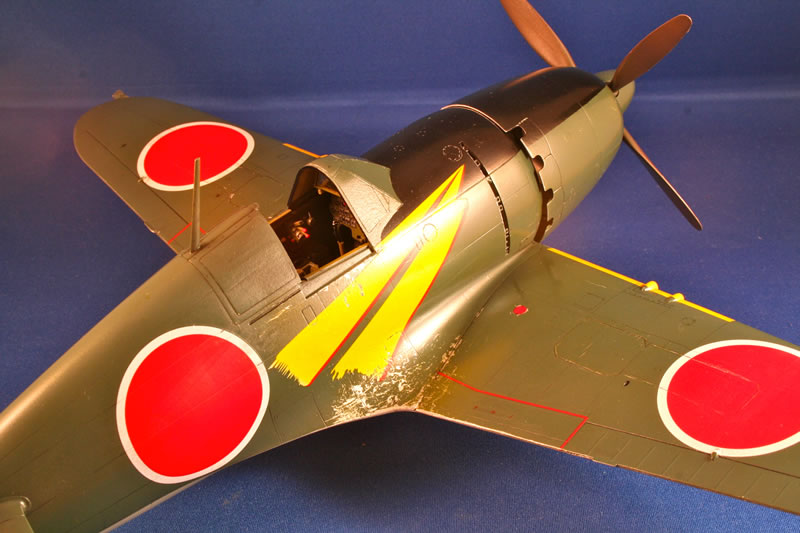
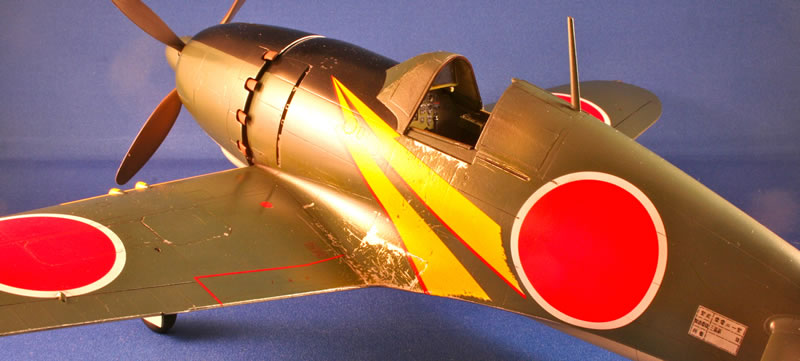
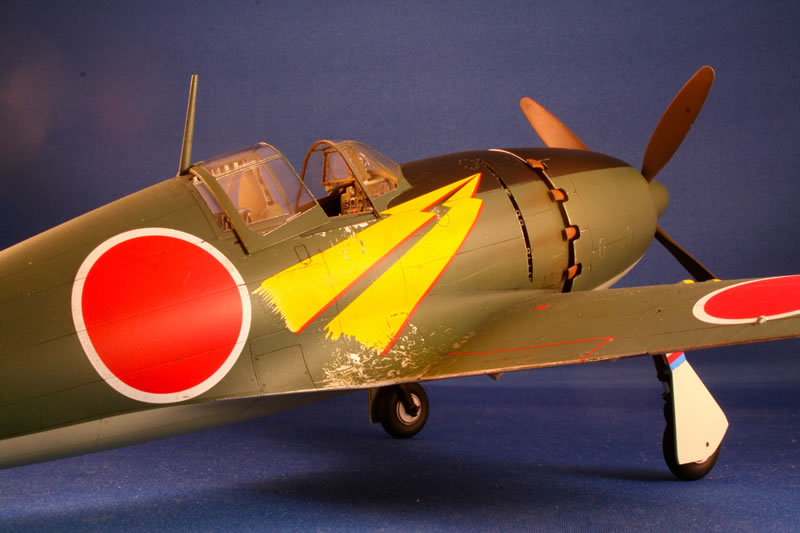
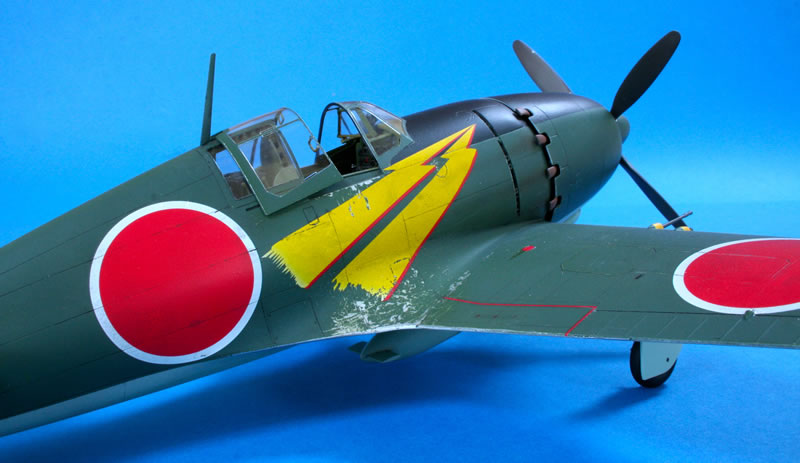
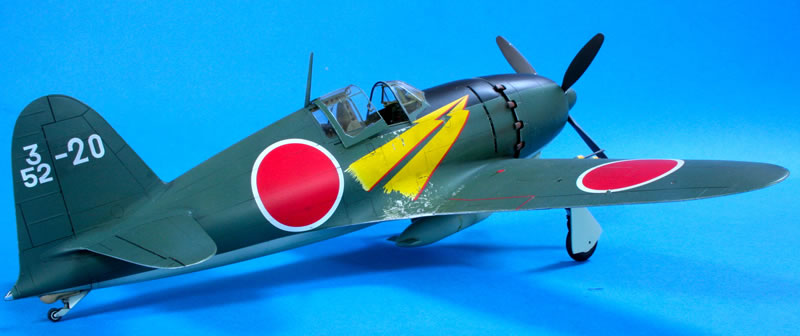
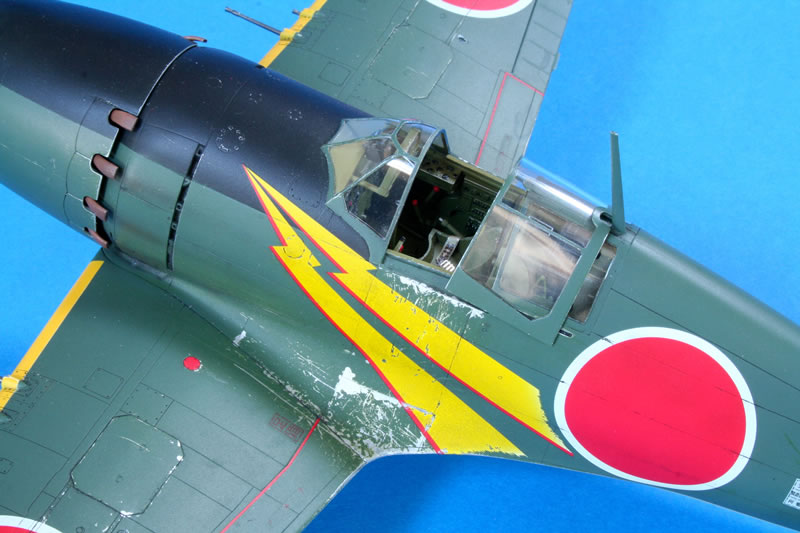
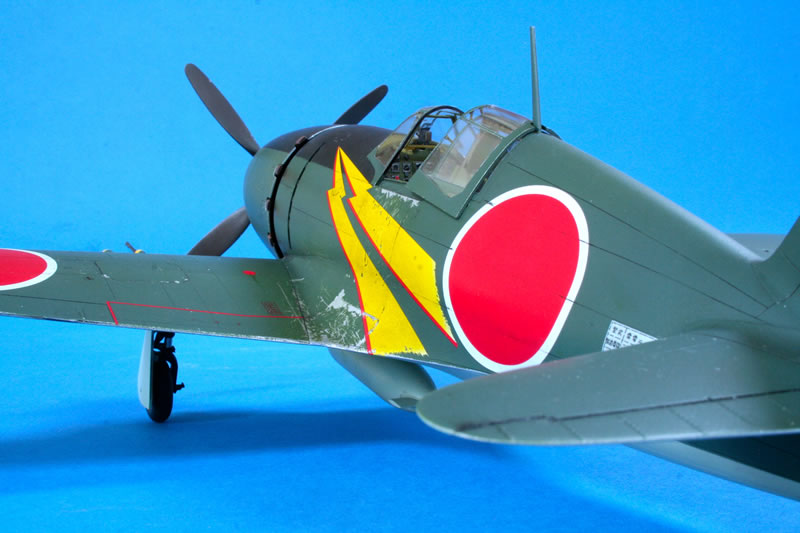
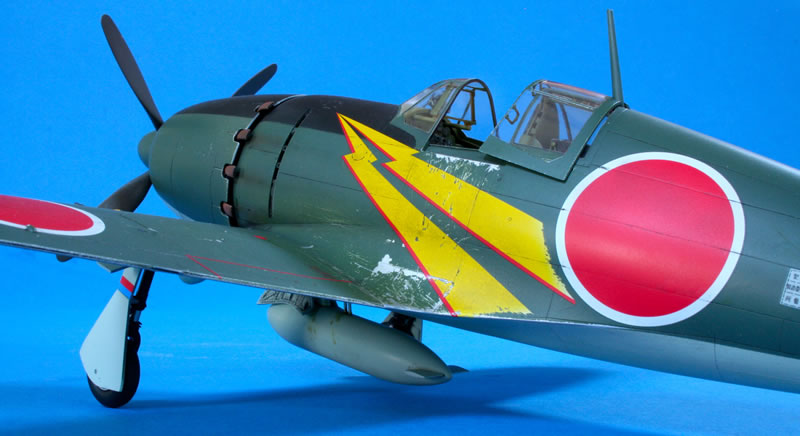
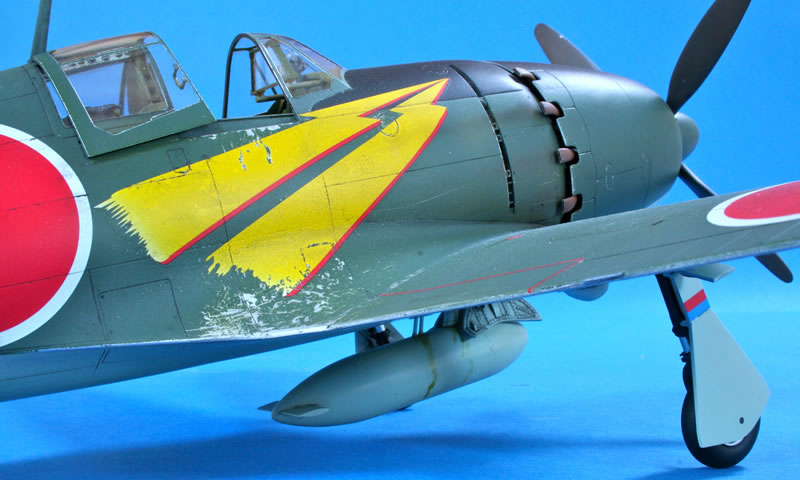
Raidens generally carried the standard light grey and dark green Imperial Japanese Navy colours and the challenge I set myself was to come up with something in-between the sometimes over-weathered models of Japanese aeroplanes seen at shows and the fairly bland colours of the aircraft’s scheme. Photos of Raidens do show paint chipping – but it’s usually fairly subtle and restricted to wing roots and removable panels. So that’s what I wanted to try and capture – along with those iconic lightning bolt markings supplied for the first option in the kit: 352-20 of the 352nd Naval Flying Group based at Omura in March 1945 and flown by Lt JG Yoshihiro Aoki.
Here’s how we went about it:
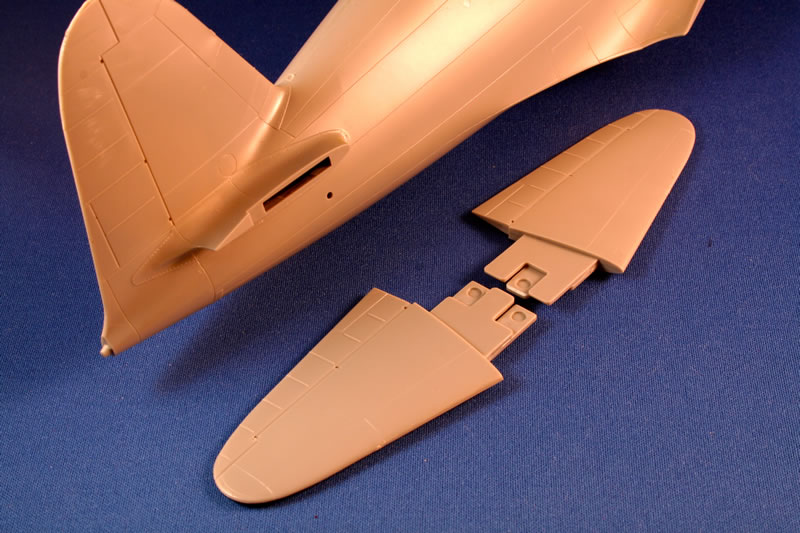
Wing Structure
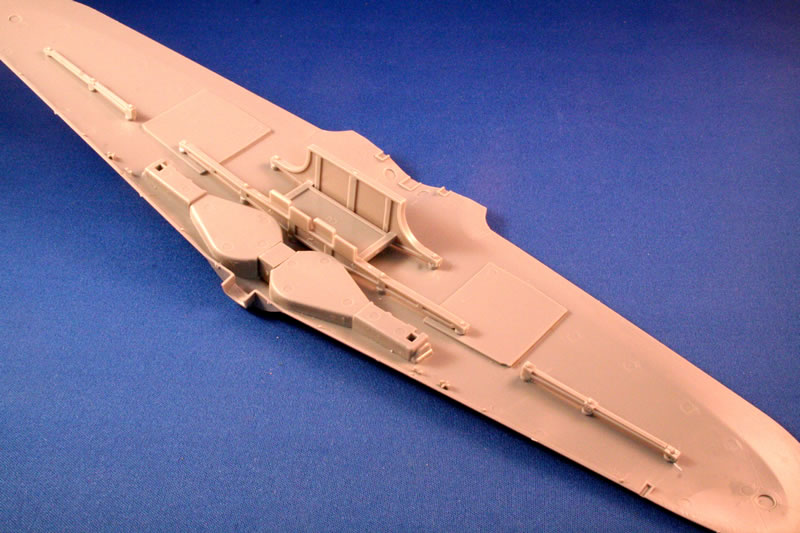
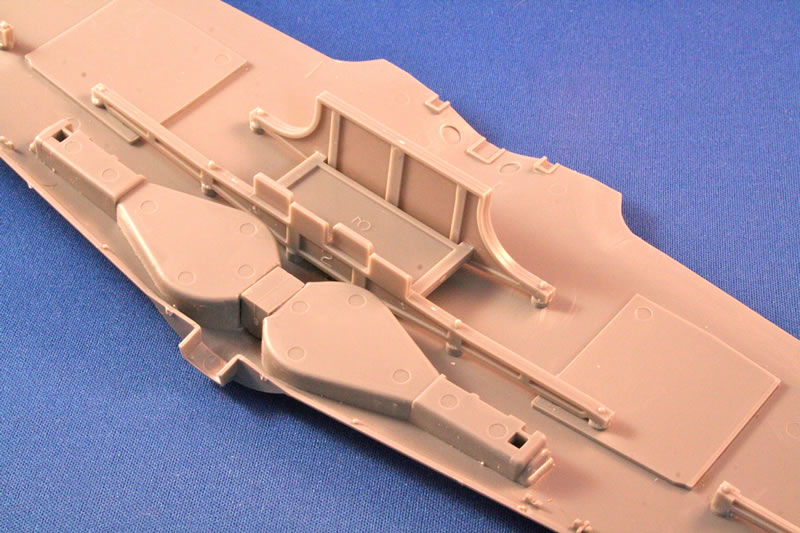
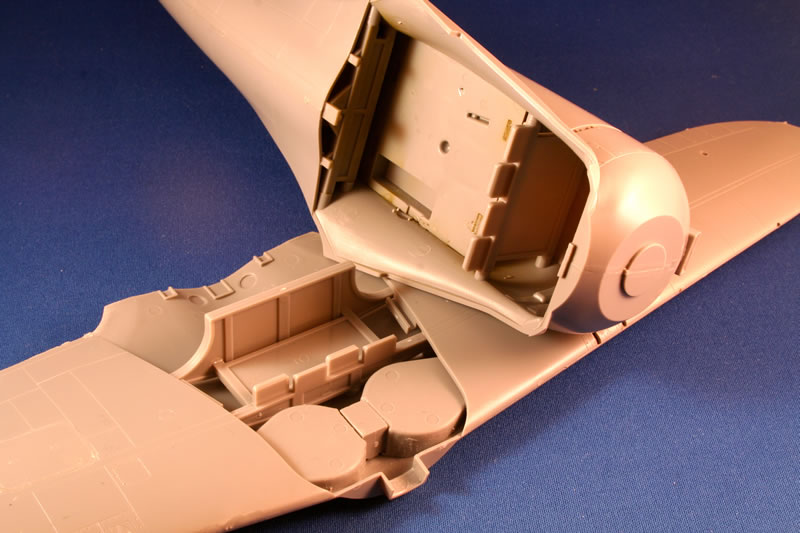
The kit is typically Hasegawa in approach; delightfully simple with no gimmicks, beautifully moulded and very accurate. It follows what appears to be a developing trend in larger-scale aircraft models in that it supplies wing spars and internal bulkheads to add strength and, in theory, make lining things up correctly a breeze. I was keen to test this and, as a first step, left the recommended build sequence to assemble the wing.
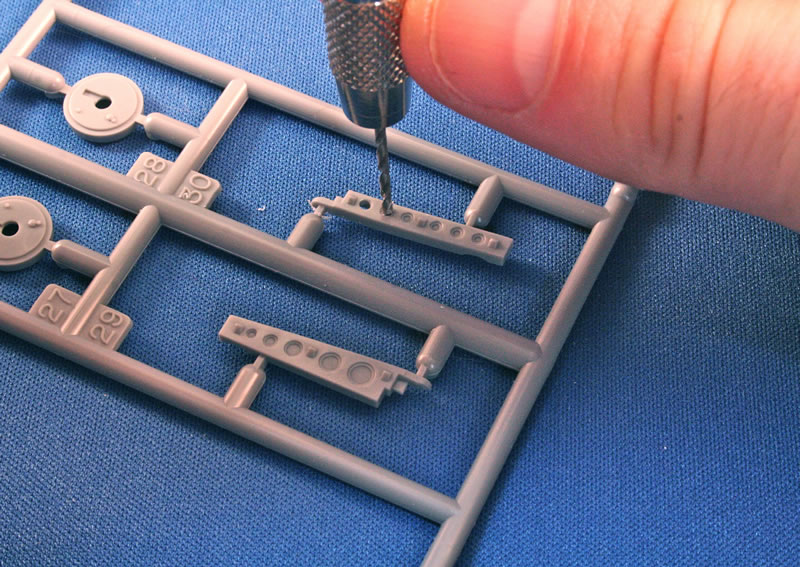
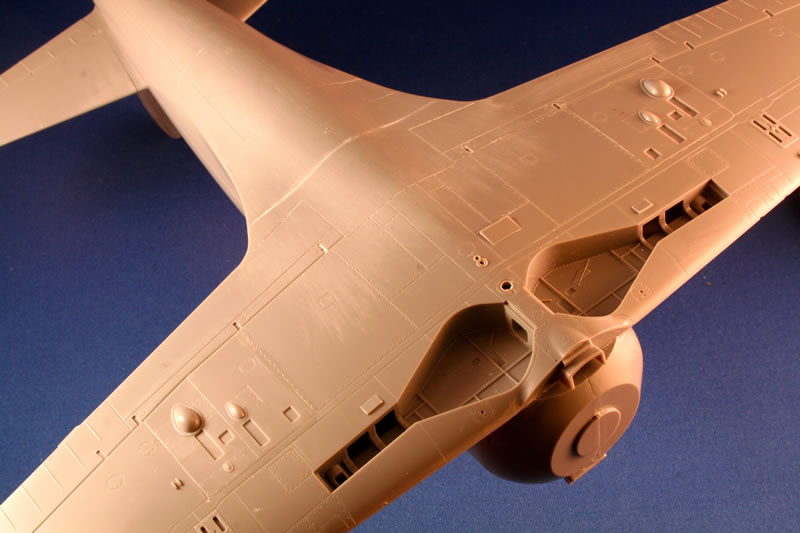
Before starting on the spars a little fettling is involved – opening up the holes in the underside for the belly tank using a small bit in a pin-vise and opening up the holes for the wing cannon in the upper surfaces. There’s also a centre-section to be added to the gear bays and this needed a little clean-up to remove pin marks before bonding in place.
The centre spar ‘box’ assembled quickly and precisely and lined up perfectly with the location holes in the wing. The ‘outer’ spars fitted likewise and the resulting lower wing was set aside overnight for everything to harden off.
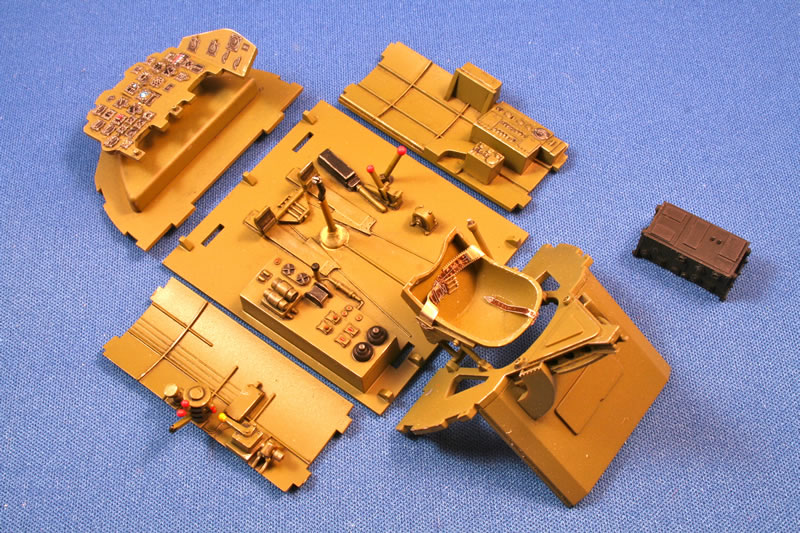
Cockpit
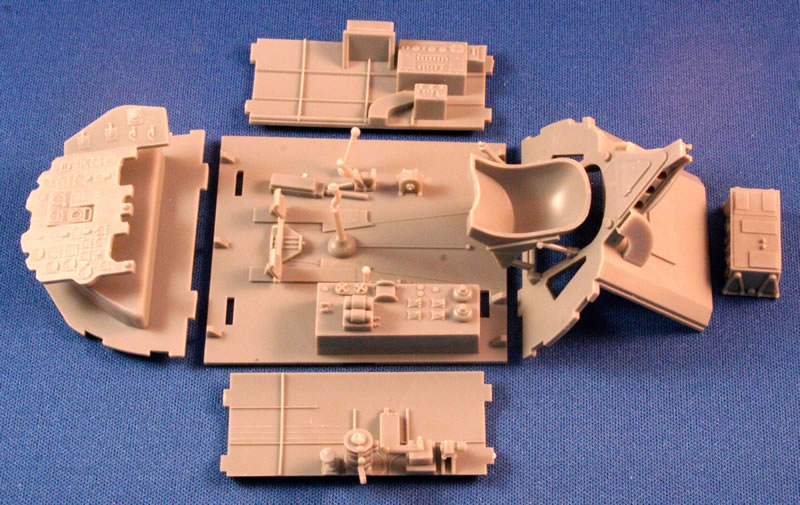
With recent builds I’ve started to take a leaf out of many armour modellers’ books and do a lot of assembly before painting. In this way the main sections were built up separately before painting: floor, panel, side section and rear deck.
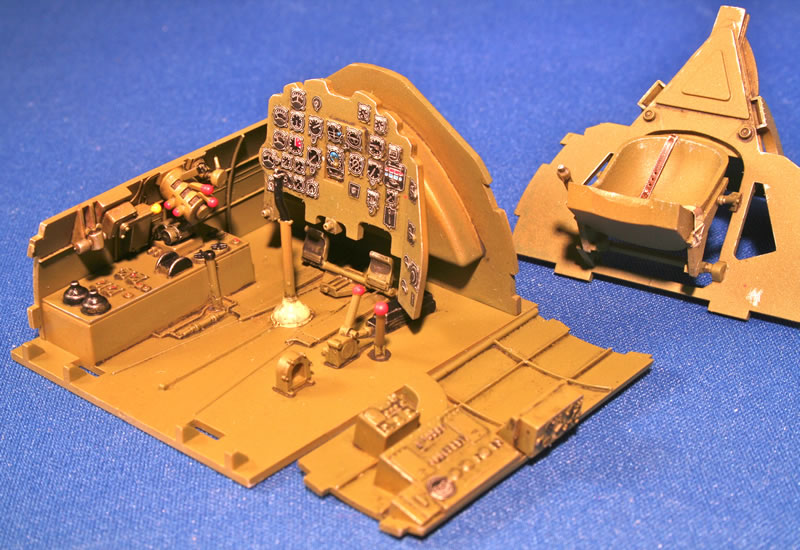
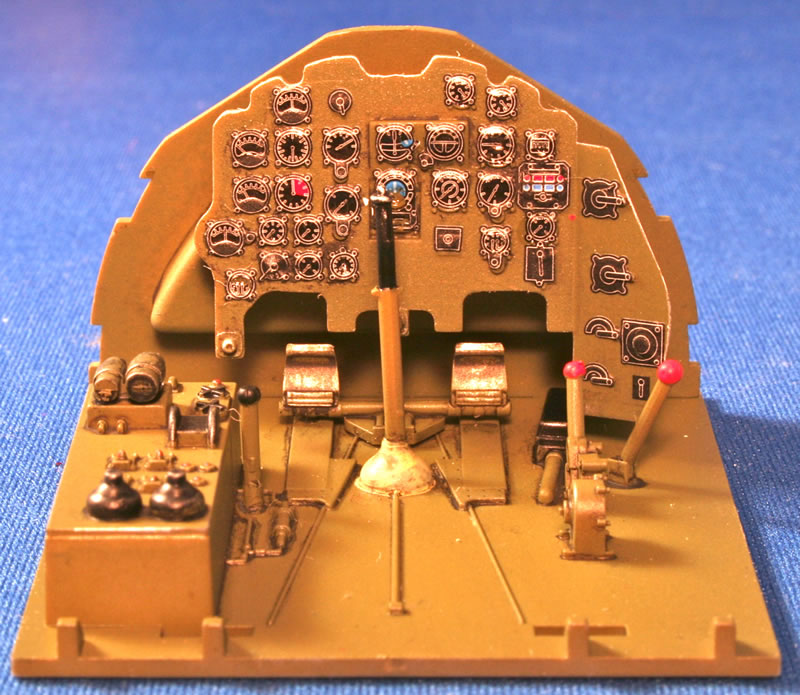
These assemblies were then sprayed with a slightly tweaked Xtracrylix Interior Green (XA1117 – the closest match to the original I had to hand) before giving a couple of light coats of Quikshine to seal in the green and provide a base for the instrument decals and weathering. The kit instrument decals were used and, after a few coats of MicroSol, they conformed beautifully to the moulded detail.
After a couple of days to dry edges of various panels and components was carefully highlighted with a 5/0 brush and MrHobby ‘MrMetalcolor’ chrome silver. A day later, after picking out details in other colours (throttle levers, joystick etc.), the various sections were given a light wash using Flory Models’ black wash to bring out a little more depth prior to a layer of Xtracrylix matt varnish. Straight from the box I think the cockpit works well – the only thing added was a set of belts from one of the Eduard sets.
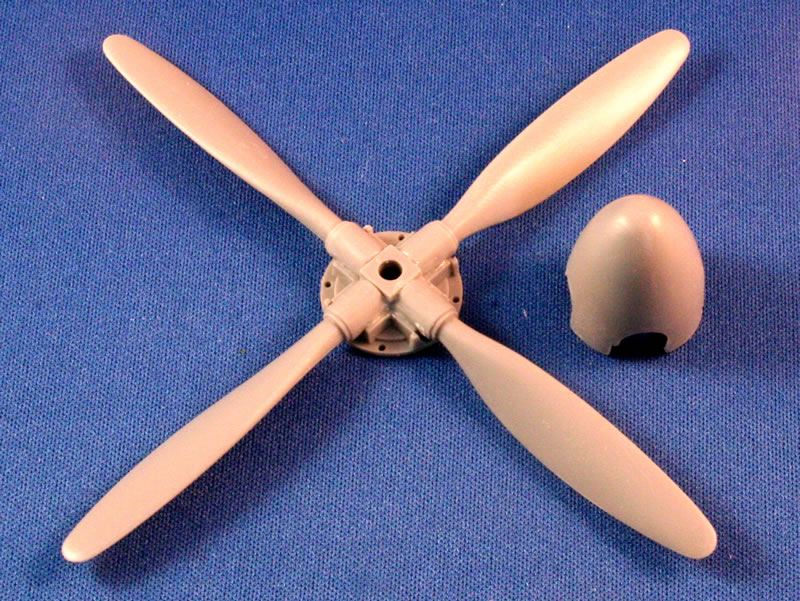
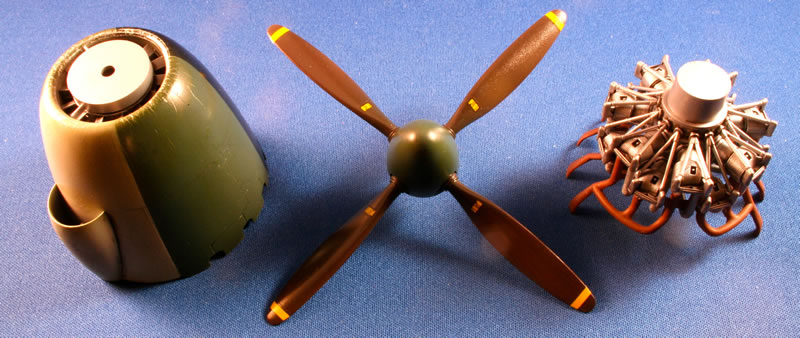
Prop and Engine Prep
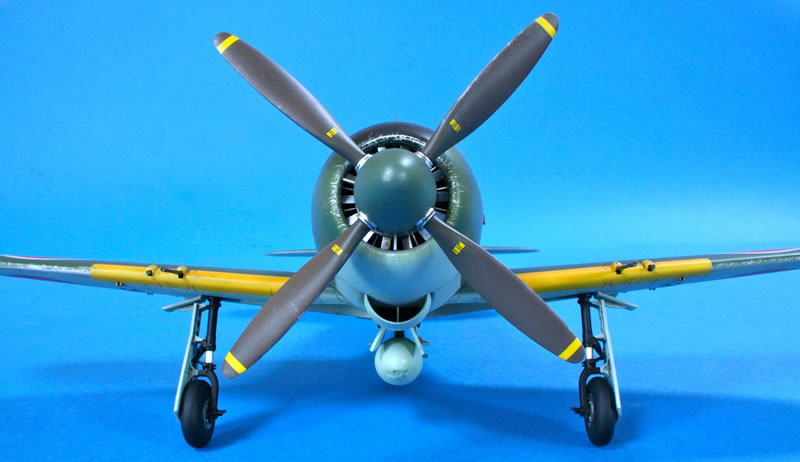
The kit provides alternative prop blades - narrow, or broad chord - depending upon version modelled and the separate blades are attached to the central hub with nice positive location.
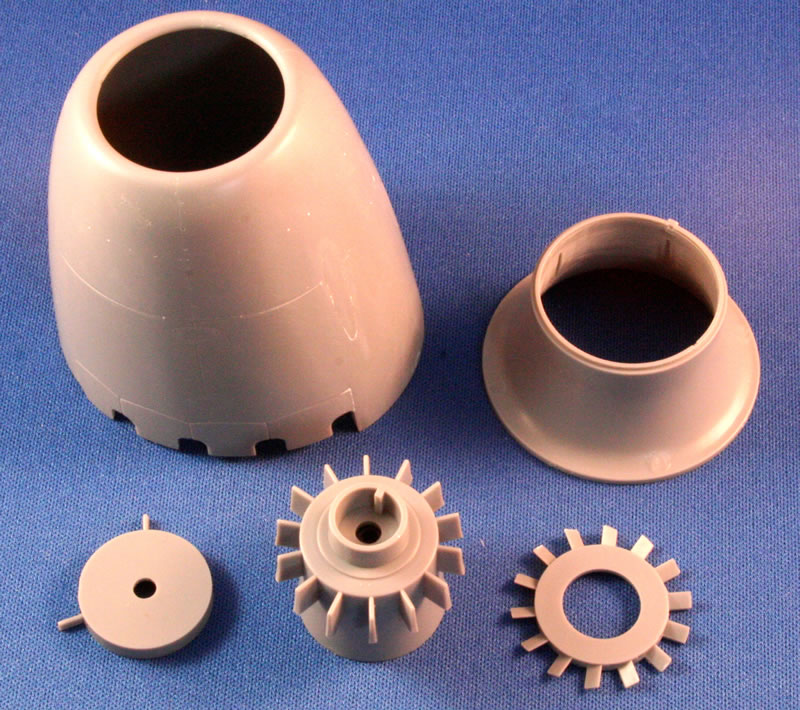
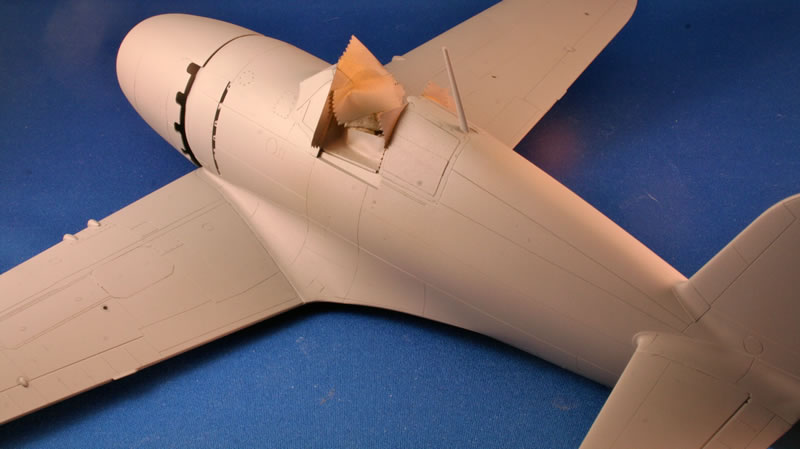
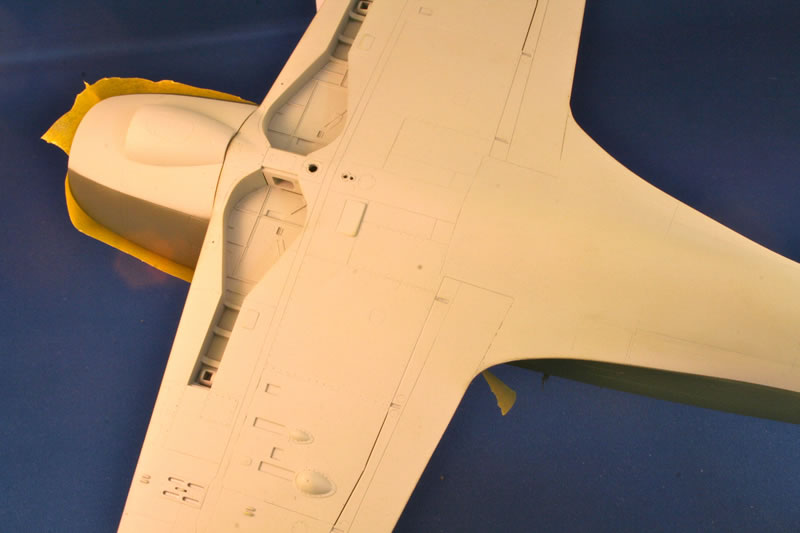
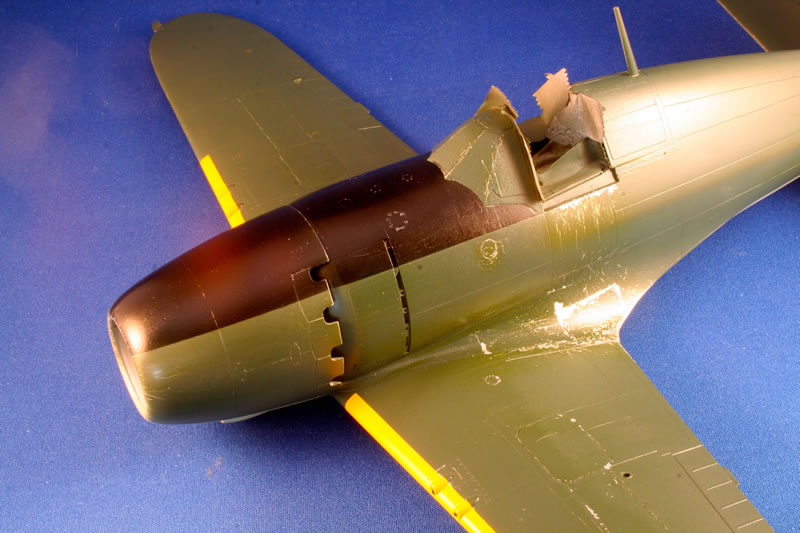
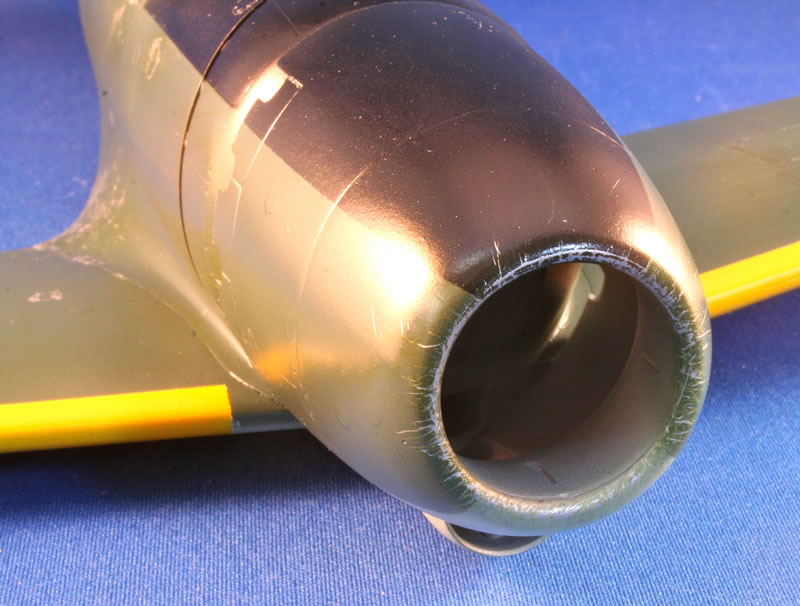
A feature of the full size aeroplane, and an impressive moulding in the kit, the cowl needs a simple mod before progressing: removal of the cowl gun troughs not applicable to this version. The kit provides simple pugs that were bonded in place and left for a few days before sanding back.
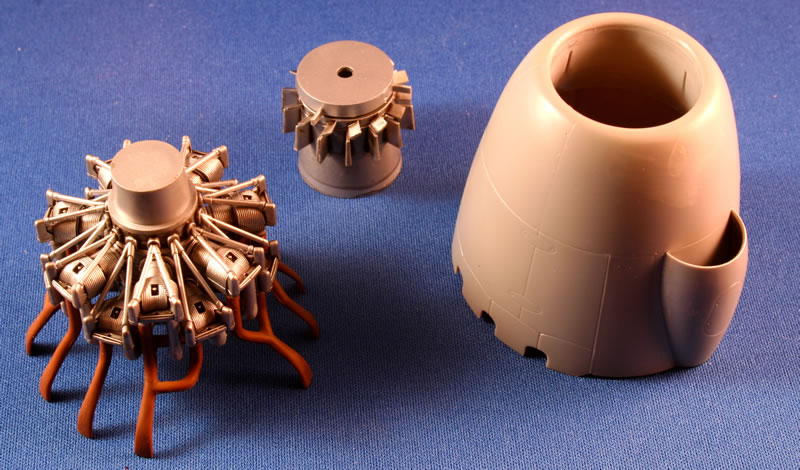
As the engine is pretty well hidden I chose the simple route and simply assembled as per instructions and painted with Alclad Aluminium followed by a wash of Tamiya smoke. You could, of course, go to town on this by adding things like ignition harnesses, but, unless you open it all up, you really won’t be able to see anything!
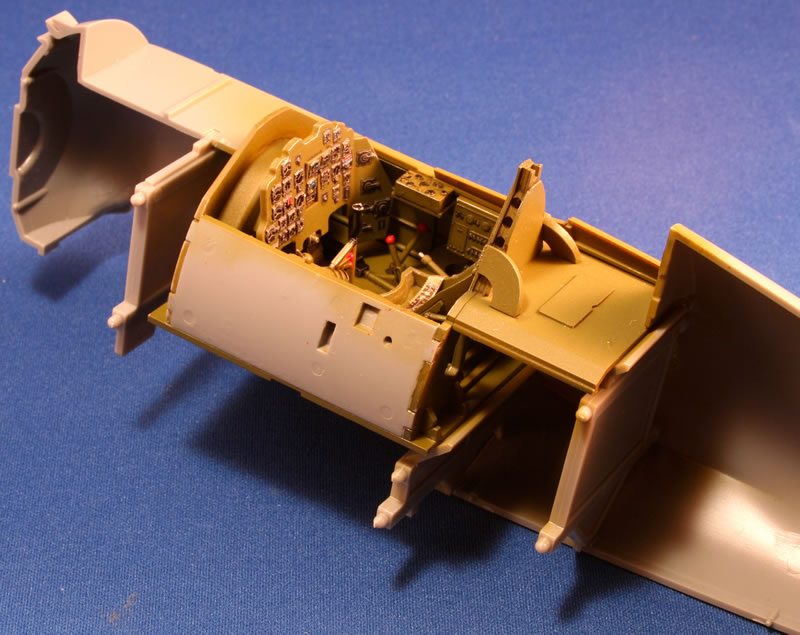
Airframe
Like the wings, Hasegawa supply a neat set of internal bulkheads that fit inside the fuselage and later act as alignment points for the wings. In the photo below you can see them fitted to the starboard fuselage half using Revell Contacta Professional glue to allow a little ‘movement’ time (the stuff in the blue plastic bottle with needle applicator). Alignment across the fuselage halves was ensured by placing the other fuselage half in position as the glue went off.
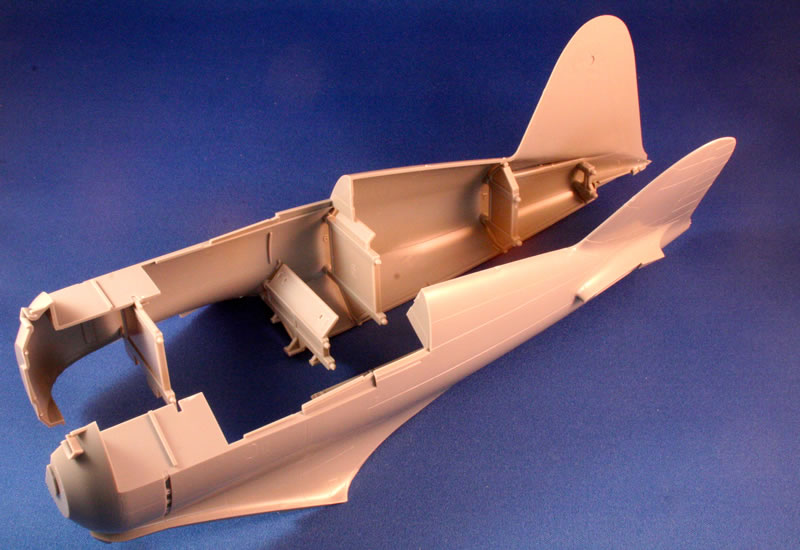
Hasegawa provide detail parts for the rear section of canopy behind the cockpit, with two differing types of top ‘structure’ section. Having selected the appropriate one it was a simple task to open out the holes using a pin vise.
With the cockpit inserted in place and the fuselage halves joined, it was time to add the tailplane. Typically simple Hasegawa approach here with interlocking halves to ensure everything straight (below). Fit of parts, as with the rest of the kit, was exceptional with very little filler needed anywhere!
I mentioned the interlocking bulkheads/wing spars and this is clearly illustrated in the photo below. Fit was a little tight but perfect, although I have read builds where some trimming was needed so take care and dry fit before applying any adhesive.
Canopy
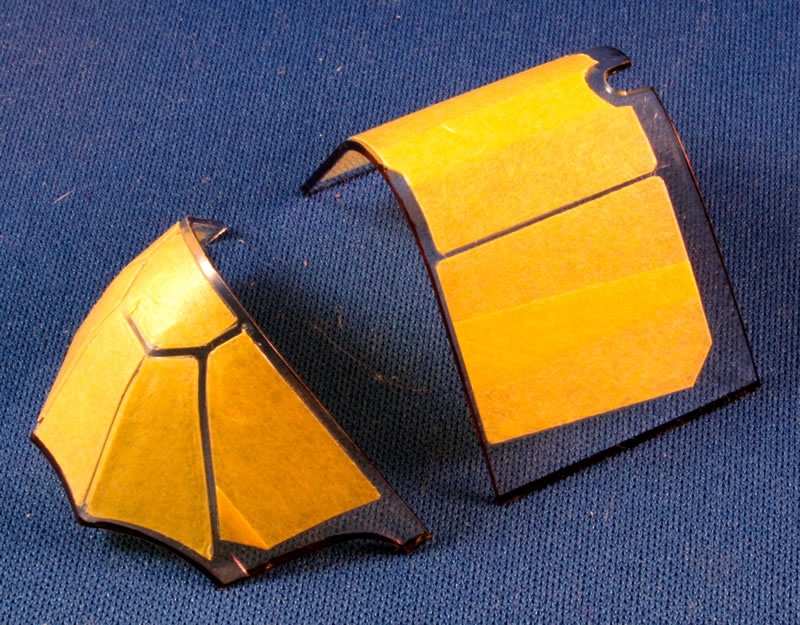
With the airframe together, photo 16, it was time to look at that huge canopy that’s such a distinctive feature of the Raiden. The canopy in this kit is simply beautifully done – thin and totally free of distortion – and provides alternative rear sections to facilitate open or closed canopies. These rear sections fit beautifully and simply has a run of black permanent marker run around their edges prior to installing and bonding with a little Plastic Weld run into the seams.
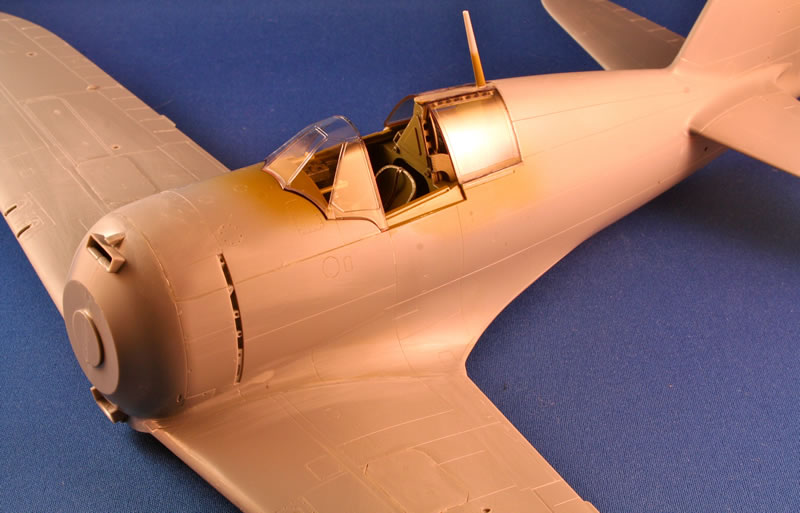
With these sections masked using Tamiya tape and a nice fresh blade it was time to add the armoured glass section and gunsight, before masking the main glazings and fitting the windshield.
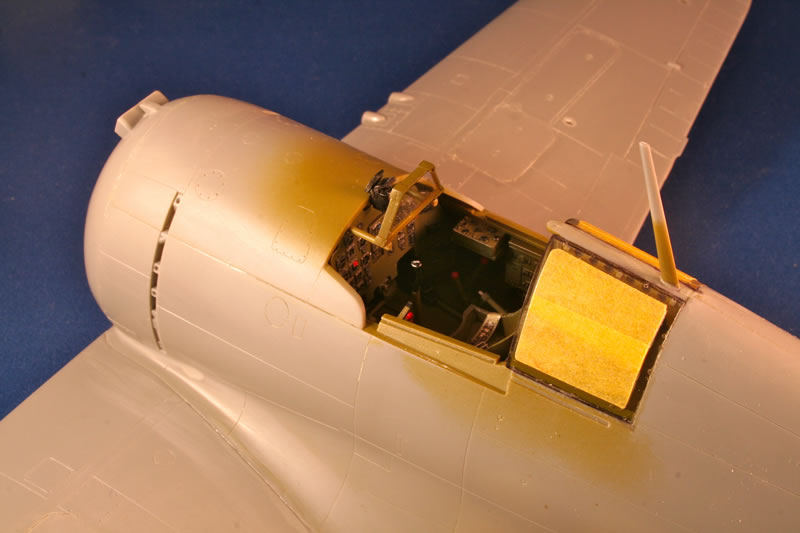
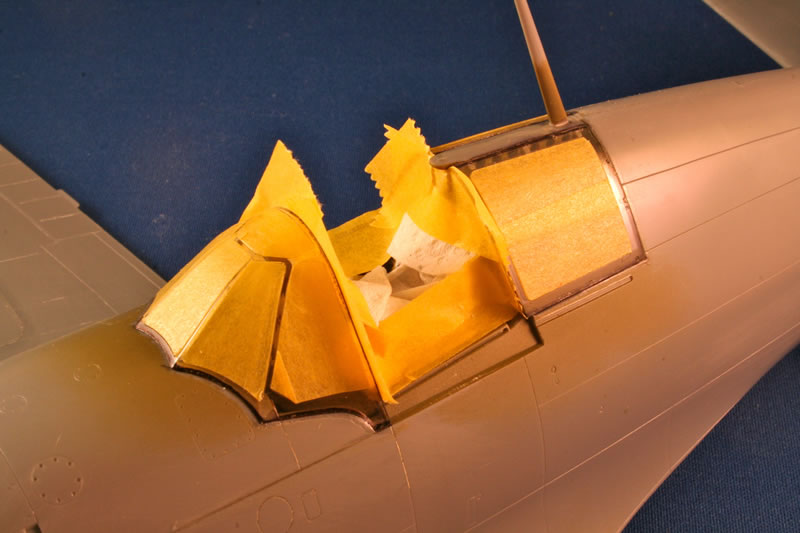
Finally - before priming - we mustn’t forget that the inside of the canopy framing should be in the interior colour - so this has been applied to the outside as a ‘first prime’.
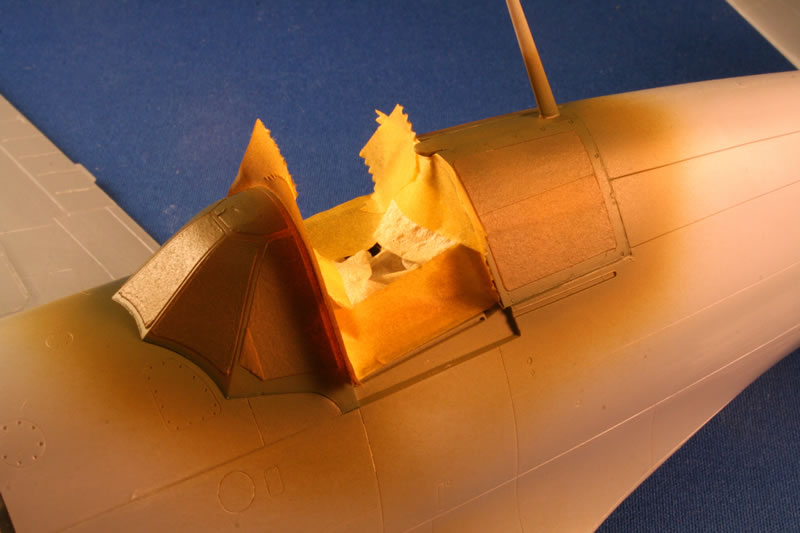
Priming
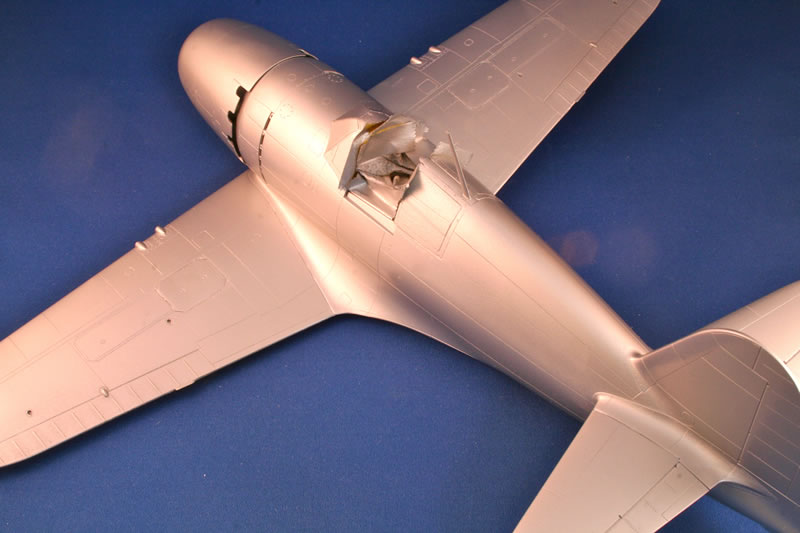
With beautifully delicate surface details I was keen not to overdo it with the primer. On this project I used my faithful Halfords grey primer applied in two thin coats with very few blemishes needing attention.
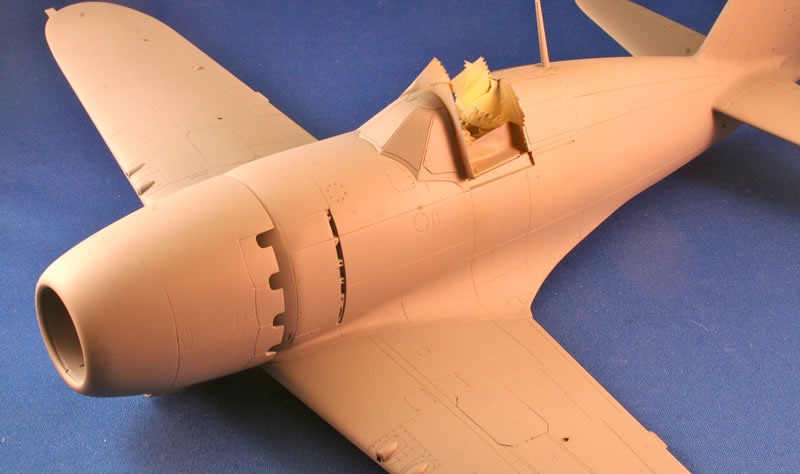
As the project was to feature a certain amount of chipping in he final finish the model was given a light coat of Tamiya silver from their spray can range followed by a couple of coats of Quikshine to seal the finish from the paint layers to come.
Paint
Now we can start to have some FUN!
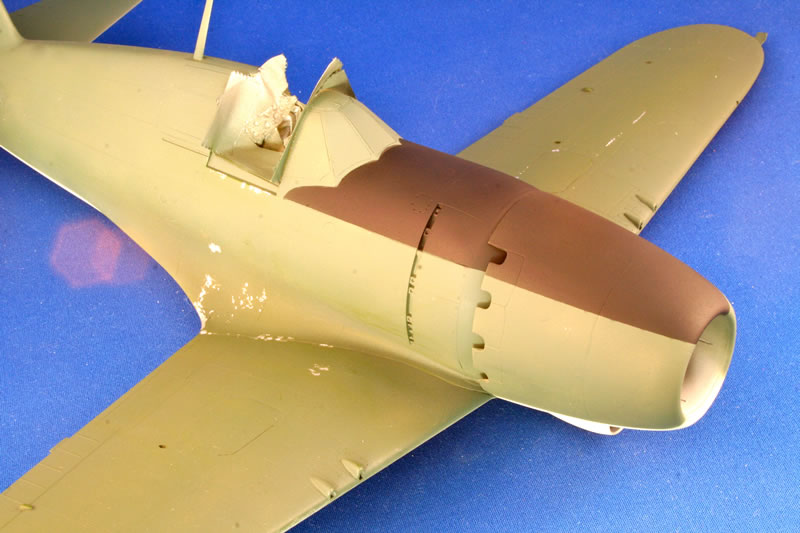
The main colours of Imperial Navy Grey, Green and black anti-dazzle area where airbrushed using old jars of Modelmaster Enamel - first time using enamels for a camouflage finish in years but decision based upon two useful benefits. Firstly - I like the colour matches - purely from a subjective view of course and secondly because it’s a different material to the underlying acrylics and those that will follow - making the weathering process easier.
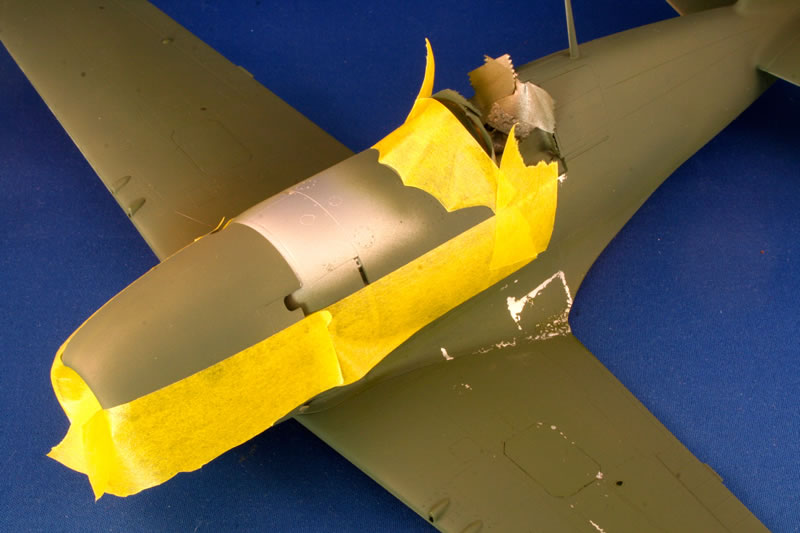
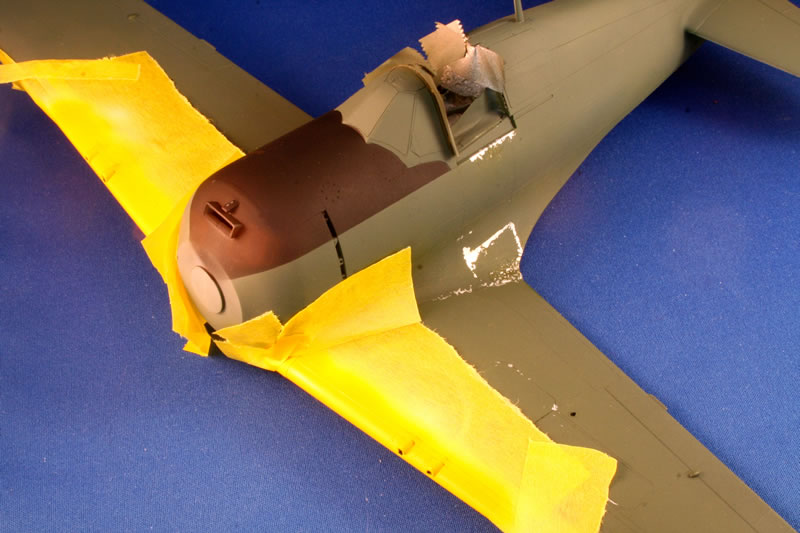
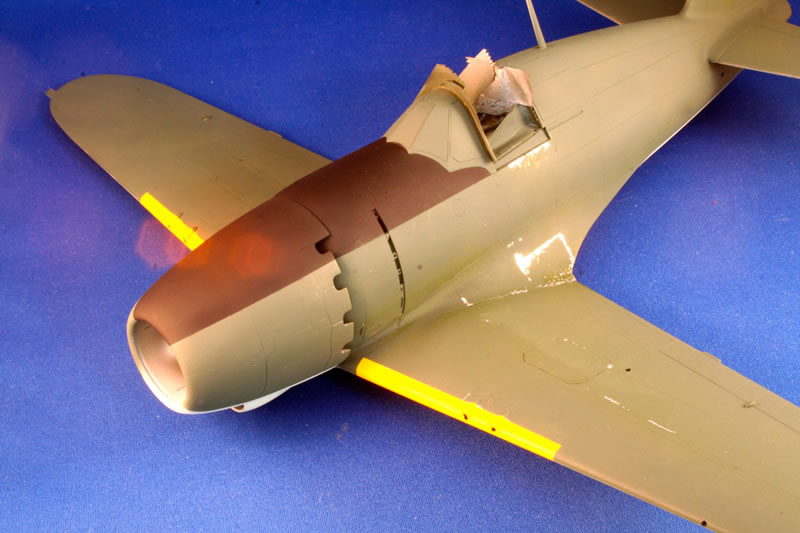
With the main colours on and allowed to dry - out with the tape again and the yellow leading edges were added.
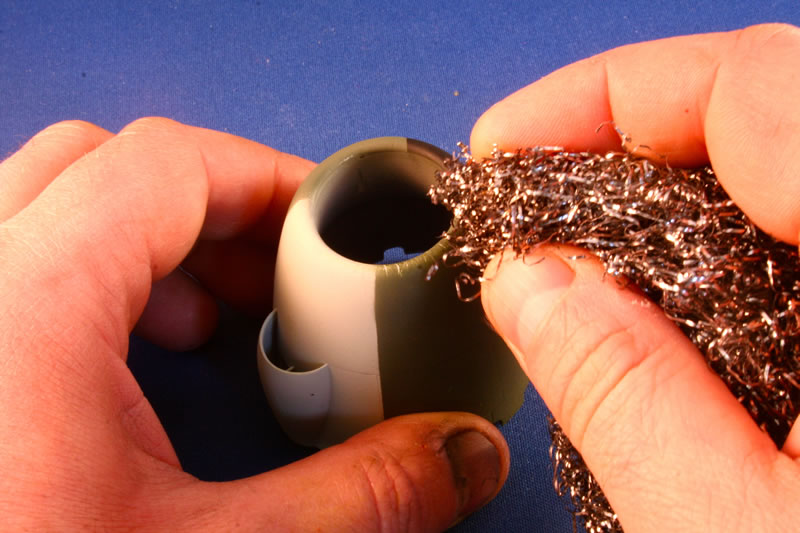
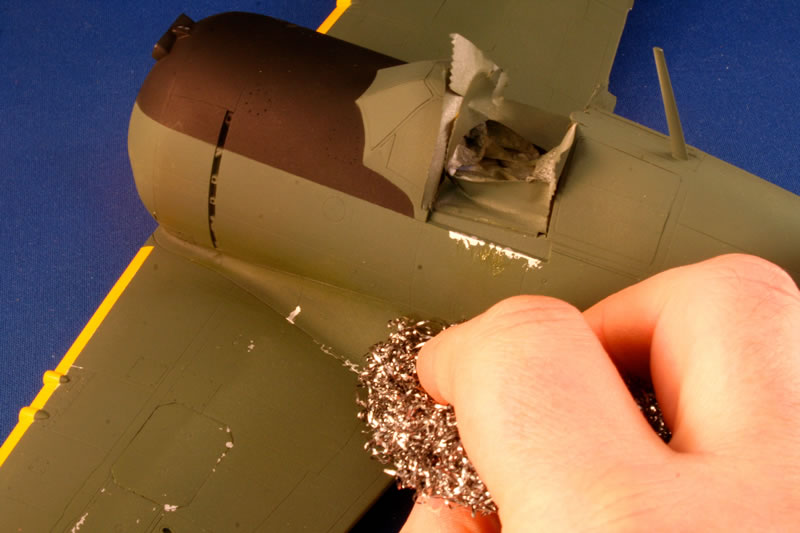
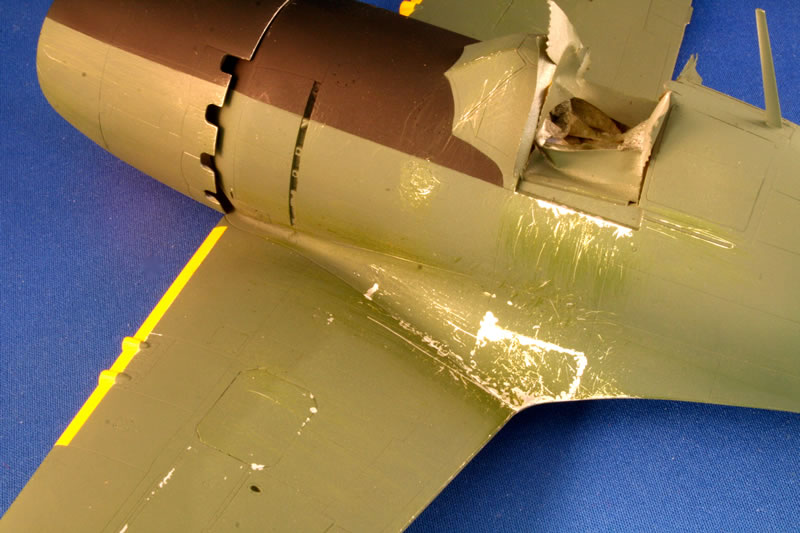
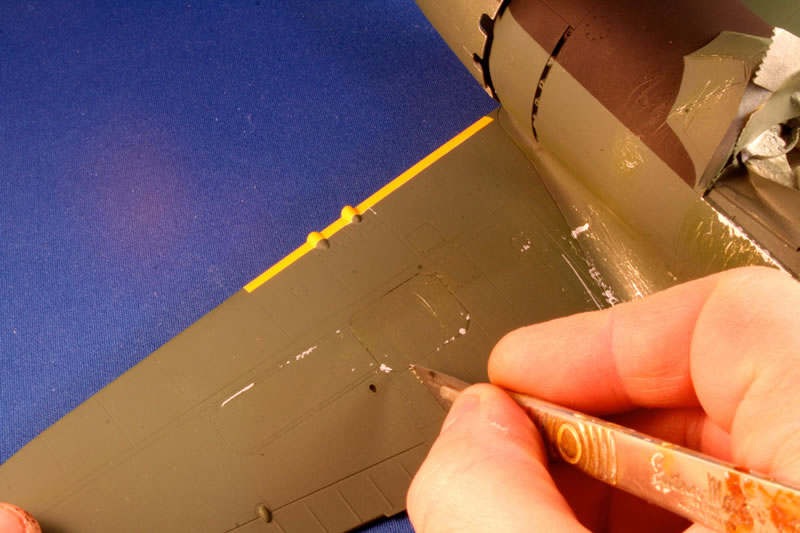
Weathering – Paint Chipping
With the silver undercoating we could now start to chip back the exterior finish; referring to photo’s of the original and trying not to overdo it. Primary weapons of choice were a new scalpel blade and a pan scourer ‘liberated’ from the kitchen. Technique wise there’s little to add to the photo’s - were simply replicating surface abrasion in miniature!
With primary weathering completed - time for a coat of clear gloss ready for the decals - again using Quickshine.
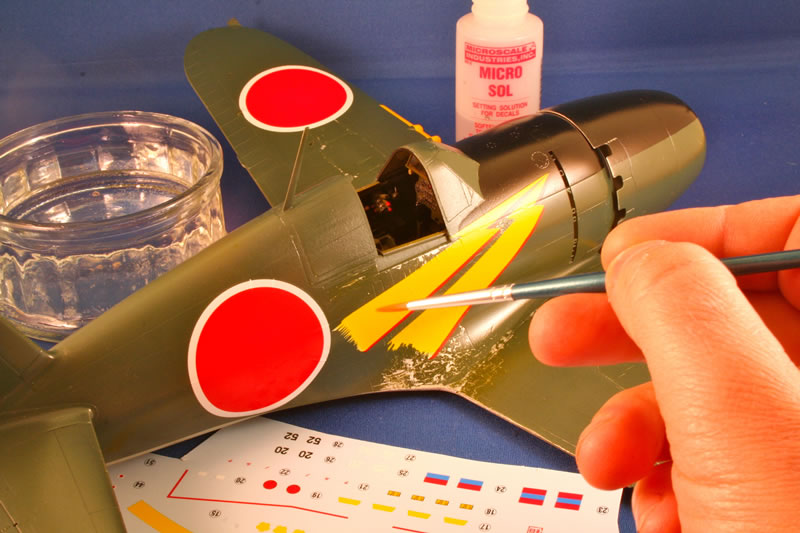
Markings
As mentioned at the beginning this was to be a straight from the box build and the decals proved to be well up to the standard of the rest of the kit with good colour and spot on registration. With a little Micro Sol applied they snuggled down beautifully over the detail when left overnight and, once dry, where carefully ‘chipped’ in places using a sharp scalpel blade.

With another coat of gloss varnish the model was put away for a few days to dry whilst some of the ‘twiddly bits’ were readied.
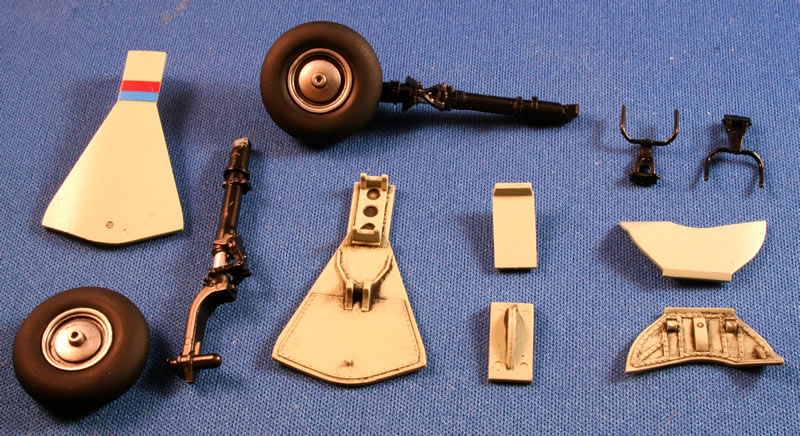
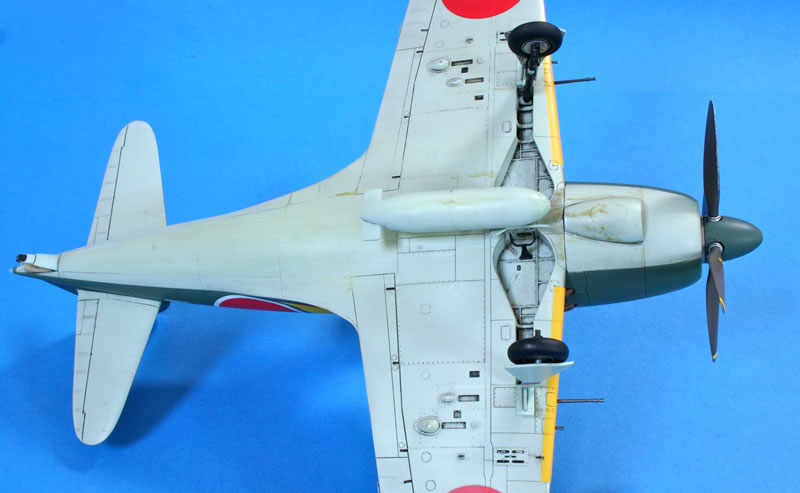
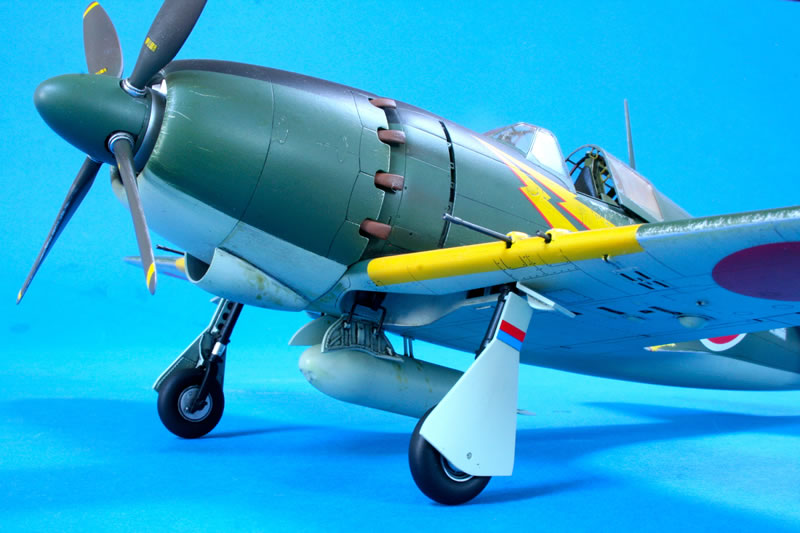
Undercarriage
The kit supplied landing gear is beautifully rendered with solid attachments to the wings. The wheel hubs are separate from the tyres which makes preparation and painting a breeze. With the parts assembled and painted the shiny oleo sections were added using kitchen foil and all components then weathered with a little black oil paint.
Surface Weathering
With the decals dried and weathered it was time to pull out a little surface detail. I rather like oils for this and a dirty brown/black colour was mixed up using Winsor and Newton oils. Applied to the airframe using a stiff brush, the oils were allowed to settle for a few hours before polishing off as much as possible using kitchen paper - leaving just a touch visible in the panel lines. Photos 44, 45, 46 and 47.
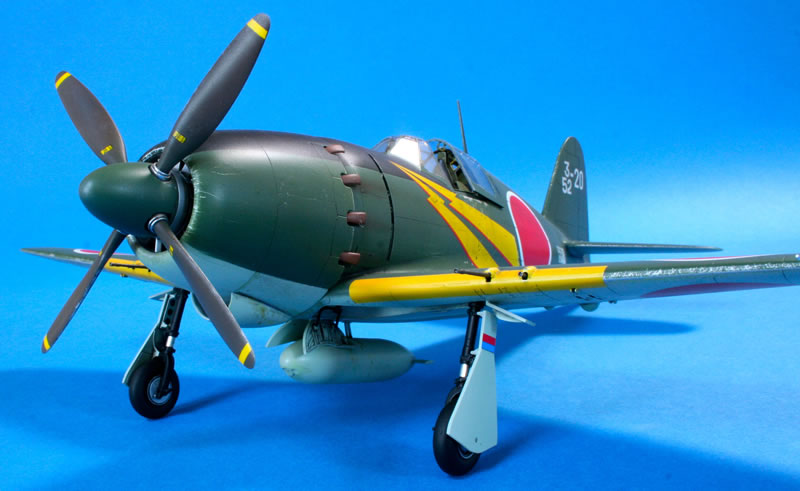
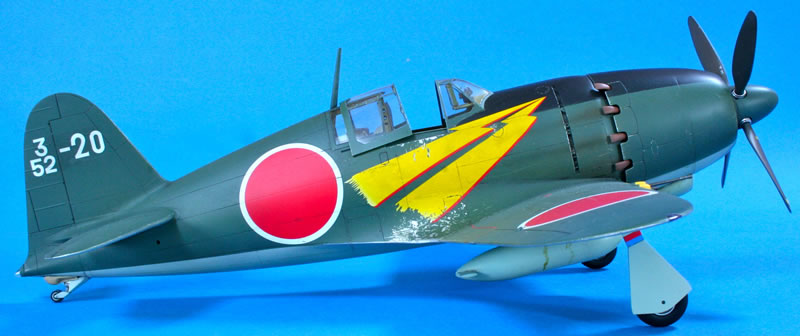
At this point the drop tank was added, having applied a few small dents to its nose, and a coat of matt varnish applied.
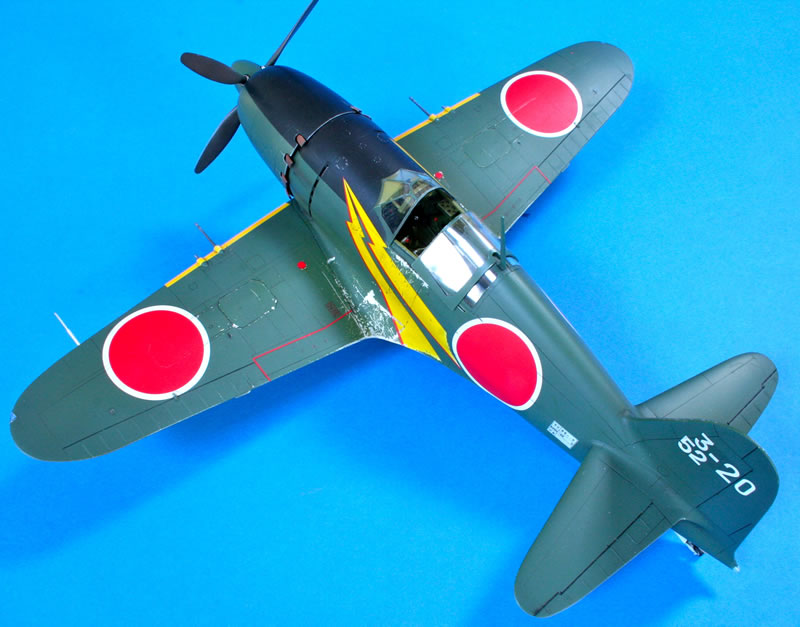
Gear added it was time to add some oil stains, liquid leaks etc with more oil paint and very thinned acrylic varnish tinted with paint - and some dust around the wing roots and underneath using MiG Powders.
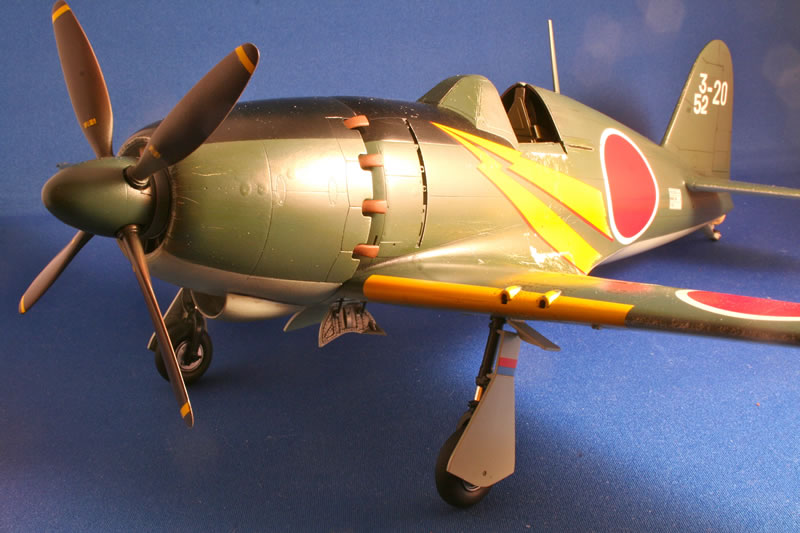
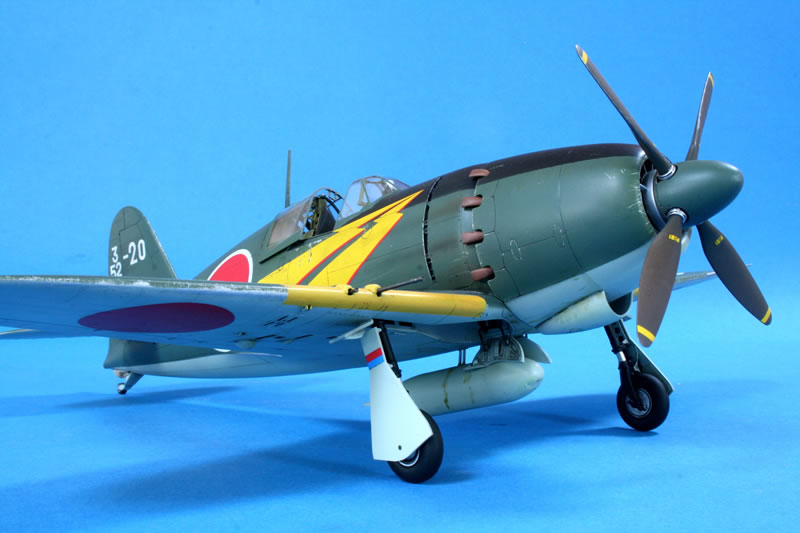
Finished!
This was a really refreshing build as the base kit is so good in my opinion. As to whether I’ve achieved the finished effect I was after - I think so - but will leave it to readers to judge as there are many different tastes and ‘schools’ in this hobby - especially when it comes to weathering aircraft models!

Conclusion
Another beauty from Hasegawa; I loved building this model and I suspect many others will too. The simple, no frills, breakdown and beautiful moulding quality means that the builder has the almost perfect canvass to paint and detail as they wish. I really like this formula - a lot. Anyone want a couple of old Revell Raidens I have in the stash? No, thought not!
With Hasegawa releasing a number of important Japanese types in recent years is it too much to hope for a Kate, Val, Nick or Dinah? Maybe one day...
Now - to another extreme - where did I put that Zoukei-Mura Skyraider?
Materials Used
- Photo Etch Belts – Eduard
- Paints – Aeromaster IJN Grey and Green, other colours from Xtracrylix and Tamiya
- Quikshine acrylic floor ‘wax’ - available in the UK from Lakeland
- Tamiya masking tape
- Winsor and Newton Oils and Acrylic Flow Enhancer
- Plastic Weld Cement
- Revell Contacta Professional and Filler
© Iain Ogilvie 2013
This article was published on Thursday, December 12 2013; Last modified on Saturday, January 14 2017